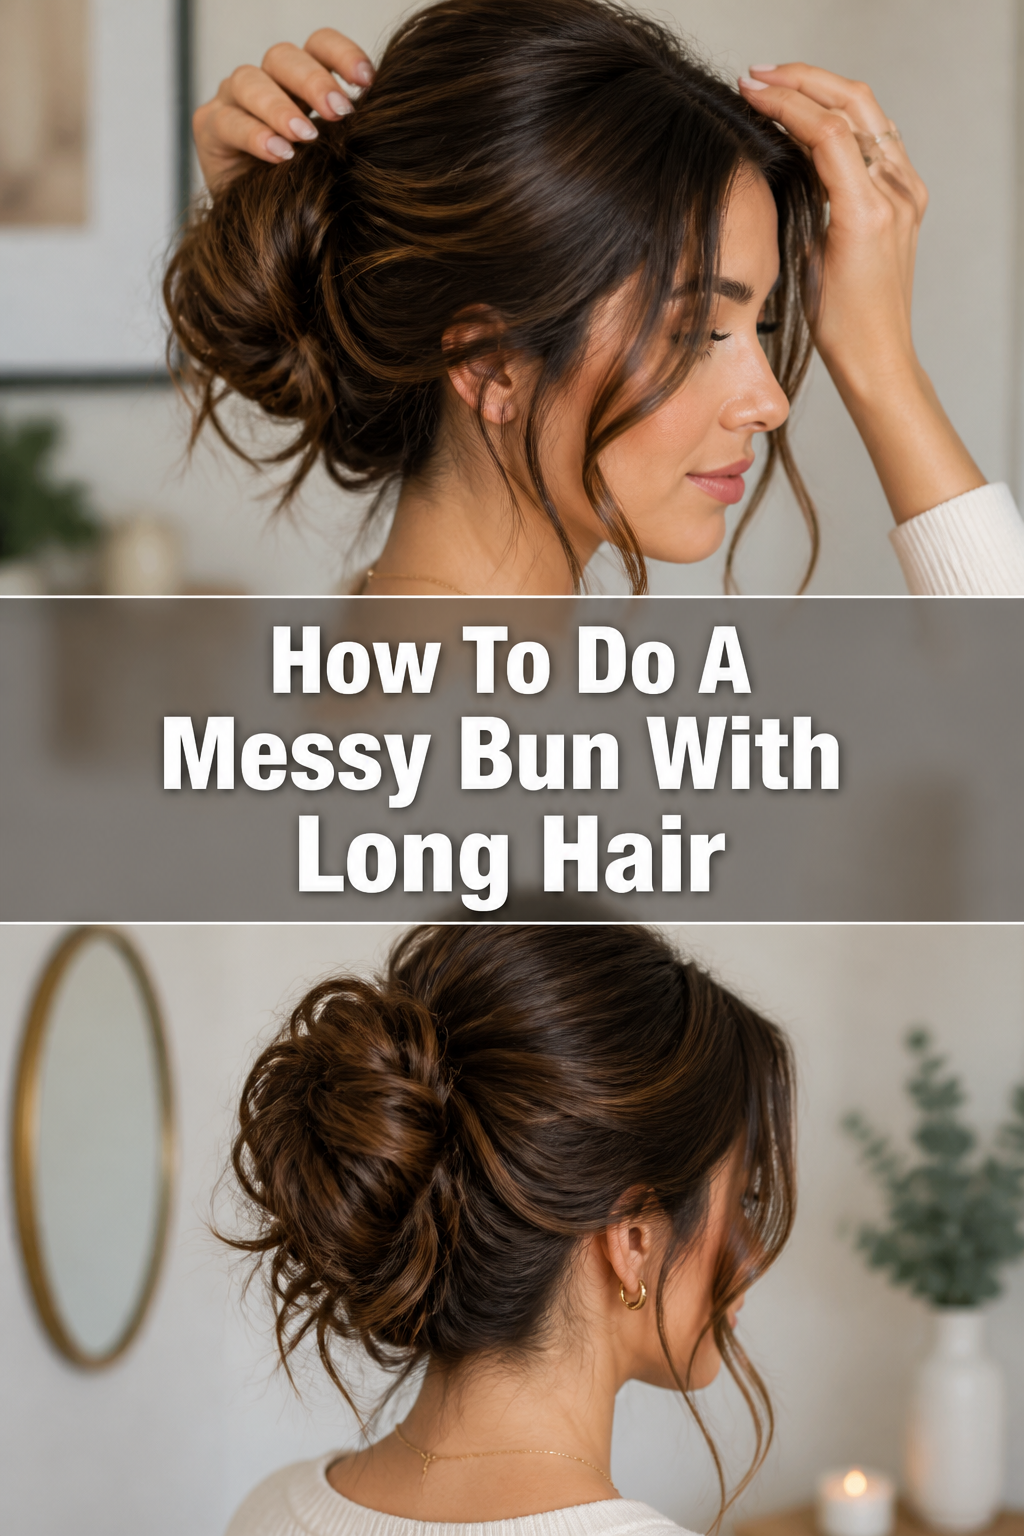
🌸 How To Do A Messy Bun With Long Hair
The messy bun is a true hair hero, offering effortless style and comfort all in one. It’s my go-to look for busy mornings, relaxed weekends, and even dressed-up evenings.
After years of wrestling with my own long hair, I’ve discovered the secrets to a perfectly imperfect bun that actually stays put.
This guide shares all the practical tips I’ve learned, helping you achieve that coveted chic look with ease.

Quick Overview
Creating a stylish messy bun with long hair is simpler than you think. You’ll learn how to build volume, secure your bun, and strategically loosen pieces for that perfectly undone finish.
- Time needed: 5-10 minutes
- Difficulty: Beginner
- What you’ll need: Hair tie(s), bobby pins, optional texturizing spray or dry shampoo
Step-by-Step Instructions
Step 1: Prepare Your Hair for Texture
Start with hair that has a little grit. Day-old hair often works best, as freshly washed hair can be too slippery.
If your hair is very clean, spritz some dry shampoo or texturizing spray through the roots and mid-lengths. This adds grip and volume, making your bun easier to manage.
Pro Tip: Gently backcomb a few sections at the crown for extra volume before gathering your hair. This creates a fuller look at the top.
Step 2: Decide on Your Bun’s Placement
Consider where you want your messy bun to sit. A high bun offers a playful, energetic look, while a mid-height bun is classic and versatile.
A lower bun, closer to the nape of your neck, often feels more relaxed and elegant. Experiment to find the spot that feels most comfortable and flattering for you.
Step 3: Gather Your Hair into a Ponytail
Tilt your head back slightly as you gather all your hair. This helps prevent bumps and ensures a smoother base for your bun.
Use your fingers, not a brush, to gather your hair into a loose ponytail at your chosen height. The “messy” aspect begins here, allowing for natural texture and flyaways.
Step 4: Secure the Base with a Hair Tie
Wrap a hair tie around your gathered ponytail, but don’t pull it too tight. You want a secure base, but not one that feels restrictive or flat against your head.
For a truly messy look, on the last wrap, only pull your hair halfway through the tie, creating a loose loop. This forms the initial shape of your bun.
Step 5: Create the Bun’s Core
With the loop you just created, begin to twist the remaining tail of your hair. This twist doesn’t need to be perfect; a loose, natural twist works best.
Then, gently wrap this twisted section around the base of the loop. Think of it like spiraling a rope around itself.
Step 6: Secure the Bun’s Shape
Once you’ve wrapped the twisted section around the base, secure the entire bun with a second hair tie. This tie should go around the whole bun, not just the original ponytail base.
Alternatively, you can use bobby pins to secure the wrapped sections, especially if you want a less structured look. Place pins strategically, pushing them into the bun and towards your scalp.
Pro Tip: Use coil hair ties for this step. Their unique shape provides a strong hold without pulling or leaving creases, and they’re great for holding thick, long hair.
Step 7: “Mess It Up” with Strategic Pulls
This is where the “messy” magic happens. Gently pull small sections of hair from the bun itself. You want to loosen it, creating volume and a soft, undone appearance.
Also, tug lightly on the hair around your temples and jawline. This releases face-framing pieces, softening your look and adding to the effortless vibe.
Step 8: Pin Loose Strands and Refine
Examine your bun from all angles. If you see any pieces that are too loose, or sticking out awkwardly, gently pin them back into the bun.
Use bobby pins that match your hair color for a discreet hold. Don’t aim for perfection; a few wisps are part of the charm.
Step 9: Lock in Your Look
To ensure your messy bun lasts, finish with a light mist of hairspray. Hold the can about 10-12 inches away from your head to avoid making your bun stiff.
A flexible hold hairspray is ideal, allowing movement while keeping stray hairs in place. This helps maintain the messy yet intentional feel.
Common Mistakes to Avoid
Making It Too Tight
Many people pull their ponytail too taut at the start. This results in a slick, flat bun that lacks the desired volume and relaxed feel.
Always aim for a loose, comfortable ponytail base. This allows for easy manipulation and creates the soft, full shape essential for a messy bun.
Forgetting About Texture
Working with super clean, silky hair can make a messy bun difficult to achieve. The hair often slips out, and the bun looks limp.
Always add some dry shampoo or texturizing spray, even if your hair isn’t dirty. This provides the necessary grip and body for a bun that holds its shape and appears fuller.
Using the Wrong Hair Ties
Thin, weak hair ties can snap under the weight of long hair, or they might not provide enough hold. Using a single, flimsy tie can lead to your bun unraveling quickly.
Invest in sturdy, thick hair ties or coil ties. Using two ties, one for the ponytail base and one around the finished bun, offers superior security for long hair.
Over-Pinning
It’s tempting to try and pin every single stray hair into submission. However, this often makes the bun look stiff and overly done, losing its “messy” appeal.
Embrace a few loose pieces. Use bobby pins sparingly, targeting only the truly unruly sections that detract from the overall look, rather than trying to achieve a perfectly smooth finish.
Troubleshooting
My Bun Keeps Falling Out
If your bun constantly unravels, it’s likely a combination of insufficient grip and weak securing. Your hair might be too clean and slippery, or your hair ties aren’t strong enough.
Start by adding more texturizing product to your hair. Use two strong hair ties: one for the initial ponytail and another wrapped tightly around the finished bun. Reinforce with plenty of bobby pins, pushing them deep into the bun and towards your scalp for maximum hold.
The Bun Looks Too Flat and Lifeless
A flat bun usually means there isn’t enough volume or texture. This often happens if you pull your initial ponytail too tight or don’t prep your hair properly.
Before gathering your hair, backcomb the roots at your crown for lift. Once the bun is formed, gently pull on small sections from the top and sides of the bun to create more volume and a rounder shape. A quick spritz of volumizing spray can also help.
I Have Too Many Awkwardly Sticking-Out Pieces
Long layers or uneven cuts can sometimes result in pieces that just don’t want to cooperate. These pieces can make the bun look less intentional and more genuinely messy in a bad way.
Use bobby pins to gently tuck these pieces back into the bun’s core. Don’t pull them tight; just guide them into the existing structure. For very short layers around the face, consider leaving them out completely as face-framing wisps, or use a tiny bit of hair gel to smooth them down.
Key Takeaways
- Embrace Texture: Always start with hair that has some grip, using dry shampoo or texturizing spray if needed, to help your bun hold its shape.
- Keep it Loose: Avoid pulling your initial ponytail too tight. A looser base allows for more volume and a naturally “messy” look.
- Layer Your Hold: Use at least two hair ties for long, heavy hair – one for the ponytail and another to secure the final bun. Bobby pins are your best friends for refining.
- Strategic Messiness: Gently pull out small sections from the bun and around your face. This creates the desired undone effect without looking disheveled.
- Practice Makes Perfect: The messy bun is an art. Don’t be discouraged if your first few attempts aren’t exactly what you envisioned.
Frequently Asked Questions
Can I do a messy bun with dirty hair?
Absolutely, dirty hair is often ideal for a messy bun! The natural oils and texture in unwashed hair provide excellent grip and hold, making it easier to sculpt and secure the bun without it slipping out. It’s a fantastic second-day (or third-day) hairstyle option.
How do I make my messy bun last all day?
To ensure your messy bun stays put, focus on a strong foundation. Use good quality hair ties and plenty of bobby pins, pushing them firmly into the base. Finish with a generous mist of strong-hold hairspray, focusing on the perimeter and any loose pieces.
Should I use a high bun or a low bun for long hair?
Both high and low buns work beautifully with long hair, it truly depends on your preference and the occasion. High buns tend to be more playful and casual, while low buns can look more elegant and sophisticated. Experiment with both to see what suits your style best.
What if my hair is extremely long and thick?
For extremely long and thick hair, the key is extra support. Use a stronger, thicker hair tie for the initial ponytail. When wrapping, you might need to loop your hair around the base more times, or even braid the ponytail before wrapping to manage the volume. Don’t shy away from using extra bobby pins to secure all sections.
Our Top Recommended Finds
- Coil Hair Ties: These unique ties distribute pressure evenly, preventing headaches and creases while providing an incredibly strong grip, perfect for thick, long hair.
- Texturizing Spray: A good texturizing spray adds grit and volume, making slippery hair easier to style and ensuring your messy bun has that desirable full, undone look.
- Good Quality Bobby Pins: Invest in pins that are sturdy and have a good grip. They make all the difference in securing loose strands and reinforcing your bun’s structure throughout the day.
Your Signature Messy Bun Awaits
You now have all the tools and techniques to create your perfect messy bun. This versatile style is more than just practical; it’s a statement of effortless confidence.
Don’t be afraid to experiment with different heights, levels of “messiness,” or even adding a cute scarf or hair accessory to truly make it your own.
Grab your hair ties and pins today, and embrace the beautiful, undone charm of a messy bun!