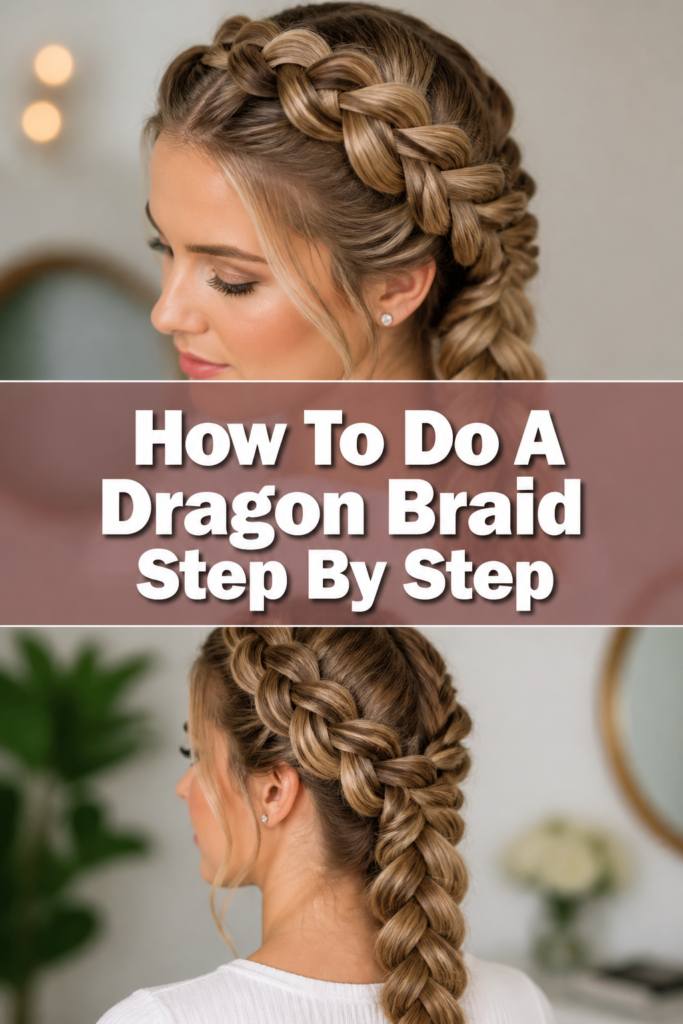
🐉 How To Do A Dragon Braid Step By Step
Learning new hairstyles can feel intimidating at first.
I remember my own struggles with braids, but with patience and the right guidance, anyone can master even intricate styles.
This guide draws on years of braiding experience to give you clear, actionable steps for a stunning dragon braid.
Quick Overview
You’re about to create a magnificent, raised braid that runs gracefully down the back of your head, reminiscent of a dragon’s spine.
This style adds a touch of fantasy and elegance to any look, perfect for special occasions or just a unique everyday statement.
- Time needed: 20-40 minutes (depends on hair length and skill level)
- Difficulty: Intermediate
- What you’ll need: Hairbrush, rat-tail comb, hair ties, bobby pins, hairspray
Step-by-Step Instructions
Step 1: Prepare Your Hair
Begin with dry, detangled hair. This is crucial for smooth braiding.
Brush through all your hair thoroughly to remove any knots or snags.
A smooth canvas makes the entire braiding process much easier and prevents frustrating tangles.
Apply a light styling cream or a small amount of hair oil if your hair is prone to frizz.
This will help to tame flyaways and give your braid a polished finish.
Make sure not to use too much product, as it can make your hair greasy or difficult to grip.
Step 2: Create Your Starting Section
Use a rat-tail comb to create a clean, triangular section of hair at the crown of your head.
The base of this triangle should sit just behind your hairline, and the point should extend back slightly towards your crown.
This initial section forms the very beginning of your dragon braid.
Ensure the lines are as straight and neat as possible.
Clean sections are the secret to a neat, professional-looking braid.
The width of this section will determine the starting width of your braid.
Pro Tip: For a more dramatic, wider braid, start with a slightly wider triangular section. For a more subtle look, keep the initial section narrower.
Step 3: Begin the Dutch Braid Technique
Divide your initial triangular section into three equal strands.
Hold the left strand in your left hand, the right strand in your right hand, and the middle strand between your thumb and forefinger.
This is the foundation of your braid.
Take the rightmost strand and cross it under the middle strand.
The original middle strand now becomes the right strand.
The goal is to make the braid sit on top of the hair, giving it that raised, dragon-scale effect.
Take the leftmost strand and cross it under the new middle strand.
This completes your first full “cross-under” cycle of a Dutch braid.
You should now have three distinct strands again, but they are woven underneath each other.
Step 4: Incorporate Hair as You Braid
Gather a small, even section of loose hair from the right side of your head, adjacent to your current right strand.
Add this new section of hair to your existing right strand.
This is where the braid starts to grow and incorporate more hair.
Cross this combined, thicker right strand under the middle strand.
Always ensure you are crossing under for a Dutch braid.
This is the key difference from a French braid, which crosses over.
Repeat the process on the left side.
Gather a small, even section of loose hair from the left side, adding it to your leftmost strand.
Cross this combined, thicker left strand under the new middle strand.
Pro Tip: Try to grab consistent, small sections of hair each time you add. This creates a more even and professional-looking braid. Uneven sections lead to a lumpy appearance.
Step 5: Continue Braiding Down the Head
Maintain consistent tension as you continue to braid down the back of your head.
This ensures the braid stays neat and secure.
Too loose, and it will fall apart; too tight, and it might pull uncomfortably.
Keep adding small sections of hair from the sides, alternating between left and right, and always crossing under the middle strand.
Work your way down, following the natural curve of your head.
Aim to incorporate all the hair from the sides as you move towards the nape of your neck.
Adjust your grip as needed to keep the strands separate and manageable.
It can be helpful to use your pinky finger to help scoop up new sections of hair.
Don’t be afraid to take breaks if your arms get tired.
Step 6: Finish the Braid
Once you have incorporated all the loose hair from the sides, you will be left with three main strands at the nape of your neck.
At this point, you can transition into a standard three-strand braid.
Simply continue crossing the left strand under the middle, then the right strand under the middle, without adding any more hair.
Braid down to the desired length, usually to the ends of your hair.
The length of the un-added section will depend on how much hair was left after incorporating everything.
Aim for a few inches of plain braid to secure it properly.
Secure the end of your braid tightly with a hair tie.
Choose a tie that matches your hair color for a seamless look, or a decorative one for a pop of color.
Ensure it’s snug enough to hold but not so tight that it causes discomfort.
Step 7: Enhance Volume and Texture (Pancaking)
Gently pull on the outer loops of the braid to “pancake” or loosen them.
Start from the top of the braid and work your way down.
This technique creates a fuller, softer, and more voluminous “dragon scale” appearance.
Be careful not to pull too hard, or the braid could unravel.
Use your fingertips to tug on small sections of each loop.
The goal is to widen the braid without losing its structure.
Adjust the pulled-out sections until you achieve your desired level of fullness.
Some prefer a subtle enhancement, while others love a dramatically voluminous look.
This step truly transforms the braid from neat to magnificent.
Step 8: Final Touches and Hold
Inspect your dragon braid from all angles using a hand mirror and a main mirror.
Check for any stray hairs or uneven sections that might need minor adjustments.
Smooth down any bumps with your comb.
Use bobby pins to secure any loose flyaways around the hairline or along the braid itself.
Match the bobby pins to your hair color for them to blend in seamlessly.
A few strategically placed pins can make a big difference in tidiness.
Finish with a light mist of hairspray to set the style and help it last all day.
Hold the can about 10-12 inches away from your head to ensure an even application.
This will keep your dragon braid looking fresh and polished for hours.
Common Mistakes to Avoid
Uneven Sections
One of the most common pitfalls is grabbing uneven sections of hair when adding to the braid.
This leads to a lopsided or bumpy braid that lacks a smooth, consistent flow.
Always aim for uniform sections to ensure a balanced and professional finish.
Crossing Over Instead of Under
Many beginners confuse Dutch braids with French braids, accidentally crossing strands over instead of under.
A French braid lies flat, while a Dutch braid (the dragon braid technique) creates a raised, prominent effect.
Double-check your technique in the early stages to ensure you’re consistently crossing under the middle strand.
Too Loose or Too Tight Tension
Finding the right tension is a delicate balance.
If your braid is too loose, it will quickly unravel and look messy.
If it’s too tight, it can be uncomfortable and pull at your scalp, potentially causing damage.
Practice maintaining a firm but gentle grip that keeps the braid secure without causing discomfort.
Neglecting Hair Preparation
Skipping the initial hair preparation, like detangling and smoothing, can make braiding significantly harder.
Knots and tangles will snag, making it difficult to create clean sections and smooth strands.
Always start with well-brushed, smooth hair for the best results.
Troubleshooting
Braid Keeps Falling Apart
This usually indicates insufficient tension or that you’re not crossing the strands tightly enough under each other.
Try to maintain a firmer grip on the working strands as you braid.
Ensure each new section added is securely integrated before crossing.
Applying a texturizing spray before you start can also give your hair more grip.
Lumpy or Uneven Sections
Lumps often occur when the sections of hair you add are inconsistent in size or when they aren’t smoothly incorporated.
Use a rat-tail comb to create clean, even partings each time you add hair.
Smooth down the new sections with your fingers before integrating them into the main braid.
It takes practice to develop a consistent hand motion.
Difficulty Adding Hair Smoothly
If you’re struggling to pick up new sections without creating bumps, try using your pinky finger to isolate the hair.
Angle your head slightly to make it easier to see and reach the sections you’re adding.
Ensure your existing strands are held firmly, so they don’t slip while you’re gathering new hair.
Key Takeaways
- Always start with thoroughly detangled hair for a smooth braiding experience.
- The dragon braid uses the Dutch braiding technique, which means crossing strands under the middle.
- Maintain consistent tension throughout the braid to ensure it stays neat and secure.
- Incorporate small, even sections of hair from the sides as you work your way down.
- “Pancaking” the braid by gently pulling on the loops adds volume and a dramatic “dragon scale” effect.
- Finish with hairspray and bobby pins to secure the style and tame any flyaways.
Frequently Asked Questions
Can I do a dragon braid on short hair?
A traditional dragon braid works best on medium to long hair because it requires enough length to weave down the head.
However, you can adapt the technique for shorter hair by starting higher on the crown and finishing with a smaller braided section or pinning the ends.
Bobs and lobs can sometimes manage a smaller version.
What’s the difference between a French braid and a Dutch braid?
The main difference lies in how the strands are crossed.
In a French braid, strands are crossed over the middle strand, causing the braid to lie flat against the head.
In a Dutch braid (used for the dragon braid), strands are crossed under the middle, making the braid stand out and appear raised.
How do I make my dragon braid last all day?
To maximize longevity, start with clean, dry hair and apply a light texturizing spray for grip.
Braid with consistent, firm tension, ensuring all sections are securely incorporated.
Finish with a generous mist of strong-hold hairspray, focusing on the top and sides, and use bobby pins for any loose areas.
Can I sleep with a dragon braid in?
Yes, you can often sleep with a dragon braid, and it can even help create soft waves when you take it out.
However, it might become slightly flattened or messy overnight.
To preserve it, consider covering your hair with a silk or satin bonnet to reduce friction.
Our Top Recommended Finds
- Rat-Tail Comb: Essential for creating clean, precise partings and scooping up small sections of hair.
- Clear Hair Elastics: These blend seamlessly into your hair, making the braid look more professional and polished.
- Strong Hold Hairspray: A good quality hairspray is key to setting your intricate braid and keeping flyaways at bay all day.
Unleash Your Inner Braiding Artist
You now have all the tools and knowledge to create a stunning dragon braid.
Remember that practice makes perfect, and each attempt will bring you closer to mastering this beautiful style.
Don’t be discouraged by initial challenges; every expert braider started somewhere.
Consider experimenting with different hair accessories once you’re comfortable with the basic technique.
Small floral pins or jeweled clips can elevate your dragon braid even further.
Take that first step today and transform your hair into a work of art!