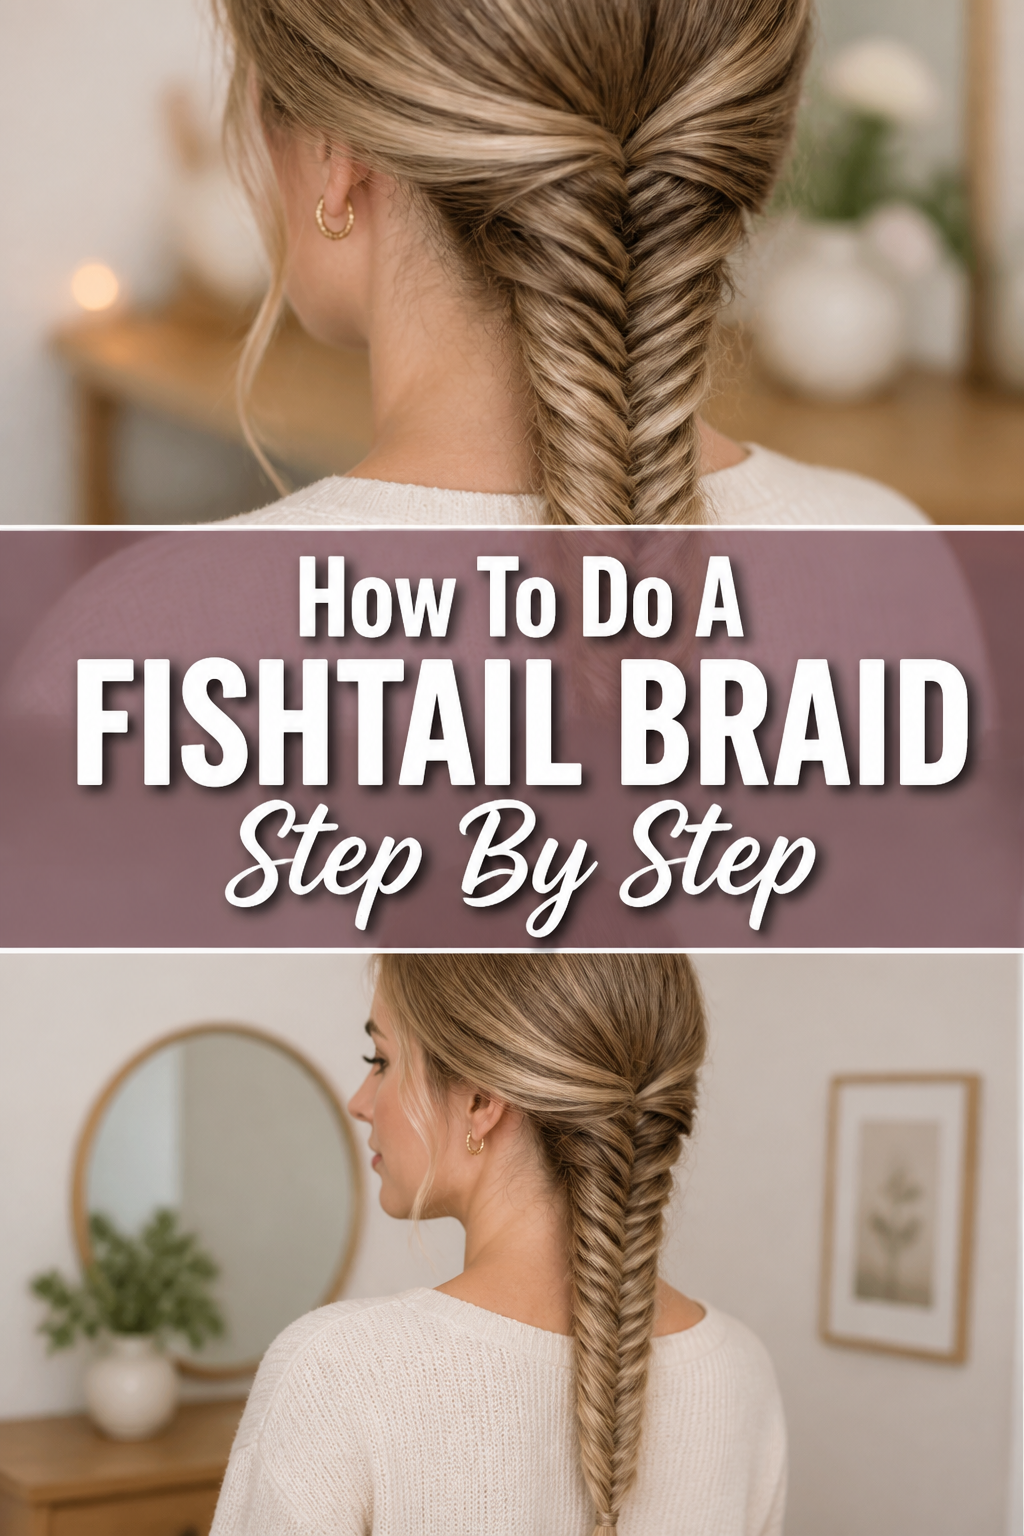
🧜♀️ How To Do A Fishtail Braid Step By Step
Learning to braid can feel like mastering a secret art, especially when it comes to the elegant fishtail.
I remember the first time I tried it, tangled and frustrated, but with persistence, it became one of my favorite go-to styles.
Now, I’m excited to share a clear, practical method to help you achieve this beautiful look with ease.

Quick Overview
This guide will walk you through creating a stunning fishtail braid, perfect for any occasion.
You’ll learn the technique from preparation to the final touches, ensuring a polished result.
- Time needed: 10-20 minutes (depending on hair length and initial practice)
- Difficulty: Intermediate
- What you’ll need: Hairbrush or comb, two hair ties, optional hairspray
Step-by-Step Instructions
Step 1: Prepare Your Hair
Start with dry, detangled hair. This is a crucial first step for any successful braid.
Use a brush or a wide-tooth comb to gently remove all knots and snags.
Smooth hair ensures the strands glide past each other, making the braiding process much easier.
A little leave-in conditioner or smoothing serum can also help manage flyaways.
Pro Tip: For a slightly textured, less slippery braid, start with second-day hair or spritz a little dry shampoo at the roots before brushing. This adds grip.
Step 2: Divide Your Hair into Two Sections
Gather all your hair to one side, or keep it at the back if you prefer a classic central braid.
Use your fingers to separate your hair cleanly into two equal sections.
Think of these as your main left and right halves.
Hold one section in each hand, keeping them separate and untangled.
Step 3: Begin the Fishtail Pattern – Left Side
Take a small, thin strand of hair from the outer edge of your left section.
The thinner the strand, the more intricate and “fishtail-like” your braid will appear.
Cross this small strand over the top of your left section, bringing it to join the inner side of your right section.
Ensure you pull it taut enough to maintain tension, but not so tight that it’s uncomfortable.
Step 4: Continue the Pattern – Right Side
Now, repeat the same action on the other side.
Take a small, thin strand of hair from the outer edge of your right section.
Cross this strand over the top of your right section, moving it to join the inner side of your left section.
Again, keep the tension consistent between both sides.
Pro Tip: Consistent strand size is key to a beautiful fishtail. Try to pick up roughly the same amount of hair each time you cross a strand. This creates a uniform, elegant pattern.
Step 5: Maintain and Repeat
Continue alternating sides, taking a small outer strand from one main section and crossing it over to join the other main section.
Work your way down the length of your hair, always keeping the two main sections separate.
Focus on maintaining even tension and consistent strand thickness throughout the process.
This rhythmic repetition is what builds the distinctive fishtail look.
Step 6: Secure the Braid
Once you’ve braided down to your desired length, or when you run out of hair, secure the end.
Use a snag-free hair tie that matches your hair color for a seamless finish.
Wrap the hair tie firmly around the end of the braid to prevent it from unraveling.
Make sure it feels secure but isn’t pulling too tightly on your scalp.
Step 7: Finish and Refine
Now for the fun part: making your braid look perfectly undone and voluminous.
Gently pull apart the loops of the braid with your fingers, starting from the top and working your way down.
This “pancaking” technique adds fullness and creates a softer, more romantic effect.
If you like, mist with a light-hold hairspray to keep flyaways at bay and ensure your braid lasts all day.
Common Mistakes to Avoid
Taking Uneven Strands
One of the most common pitfalls is not taking consistent strand sizes. When you pull varying amounts of hair for each cross-over, the braid can look lumpy and uneven.
To correct this, consciously try to gauge the size of each strand you pick up. Aim for uniform, thin sections every time to create that delicate, interwoven appearance.
Losing Tension
If your braid feels loose and falls apart easily, you might be losing tension as you work. It’s crucial to maintain a firm, consistent pull on the strands.
Keep your hands close to your head at the beginning and ensure each crossover feels secure before moving to the next. Practice helps build muscle memory for the right tension.
Starting Too Loose or Too Tight
Starting the braid too loosely can result in a messy top that unravels quickly. Conversely, starting too tightly can pull uncomfortably and look severe.
Find a comfortable medium where the braid is snug against your head without causing discomfort. You can always gently loosen the top sections later for a softer look.
Forgetting to Detangle First
Attempting to braid hair that still has tangles will lead to frustration and a messy, uneven result. Knots will prevent smooth crossing of strands and can even damage your hair.
Always take the time to thoroughly brush and detangle your hair before starting any braid. This simple step makes a huge difference in the final outcome.
Troubleshooting
Braid Falls Apart Easily
If your fishtail braid doesn’t hold, the most likely culprit is insufficient tension or strands that are too thick. Ensure you’re pulling each small section firmly as you cross it over.
Also, try taking even thinner strands of hair. Finer sections interlock more securely, creating a sturdier braid. A quick spritz of hairspray before starting can also add grip.
Looks Messy/Uneven
A messy or uneven appearance often stems from inconsistent strand size or uneven tension between the two main sections. Focus on picking up precisely the same amount of hair from each side.
Practice helps develop a feel for uniformity. If it still looks uneven, gently tug on individual loops to balance the look, or embrace the “messy fishtail” style by intentionally pulling strands loose.
Difficult to Braid Back of Head
Braiding the back of your head can be tricky, especially for beginners. The key is to use a mirror or practice where you can see your hands, even if it’s just in your peripheral vision.
Alternatively, try doing a side fishtail braid first. This allows you to see your hands and get comfortable with the motion before attempting a central back braid. You can also try a French fishtail where you add hair as you go, which can sometimes feel more intuitive than a standard back braid.
Key Takeaways
- Always start with thoroughly detangled hair for the best results.
- Divide your hair into two equal main sections before beginning the braid.
- Take small, thin strands from the outer edge of one section and cross them over to join the other.
- Maintain consistent tension and strand size throughout the entire braiding process.
- Secure the braid firmly with a hair tie once you’ve reached your desired length.
- Gently “pancake” the braid by pulling apart the loops for added volume and a softer look.
Frequently Asked Questions
Can I do a fishtail braid on short hair?
Yes, you can absolutely do a fishtail braid on shorter hair, though it might be more challenging. Your hair needs to be long enough to create distinct sections that can be crossed over without falling out.
For bobs or lobs, a half-up fishtail or a small accent fishtail near the face can work wonderfully. The key is often to use smaller sections and slightly more product for grip.
Is it easier on wet or dry hair?
A fishtail braid is generally easier to do on dry hair, or slightly damp hair that’s almost dry. Wet hair can be more slippery and harder to hold, making it difficult to maintain tension and consistent strand size.
Dry hair also allows for better “pancaking” at the end to create a fuller look. If your hair is very fine, a little texture spray on dry hair can provide extra grip.
How do I make it look fuller?
To make your fishtail braid look fuller and thicker, the “pancaking” technique is your best friend. Once the braid is secured, gently pull on the outer loops of the braid with your fingertips, starting from the top and working your way down.
You can also start with slightly curled or wavy hair, which adds natural volume. Using a texturizing spray or dry shampoo before braiding can also give your hair more body and grip.
What’s the difference between a French fishtail and a regular fishtail?
A regular fishtail braid starts by dividing all your hair into two sections and then braiding downwards. A French fishtail, however, incorporates hair as you go, similar to a French braid.
With a French fishtail, you start with a small section at the crown of your head, divide it into two, and then add small sections of new hair from the sides of your head into your main sections before crossing them over. This creates a braid that lies flat against your scalp.
Our Top Recommended Finds
- Fine-tooth comb: Essential for precise parting and separating thin strands, ensuring a clean and intricate braid.
- Snag-free hair ties: These prevent damage and breakage when securing your braid, making removal smooth and easy.
- Light-hold hairspray: Perfect for taming flyaways and adding a touch of hold without making your braid stiff or sticky.
Your Braid Journey Starts Now
Mastering the fishtail braid is a rewarding skill that adds a touch of bohemian elegance to any look.
It takes a little practice, but with each attempt, you’ll find your rhythm and improve your technique.
Don’t be afraid to experiment with different placements, like a side fishtail or a half-up style.
Grab your brush and hair ties today and create your first beautiful fishtail braid!