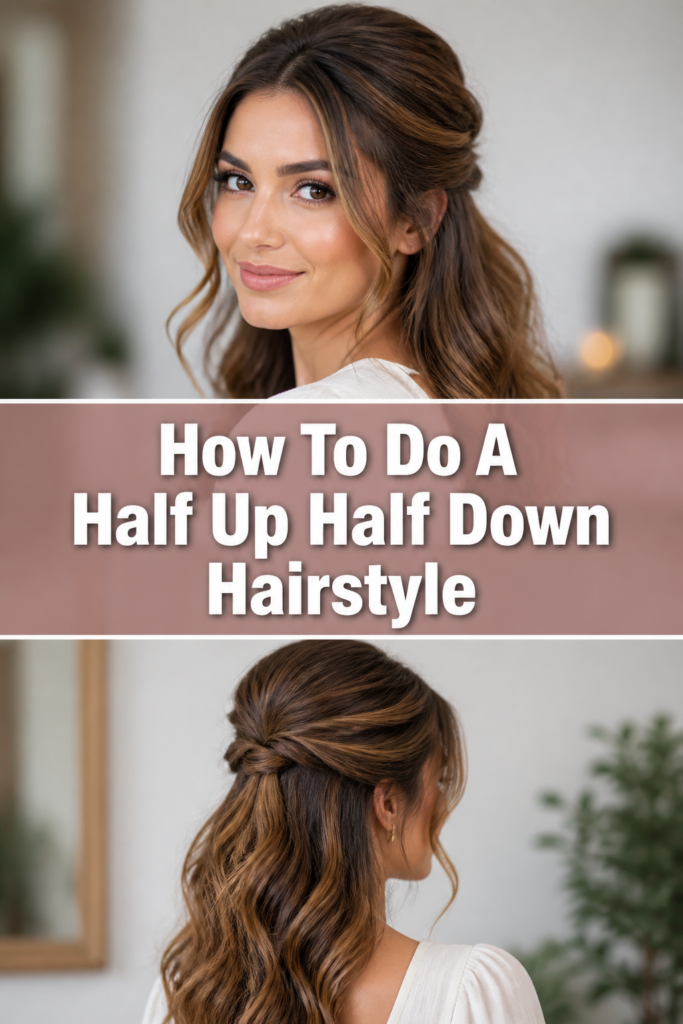
✨ How To Do A Half Up Half Down Hairstyle
Finding a hairstyle that works for every occasion can feel like a constant struggle.
I remember spending years trying to master the perfect balance between casual comfort and polished elegance before a big dinner date.
After working behind the scenes at local fashion shows and styling countless friends, I discovered that the half up half down look is the ultimate “cheat code” for great hair.
Quick Overview
This guide will help you master the foundational techniques for a secure and stylish half-up look.
- Time needed: 10 to 15 minutes
- Difficulty: Beginner
- What you’ll need: Rat-tail comb, hair elastics, bobby pins, and hairspray.
Step-by-Step Instructions
Step 1: Prepare Your Texture
Start with hair that isn’t slippery or freshly washed if possible.
Day-old hair often has more “grip,” which helps the style stay in place throughout the day.
Apply a light mist of dry shampoo or a texturizing spray to your roots to create immediate volume.
If your hair is naturally very fine or straight, consider adding a few loose waves with a curling iron before you begin.
Pro Tip: If you just washed your hair, use a sea salt spray on damp strands and blow-dry it in to create the necessary friction for the elastic to hold.
Step 2: Map Out Your Section
Identify the points on your head where you want the half-up section to begin.
A classic starting point is the top of your ears or the outer corners of your eyebrows.
Use your index fingers to trace a line from these points toward the back of your head.
Meeting your fingers in the middle ensures that the amount of hair you gather is symmetrical on both sides.
Step 3: Create Clean Parting Lines
Switch to a rat-tail comb to refine the lines you just created with your fingers.
Clean partings are what separate a professional-looking style from a messy “just rolled out of bed” look.
Tilt your head forward slightly to see the top and sides more clearly in the mirror.
Run the pointed end of the comb along the scalp to separate the top half from the bottom half with precision.
Pro Tip: For a more modern, soft look, try a “V-shaped” parting that dips down toward the crown rather than a straight horizontal line.
Step 4: Smooth the Top Section
Hold the gathered hair in one hand while using a boar bristle brush with the other.
Gently brush from the hairline back toward the center where your ponytail will sit.
Focus on smoothing out any “bubbles” or lumps that often form near the temples.
If you prefer a sleek look, you can apply a tiny amount of hair gel or pomade to your palms before smoothing.
Step 5: Secure the Hair Tie
Wrap a small, clear elastic or a hair tie that matches your hair color around the gathered section.
Ensure the elastic is tight enough to stay put but not so tight that it causes tension on your scalp.
Pull the ponytail into two halves and tug them gently to tighten the base against your head.
This “tug” helps lift the ponytail slightly, giving it a more energetic and youthful appearance.
Step 6: Add Volume to the Crown
Place your fingers at the front of the secured section, near your forehead.
Gently “pinch and pull” small sections of hair upward to create height and texture.
Repeat this process across the entire top section to ensure the volume is even.
This step prevents the hair from looking too flat against the skull, which can sometimes look harsh under bright lights.
Pro Tip: If your hair is very flat, use the end of your rat-tail comb to gently lift the hair at the crown after it is already tied.
Step 7: Style the Bottom Half
Check the hair that is still hanging down to make sure it looks cohesive with the top.
If the top is sleek, you might want to run a flat iron through the bottom sections for a consistent finish.
Add a few more curls or waves to the loose hair if you want a more romantic or formal vibe.
Make sure to brush through any new curls with your fingers so they look soft and integrated.
Step 8: Conceal the Elastic
Take a small strand of hair from the bottom of your ponytail.
Wrap this strand around the hair tie until the elastic is completely covered from view.
Secure the end of the strand underneath the ponytail using a bobby pin.
This small detail makes the entire hairstyle look like it was done by a professional stylist.
Step 9: Final Finishing Touches
Mist the entire style with a flexible-hold hairspray to keep everything in place.
Use your hands to smooth down any remaining flyaways around your ears and neck.
Look at the back of your head using a hand mirror to ensure the parting is straight and the bobby pin is hidden.
If you have “baby hairs” at the front, you can use a clean toothbrush with a bit of hairspray to lay them down flat.
Common Mistakes to Avoid
Grabbing Too Much Hair
One of the most frequent errors is taking a section that is too thick.
When you gather more than half of your hair, the bottom section looks thin and “straggly.”
Aim to take only the top third or top half of your hair to maintain a lush look for the hair that remains down.
Ignoring the Back View
It is easy to focus only on what you see in the mirror from the front.
However, the half-up style often reveals messy partings or tangles at the back that you might miss.
Always use a secondary mirror to check the rear of your head before you finish the process.
Using Heavy Accessories
Large, heavy clips can weigh down the top section and cause it to sag over time.
This leads to a “droopy” look that loses its volume within an hour or two.
Stick to lightweight elastics or small decorative pins that won’t pull on the hair follicles.
Troubleshooting
The Top Section Feels Loose
If your ponytail starts to slide down, your elastic might be too large for the amount of hair you used.
You can fix this without starting over by inserting two bobby pins in an “X” shape directly through the elastic and into the hair against your scalp.
This creates an anchor that prevents the hair tie from moving downward.
Visible Lumps and Bumps
Lumps usually happen when the hair isn’t brushed thoroughly toward the center before tying.
If you see a bump, try using the fine-tooth end of your comb to gently “hook” the hair and pull it toward the elastic.
If the bump is too large, it is usually better to undo the elastic, re-brush, and tie it again with more tension.
The Parting Is Crooked
A crooked parting can make the whole head look unbalanced.
To fix this, you don’t always have to take the whole style down.
Use your rat-tail comb to pull a few stray hairs from the “heavy” side and tuck them into the ponytail or pin them back.
Key Takeaways
- Prep is essential: Use dry shampoo or texture spray to give your hair the “grit” it needs to hold a style.
- Mind the lines: Use the corners of your eyebrows as a guide for a flattering and symmetrical section.
- Smooth as you go: Brush the hair toward the center of the ponytail to avoid unsightly lumps.
- Hide the mechanics: Wrapping a small piece of hair around the elastic provides a high-end, polished finish.
- Check every angle: Use a hand mirror to ensure the back looks just as good as the front.
Frequently Asked Questions
Can I do this hairstyle on short hair?
Yes, the half up half down look is actually one of the best styles for bobs and lob-length hair.
You may need to use more bobby pins on the sides to catch shorter layers that don’t quite reach the elastic.
Focus on a “top knot” style for the upper section if your hair is too short for a traditional ponytail.
How do I make the style look more formal for a wedding?
Adding curls to the bottom section and volume to the crown immediately makes this look more sophisticated.
You can also replace the simple hair tie with a decorative pearl clip or a silk ribbon.
Braiding the top section before securing it also adds a level of complexity that suits formal events.
Should I do this on wet hair?
It is generally best to avoid styling your hair into a ponytail while it is wet.
Wet hair is more elastic and prone to breakage when it is stretched by a hair tie.
Wait until your hair is at least 90% dry to ensure you don’t damage the strands or cause scalp irritation.
How can I make my hair look thicker in this style?
The “pinch and pull” method at the crown is the best way to create the illusion of thickness.
You can also lightly tease the underside of the ponytail section before you tie it to give it more “oomph.”
Using a colored hair powder on your scalp can also hide any visible gaps in the parting lines.
Our Top Recommended Finds
- Professional Rat-Tail Comb: A heat-resistant carbon comb allows for the most precise partings and sectioning.
- Clear Polyband Elastics: These are nearly invisible and provide a strong grip for all hair types without snapping.
- Boar Bristle Smoothing Brush: This tool is perfect for distributing natural oils and creating a sleek, bump-free surface.
Mastering Your New Go-To Look
Now that you have the basic steps down, you can start experimenting with different variations.
Try a messy bun for the top section on casual weekends or a sleek high-pony version for the office.
The beauty of this style lies in its versatility and how it keeps hair out of your face while showing off your length.
Grab your comb and a mirror, and give this a try before your next outing.
You might find that it quickly becomes your favorite way to wear your hair.