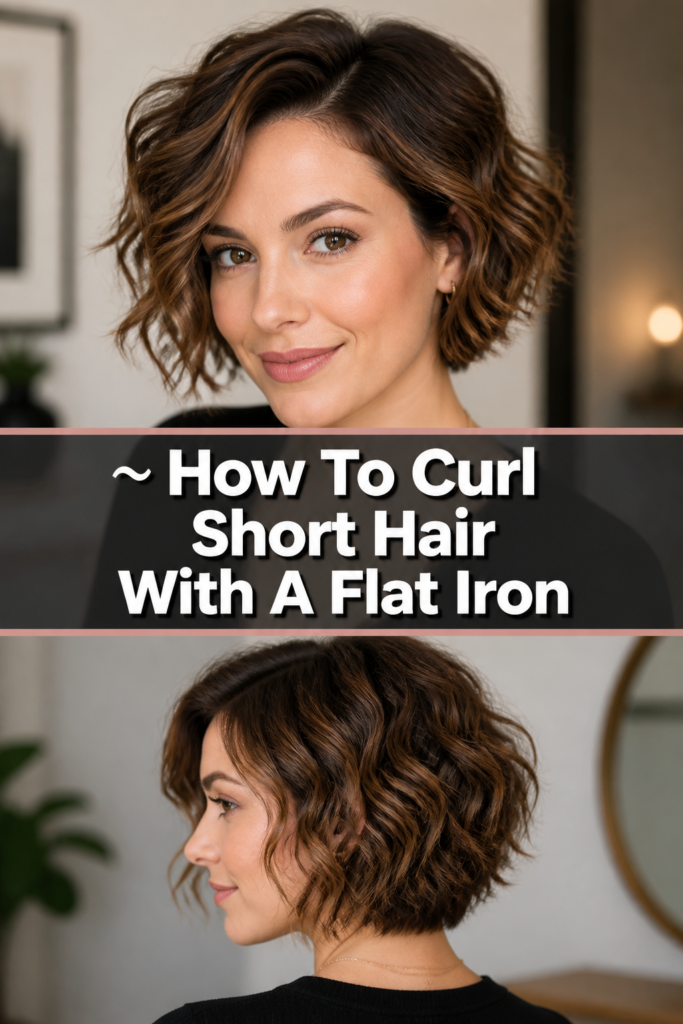
〰️ How To Curl Short Hair With A Flat Iron
Curling short hair with a flat iron might seem like a daunting task at first. Many people assume flat irons are only for straightening, or that short hair is too tricky to manage. I remember feeling the same way, struggling to add any movement to my chin-length bob.
However, with the right technique and a little practice, you can create beautiful, bouncy curls or soft waves that add incredible volume and style. This guide will walk you through every step, transforming your short hair into a masterpiece of texture and flair. You’ll be surprised at how simple and effective it can be to achieve salon-worthy results right at home.
Quick Overview
This guide will empower you to confidently curl your short hair using a flat iron. You’ll learn the essential prep work, precise curling techniques, and crucial finishing touches to ensure your style lasts. Get ready to embrace versatile looks and add dynamic movement to your short cut.
- Time needed: 20-40 minutes (depending on hair length and density)
- Difficulty: Intermediate (Beginner-friendly with practice)
- What you’ll need: Flat iron (1-inch or smaller recommended), heat protectant spray, hair clips, fine-tooth comb, hairspray, optional: texturizing spray or dry shampoo.
Step-by-Step Instructions
Step 1: Prepare Your Hair Thoroughly
Begin with clean, dry hair. Any moisture can cause damage when heat is applied, so ensure your hair is completely air-dried or blow-dried. This foundational step is critical for both the health of your hair and the longevity of your curls.
Apply a high-quality heat protectant spray generously throughout your hair. This creates a barrier against the intense heat of the flat iron, preventing damage, breakage, and frizz. Distribute it evenly from roots to ends for comprehensive protection.
Pro Tip: For extra volume at the roots, apply a lightweight volumizing mousse or root-lifting spray to damp hair before blow-drying. This gives your curls a better foundation to stand on.
Step 2: Section Your Hair Precisely
Divide your hair into manageable sections. Using a fine-tooth comb, create a horizontal part from ear to ear, separating the top half of your hair from the bottom. Secure the top section with a hair clip.
Work with the bottom section first, further dividing it into smaller, vertical subsections. Each subsection should be no wider than the plates of your flat iron, typically about 1-inch thick. Smaller sections lead to more defined curls.
Step 3: Select the Right Flat Iron and Temperature
Choose a flat iron with plates that are 1 inch or smaller, especially for very short hair. Smaller plates allow for tighter curls and greater control over short strands. A larger iron might be difficult to maneuver without crimping your hair.
Set your flat iron to an appropriate temperature for your hair type. Fine or damaged hair typically needs lower heat (250-300°F), while thick or coarse hair can handle higher temperatures (350-400°F). Always start with a lower setting and increase if necessary to avoid heat damage.
Step 4: Master the Flat Iron Grip and Angle
Hold your flat iron vertically, rather than horizontally. This vertical orientation is key for creating natural-looking curls and waves, preventing a crimped or unnatural shape. Position the iron so the cord faces upwards.
Take your first small section of hair and open the flat iron plates. Clamp the iron near the root of the hair, leaving about an inch free. Ensure you don’t clamp too tightly, as this can create a harsh crease.
Step 5: Execute the Curling Motion
With the hair clamped, rotate the flat iron 180 degrees (half a turn) away from your face. This rotation helps create a natural-looking curl pattern. The hair should now be wrapped once around the barrel of the iron.
Slowly glide the flat iron down the length of the hair section, maintaining the 180-degree rotation. Move at a consistent, steady pace – too fast, and the curl won’t set; too slow, and you risk heat damage. As you reach the ends, gently release the iron.
Pro Tip: For softer waves, rotate the iron less (around 90 degrees) and glide a bit faster. For tighter curls, slow down slightly and ensure a full 180-degree rotation.
Step 6: Continue Section by Section
Release another small section of hair from your clip and repeat the curling process. Maintain consistency in your rotation direction, either always curling away from your face or alternating for a more disheveled look. Consistency is important for a cohesive style.
As you work your way around your head, unclip larger sections of hair as needed. Always ensure you are working with small, manageable subsections. This prevents uneven curls and ensures every strand gets attention.
Step 7: Pay Attention to the Face-Framing Pieces
When you reach the hair around your face, be especially mindful of the curling direction. Curling these pieces away from your face tends to open up your features and create a flattering, soft frame. This technique is universally appealing.
Use a slightly lighter touch on these delicate strands. You might even opt for a slightly faster glide to create softer, less defined curls around your face. This prevents a too-structured look and allows for natural movement.
Step 8: Allow Curls to Cool and Set
Once you’ve curled all sections of your hair, resist the urge to immediately touch or brush them. Allowing the curls to cool completely is crucial for them to set and hold their shape. Warm curls are still pliable and will fall flat easily.
Once cooled, lightly mist your entire head with a flexible-hold hairspray. This helps to lock in the style without making your hair stiff or crunchy. Choose a spray that offers movement for a natural finish.
Step 9: Refine and Finish Your Style
After your curls are fully set and sprayed, gently break them up with your fingers. Do not use a brush, as this can turn curls into frizz. Finger-combing separates the curls, creating a softer, more natural wave.
For added texture and volume, especially if your hair feels too “perfect,” spray a texturizing spray or sprinkle a volumizing powder at the roots and mid-lengths. Gently scrunch your hair to distribute the product and enhance the lived-in look. This final touch gives your short curls definition and body.
Common Mistakes to Avoid
Using Too Much Heat
Applying excessive heat to your hair is a common mistake that leads to significant damage. High temperatures can fry your strands, cause split ends, and make your hair brittle over time. Always start with the lowest effective temperature for your hair type. Gradually increase the heat only if your curls aren’t holding.
Not Using Heat Protectant
Skipping heat protectant is like exposing your skin to the sun without sunscreen. Without this protective barrier, your hair is directly exposed to intense heat, leading to dehydration and damage. Always apply a heat protectant evenly before using any hot tools.
Clamping Too Tightly or Not Gliding
Clamping the flat iron too tightly can create a harsh, unnatural crease in your hair, ruining the smooth curl. Conversely, not gliding the iron smoothly and consistently can result in uneven curls or a kinky texture. Practice a gentle, consistent glide to achieve fluid, seamless curls.
Over-Curling or Overworking Sections
Repeating the curling motion multiple times on the same section of hair will not make the curl hold better; it will only expose your hair to unnecessary heat. Overworking sections can lead to damaged, frizzy hair and an unnatural, stiff look. Curl each section once, with a smooth, deliberate motion.
Troubleshooting
Curls Not Holding Shape
If your curls are falling flat quickly, several factors could be at play. Your hair might not be completely dry, or you might be using too low a temperature for your hair type. Ensure your hair is bone dry and try increasing the heat slightly, but always within safe limits.
Another common reason is not allowing the curls to cool down before touching them. After curling each section, let it cool completely before releasing or finger-combing. A light-hold hairspray applied after cooling can also significantly improve hold.
Hair Looks Frizzy or Damaged
Frizz often indicates either too much heat, insufficient heat protectant, or improper technique. Check your flat iron’s temperature settings to ensure they are appropriate for your hair. Make sure you’re applying heat protectant thoroughly.
Additionally, pulling the iron too fast or too slow can cause frizz. A steady, consistent glide is key. If your hair still looks frizzy, consider using a smoothing serum or oil as a finishing product, applied sparingly to the ends.
Ends Are Straight or Kinky
Straight ends typically happen if you don’t glide the flat iron all the way through to the very tip of the hair strand. Ensure you maintain the rotation and even pressure until the iron completely releases the end. This ensures a uniform curl from root to tip.
Kinky ends, on the other hand, can occur if you clamp the iron too hard at the very end of the section or if you stop the gliding motion abruptly. Practice a smooth, continuous release of the iron as it exits the hair. A gentle touch on the ends is essential for a polished finish.
Key Takeaways
- Always start with fully dry hair and generously apply heat protectant to prevent damage.
- Section your hair into small, manageable pieces (about 1-inch thick) for even and defined curls.
- Use a flat iron with 1-inch or smaller plates and adjust the temperature to your hair type.
- Hold the flat iron vertically and rotate it 180 degrees away from your face for natural-looking curls.
- Allow curls to cool completely before touching or styling them to ensure they set and hold their shape.
- Finish your style by gently finger-combing and using a light-hold hairspray or texturizing spray.
Frequently Asked Questions
What flat iron size is best for short hair?
For short hair, a flat iron with 1-inch or even 0.5-inch plates is ideal. These smaller plates provide greater control and allow you to wrap short strands more effectively. Larger irons can be cumbersome and may lead to crimped hair rather than smooth curls.
Should I curl towards or away from my face?
Curling away from your face is generally recommended for the sections around your hairline. This technique opens up your facial features and creates a soft, flattering frame. For the rest of your hair, you can continue curling away from your face for a uniform look, or alternate directions for a more textured, messy style.
How do I make curls last longer in short hair?
To make your curls last, begin with a good heat protectant that also offers some hold. Ensure your hair is completely dry before curling. After curling each section, let it cool completely without touching it. Finish with a strong-hold hairspray and avoid brushing; instead, gently separate curls with your fingers.
Can I curl super fine short hair with a flat iron?
Yes, you absolutely can curl super fine short hair. The key is to use the lowest possible heat setting on your flat iron to prevent damage. Also, ensure you use a lightweight heat protectant and a very light-hold hairspray, as heavy products can weigh down fine hair. Small sections are crucial for fine hair to ensure the curl holds.
Our Top Recommended Finds
- Quality Heat Protectant Spray: Essential for shielding your hair from heat damage. Look for one that also offers frizz control and a lightweight feel.
- Small Barrel Flat Iron (1-inch or smaller): Crucial for precise curling on short hair. Ceramic or tourmaline plates are excellent for even heat distribution.
- Lightweight Texturizing Spray: Perfect for adding volume and a natural, undone finish to your curls without weighing them down.
Embrace Your Newfound Styling Power
You now possess the knowledge and step-by-step guidance to transform your short hair with beautiful curls using a flat iron. No more feeling limited by your hair length; instead, you have a versatile tool to create dynamic, stylish looks. This skill opens up a world of possibilities, from soft, elegant waves to playful, bouncy curls.
Don’t wait to experiment with these techniques. Grab your flat iron and start practicing today. The more you try, the more confident and skilled you’ll become. Consider exploring different curl directions or finishing products to truly personalize your look. Your short hair journey has just become a lot more exciting!