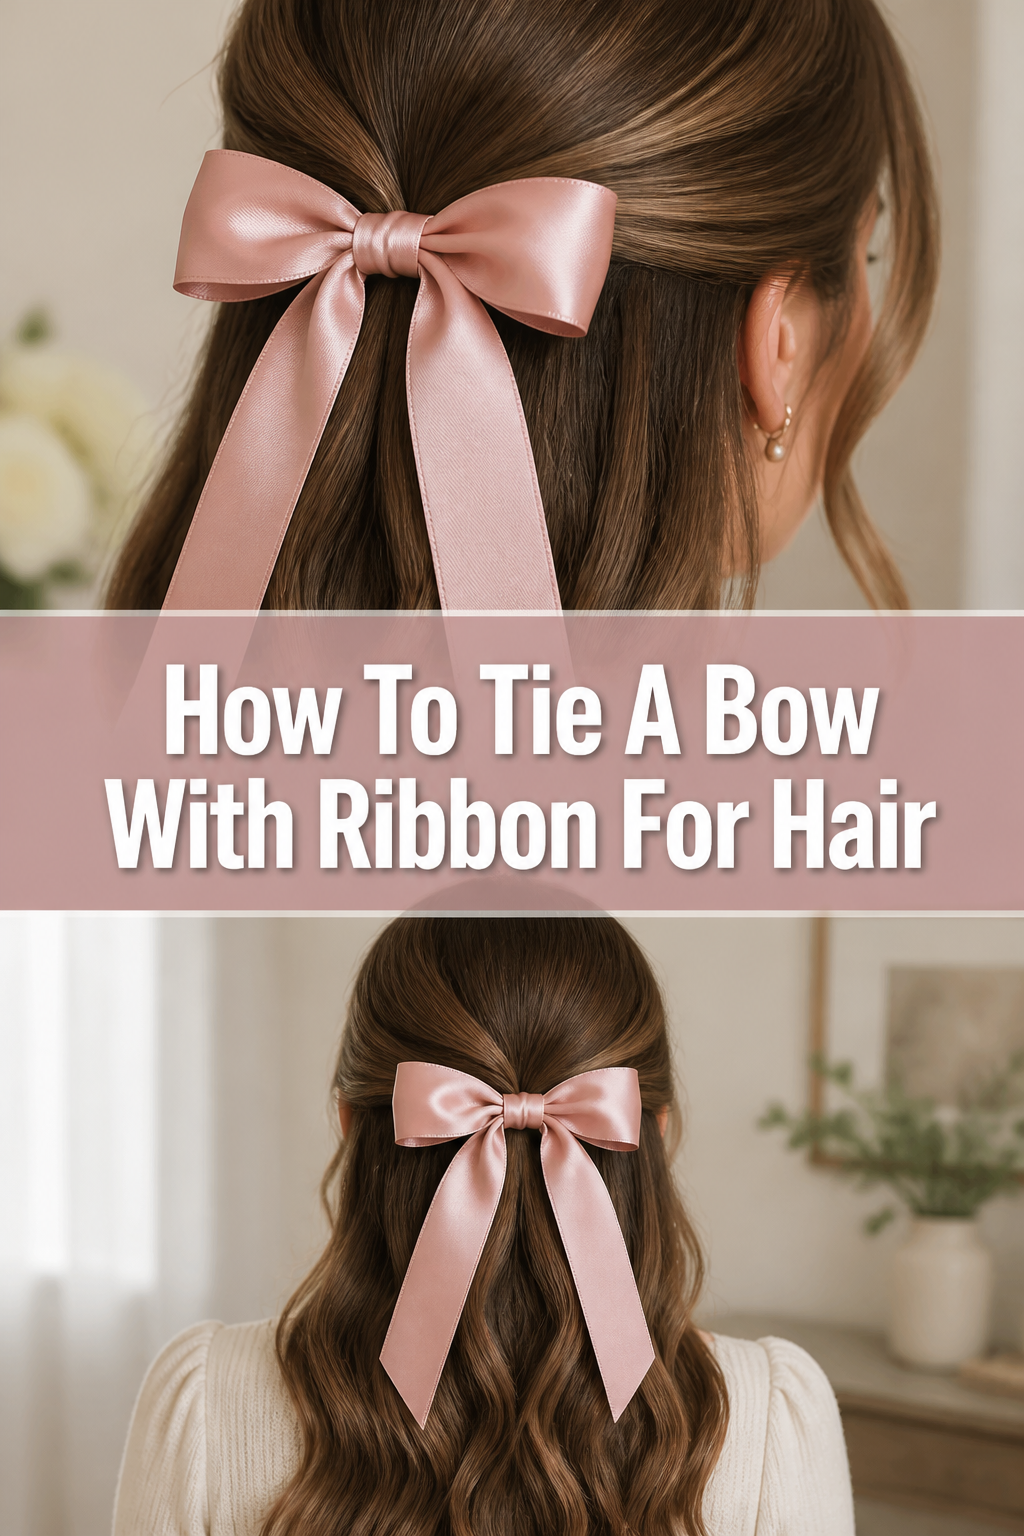
🎀 How To Tie A Bow With Ribbon For Hair
Creating a beautiful hair bow with ribbon can seem a bit tricky at first glance.
I remember countless attempts at getting that perfectly symmetrical, elegant loop for my own hair or a friend’s special occasion.
This guide will walk you through each movement, helping you achieve a stunning, handmade bow every time.

Quick Overview
You’re about to master the art of tying a charming ribbon bow, adding a personal touch to any hairstyle.
- Time needed: 5-10 minutes
- Difficulty: Beginner
- What you’ll need: Ribbon, scissors, a hair elastic or clip (optional)
Step-by-Step Instructions
Step 1: Choose and Prepare Your Ribbon
Select your ribbon carefully. Consider the material, color, and width that best complements your hair and the occasion.
Cut a length of ribbon. For most standard bows, 18 to 24 inches (45-60 cm) is a good starting point, allowing plenty of room to work.
Trim the ends of the ribbon at an angle or into a “V” shape. This prevents fraying and gives your finished bow a polished look.
Pro Tip: Thicker ribbons tend to hold their shape better, while thinner ribbons offer a more delicate appearance. Experiment with different types to find your favorite.
Step 2: Position the Ribbon
Hold one end of the ribbon in your left hand and the other end in your right.
Place the center of the ribbon over the area where you want the bow to sit in your hair. This might be over a ponytail, a bun, or simply on the side of your head.
Ensure both sides of the ribbon are hanging down evenly. This initial balance helps with symmetry later on.
Step 3: Create the First Loop
Bring the right side of the ribbon over the left side, as if you’re starting to tie a shoelace.
Tuck the right ribbon end underneath the left and pull it through the loop you just formed.
Pull gently to create a simple knot. This base knot will secure the ribbon to your hair.
Step 4: Form the First Bow Loop
Take the ribbon hanging from your left hand.
Fold it over itself to create a loop, similar to a bunny ear.
Hold this loop firmly with your thumb and forefinger at its base, where it meets the central knot.
Step 5: Form the Second Bow Loop
Take the ribbon hanging from your right hand.
Bring it over the top of the first loop you just made.
Wrap it around the back of the first loop, moving from top to bottom.
Step 6: Thread the Second Loop Through
Push the end of the right ribbon up through the small opening behind the first loop.
Gently pull it through to create your second “bunny ear” loop.
Adjust both loops so they are roughly the same size and shape.
Pro Tip: Don’t pull too tightly yet. Leave a little slack to allow for easy adjustments in the next step.
Step 7: Tighten and Adjust the Bow
Pull both loops simultaneously to tighten the knot at the center of your bow.
Hold the center knot while pulling the loops to ensure it stays secure.
Adjust the size and symmetry of each loop by gently tugging on them or the dangling ribbon ends.
Smooth out any creases in the ribbon. Ensure the tails hang nicely.
Step 8: Secure if Needed (Optional)
Use a small bobby pin. If your bow feels a little loose or you want extra security, slide a bobby pin through the central knot of the bow and into your hair.
Conceal the bobby pin by pushing it under the ribbon.
Spray with a light mist of hairspray. This can help keep the ribbon in place, especially if it’s a slicker material.
Step 9: Final Touches
Fluff out the loops of your bow. Give them a gentle pinch and pull to make them look full and shapely.
Check the overall placement in your hair. Make any final minor adjustments to the loops or tails.
Admire your perfectly tied ribbon bow. You’ve added a beautiful, custom accessory to your hairstyle.
Common Mistakes to Avoid
Tying Too Tightly Too Soon
Many people pull the ribbon very tight as they form the first knot or the loops. This makes it incredibly difficult to adjust the bow’s shape and symmetry later on.
Instead, tie the initial knot and form the loops with a relaxed grip. Only tighten the bow fully once you are happy with the size and balance of both loops.
Uneven Ribbon Lengths
Starting with one ribbon tail significantly longer than the other can lead to an lopsided bow or running out of ribbon on one side. It also makes the final dangling tails uneven.
Always ensure your initial ribbon length is centered and both tails are hanging evenly before you begin forming your loops. This sets a good foundation for a symmetrical bow.
Not Securing the Bow Properly
A beautiful bow that slips out of place is frustrating. Sometimes the ribbon itself is slippery, or the hairstyle doesn’t offer enough grip.
Consider the texture of your ribbon and hair. If needed, use a small bobby pin threaded through the central knot and into your hair, or even tie the bow around a hair elastic already in place.
Ignoring Ribbon Material
Different ribbon materials behave differently. A stiff grosgrain ribbon holds shape easily, while a silky satin ribbon might slip and require more careful handling.
Choose a ribbon material that suits your desired look and skill level. For beginners, a slightly stiffer ribbon like grosgrain or a cotton blend can be more forgiving.
Troubleshooting
My Bow Looks Lopsided
This is a common issue, often caused by uneven loop sizes or one side being pulled tighter than the other. Don’t worry, it’s fixable.
Gently loosen the central knot slightly. Then, pull on the shorter loop to lengthen it, or pull on the longer loop’s tail to shorten it. Adjust until both loops are symmetrical, then carefully tighten the center again.
The Bow Keeps Slipping Out
If your bow refuses to stay put, it might be due to very smooth hair, a slippery ribbon, or not enough tension in the initial tie.
Try placing the bow over a hair elastic that’s already securing a ponytail or bun. Alternatively, slide a bobby pin through the knot of the bow and anchor it into the hair beneath. A light mist of hairspray can also add grip.
The Ribbon Looks Flat and Lifeless
Sometimes bows can look flat, especially with softer ribbons, losing that desirable full shape. This can happen if the loops aren’t properly “fluffed.”
Once your bow is tied and secured, gently pinch the base of each loop and pull it outwards and upwards. This helps to open up the loops and give them more volume and dimension.
Key Takeaways
- Always start with an adequately long ribbon and ensure both ends are even before tying.
- Tie your initial knots and loops gently, allowing room for adjustments.
- Symmetry is key; adjust loop sizes by pulling on the loops or tails before fully tightening.
- Consider the ribbon material, as it impacts how easily the bow holds its shape.
- Don’t hesitate to use bobby pins or hairspray for extra security, especially with slippery hair or ribbon.
- Practice makes perfect; your bows will become more beautiful and effortless with each attempt.
Frequently Asked Questions
What’s the best type of ribbon for hair bows?
Grosgrain ribbon is an excellent choice for hair bows because its ribbed texture provides good grip, and it holds its shape well. Satin ribbons offer a luxurious look but can be a bit more slippery to work with. Organza ribbons create a delicate, airy bow.
How long should my ribbon be for a hair bow?
For a standard, medium-sized bow, a ribbon length of 18 to 24 inches (45-60 cm) is generally sufficient. If you want larger loops or longer tails, you’ll need more ribbon. Always err on the side of cutting a bit more than you think you’ll need.
Can I tie a bow directly into my hair without an elastic?
Yes, you can. For a half-up style or to adorn a braid, you can tie the ribbon directly around a section of hair. However, if your hair is very fine or slippery, tying it around an existing elastic or using a bobby pin to secure the knot will provide better hold.
How do I prevent my ribbon bow from fraying?
To prevent fraying, always cut your ribbon ends at an angle or in a “V” shape. For synthetic ribbons, you can very carefully and quickly pass the cut edges over a flame (like from a candle or lighter) to slightly melt and seal them, but use extreme caution and only do this if you are comfortable and safe.
Our Top Recommended Finds
- Grosgrain Ribbon Assortment: Perfect for beginners, offering various colors and sizes that hold shape well.
- Sharp Fabric Scissors: Essential for clean, crisp cuts that prevent fraying and give a professional finish.
- Clear Hair Elastics: Ideal for securing ponytails or buns before adding the ribbon bow for extra stability.
Embrace Your Inner Style Creator Today
Tying a ribbon bow for your hair is a delightful skill that adds a touch of charm and personality to any look.
Whether you’re dressing up for a special event or simply want to elevate your everyday style, a handmade bow is always a wonderful choice.
Grab some ribbon and start practicing; you’ll be creating beautiful bows with confidence in no time.