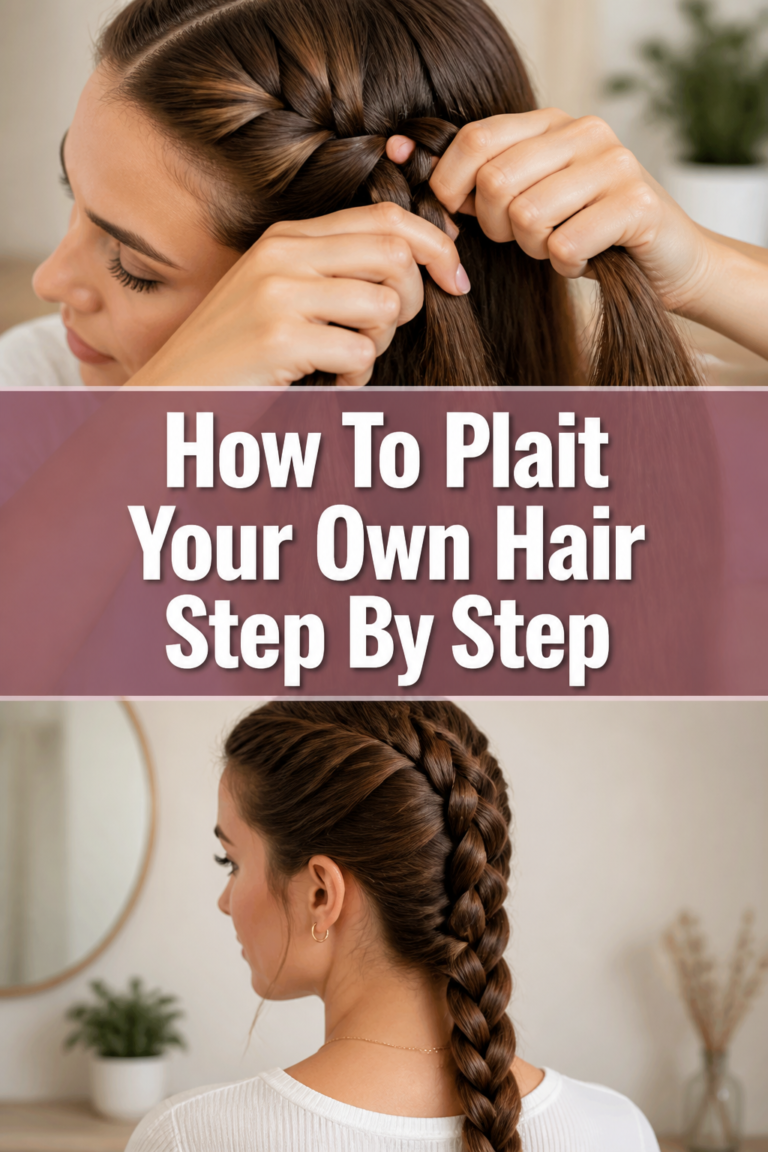
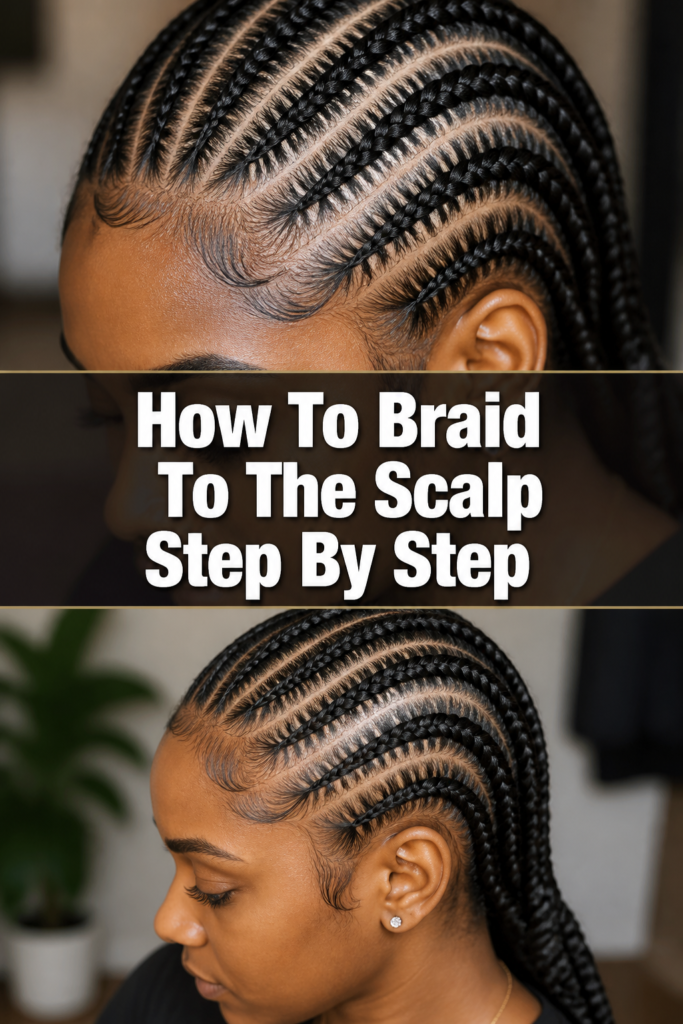
💆♀️ How To Braid To The Scalp Step By Step
I remember my first attempt at braiding to the scalp; it was a tangled mess and quite frustrating. But with consistent practice and understanding the right technique, anyone can master this skill. This guide comes from years of hands-on experience, breaking down every detail for you to succeed.
Quick Overview
This guide will walk you through the precise steps to create beautiful, neat braids that lie flat against the scalp. You’ll learn the essential techniques, how to avoid common pitfalls, and master the art of consistent, secure braiding.
- Time needed: 30 minutes to 2 hours (depending on hair length/density and skill level)
- Difficulty: Intermediate (requires practice, but beginners can definitely learn)
- What you’ll need: Rat-tail comb, hair clips, spray bottle with water, edge control or styling gel, small hair elastics.
Step-by-Step Instructions
Step 1: Prepare Your Hair
Start with clean, detangled hair. This is crucial for smooth braiding and preventing knots. Wash your hair and condition it thoroughly before you begin.
Ensure your hair is completely dry or slightly damp, depending on your preference. Some find damp hair easier to work with, while others prefer dry.
Apply a leave-in conditioner or light oil. This adds moisture, reduces frizz, and makes the hair more pliable. Distribute it evenly from roots to ends.
Pro Tip: Working with freshly washed and detangled hair minimizes snags and makes parting much easier. It also helps the braids look neater and last longer.
Step 2: Gather Your Tools
Collect all necessary items before you start. Having everything within reach prevents interruptions and keeps your focus. You will need a rat-tail comb, several hair clips, a spray bottle with water, a small amount of edge control or styling gel, and several small hair elastics.
Organize your workspace. A clear area helps you concentrate on the intricate movements required for braiding. Ensure good lighting so you can clearly see the sections of hair.
Step 3: Create Your First Part
Decide on your braid pattern. Will it be a single braid down the middle, side braids, or multiple cornrows? Visualize the direction your braid will take.
Use the rat-tail comb to create a clean, straight part where your first braid will begin. This initial part sets the foundation for neatness.
Section off the hair around this part, securing the rest of your hair out of the way with clips. This prevents loose strands from interfering with your work.
Pro Tip: A perfectly straight part is key to a polished look. Use the tail of your comb and take your time to get it right. You can use a little edge control along the part line for extra neatness.
Step 4: Begin the Braid with Three Strands
Take a small, triangular section of hair at the very beginning of your part. This section should be about 1-2 inches wide, depending on your desired braid size.
Divide this small section into three equal strands. Hold these strands firmly between your thumb, index, and middle fingers.
Start a regular three-strand braid for one or two crossovers. Cross the right strand over the middle, then the left strand over the new middle. This establishes the initial tension.
Step 5: Master Adding Hair Consistently
Hold the three strands firmly against the scalp. As you prepare for the next crossover, pick up a small, even piece of loose hair from the scalp.
Combine this new piece of hair with the strand that is about to cross over to the middle. For example, if the right strand is going to cross, add hair to the right strand.
Ensure the amount of hair you add is consistent with each pass. This is the secret to an even, uniform braid. Too much or too little will create bumps or thin spots.
Pro Tip: Always add hair before you cross the strand over. This integrates the new hair smoothly into the braid. Practice picking up hair with the non-braiding hand to maintain tension with the braiding hand.
Step 6: Maintain Tension and Direction
Keep consistent tension on the hair as you braid. This prevents the braid from becoming loose or pulling too tightly on the scalp. A firm but gentle grip is ideal.
Guide the braid in the desired direction. Use your fingers to lay the braid flat against the scalp, following the line of your initial part.
Adjust your hand position as you move down the scalp. Your hands should stay close to the scalp to control the hair being added.
Step 7: Continue Braiding Down the Scalp
Repeat the process of adding hair and crossing strands. Work your way down the section, picking up new hair from the scalp with each crossover.
Pay attention to the edges of your section. Make sure you are picking up all the hair within your designated braid path, leaving no stray pieces.
Use your rat-tail comb to help define the next section of hair to be added if needed, especially for very neat cornrows. This ensures clean lines.
Pro Tip: If your fingers start to feel tired or your grip loosens, take a short break. It’s better to pause than to create an uneven braid. Re-moisten hair with the spray bottle if it becomes dry.
Step 8: Finish the Braid
Continue braiding to the scalp until you run out of hair to add. At this point, you will have braided all the hair within your section.
Transition into a regular three-strand braid once you are no longer adding hair. Braid the remaining length of the hair down to the ends.
Secure the end of the braid with a small hair elastic. Make sure it’s tight enough to hold but not so tight that it causes discomfort.
Step 9: Secure and Style
Gently spray the finished braids with water or a light holding spray to tame any flyaways. You can also use a small amount of edge control along the parts and hairline.
Smooth down any frizz or loose hairs with your fingers or the comb. This gives the braids a polished, finished look.
Repeat the entire process for any additional braids you wish to create. Ensure consistency in size and tension across all braids.
Common Mistakes to Avoid
Uneven Sections
Starting with uneven sections of hair will lead to an inconsistent braid size. This makes the overall style look messy and unbalanced. Always take your time to create clean, uniform parts with your rat-tail comb before you even start braiding. Use clips to keep other hair out of the way.
Inconsistent Hair Added
If you pick up different amounts of hair with each pass, your braid will have bumps and thin spots. This is a common pitfall that affects the smoothness and durability of the braid. Strive to add the same small, precise amount of hair every single time you cross a strand. This takes practice but is crucial for neatness.
Too Loose or Too Tight Tension
Braiding too loosely results in a braid that quickly unravels and looks messy. Braiding too tightly can cause discomfort, scalp irritation, and even hair breakage. Find a balance of firm but gentle tension that keeps the braid secure against the scalp without causing pain. Your fingers should feel the hair being held securely, not strained.
Ignoring Hair Preparation
Skipping the steps of washing, detangling, and moisturizing your hair makes braiding significantly harder. Dry, tangled hair is prone to breakage, frizz, and difficult to part smoothly. Always prepare your hair properly to ensure a smooth, enjoyable braiding process and a better final result.
Troubleshooting
Braid is Not Lying Flat
If your braid is lifting off the scalp, it’s usually due to inconsistent tension or not picking up hair close enough to the scalp. Try to keep your hands very close to the scalp as you braid. Ensure you are adding hair from the root area and maintaining a firm, consistent pull with each crossover.
Difficulty Picking Up New Hair
This often happens when your non-braiding hand is not effectively isolating the next section of hair. Use the tail of your comb or the pinky finger of your non-braiding hand to cleanly separate the small section of hair you need to add. Practice this motion repeatedly until it feels natural.
Braid Looks Messy or Uneven
A messy appearance usually stems from uneven sections, inconsistent added hair, or loose flyaways. Go back to basics: ensure your initial parts are clean, add the same amount of hair with each pass, and use a little edge control or gel to smooth stray hairs. Consistency in practice will improve your results.
Key Takeaways
- Preparation is paramount: always start with clean, detangled, moisturized hair.
- Master the clean part; it sets the foundation for neat braids.
- Consistent tension is vital for secure and comfortable braids.
- Always add the same amount of hair with each pass to ensure uniformity.
- Practice makes perfect; don’t get discouraged by initial attempts.
- Use your tools effectively, especially the rat-tail comb for precise sectioning.
Frequently Asked Questions
How do I make my parts really straight?
Achieving straight parts requires patience and a good rat-tail comb. Use the tail of the comb to draw a line, applying gentle pressure against the scalp. Look in a mirror, or have someone help you with the back. You can also apply a little edge control along the part to define it further.
What if my fingers get tired?
Braiding can be a workout for your hands, especially when you’re learning. Take frequent short breaks to stretch your fingers and shake out your hands. This prevents cramping and helps you maintain consistent tension throughout the process. Don’t push through discomfort.
Can I braid to the scalp on short hair?
Yes, you can braid to the scalp on short hair, but it requires more precision and often smaller sections. Use a strong styling gel or edge control to help grip the shorter strands and keep them integrated into the braid. Start with very small sections to ensure all hair is caught.
How do I make the braids last longer?
To make your braids last, ensure they are tight but not painful, and use a good quality styling product or gel during braiding. Sleep with a satin scarf or bonnet to protect them from frizz and friction. Avoid excessive manipulation or washing them too frequently.
Our Top Recommended Finds
- Rat-Tail Comb: Essential for precise parting and sectioning, allowing for neat, clean lines.
- Hair Clips (Sectioning Clips): Keeps hair neatly out of the way, preventing tangles and allowing you to focus on one section at a time.
- Edge Control or Styling Gel: Perfect for smoothing flyaways, defining parts, and ensuring a sleek, polished finish.
Your Braiding Journey Starts Now
Learning to braid to the scalp is a rewarding skill that opens up a world of versatile hairstyles. Don’t be afraid to experiment with different patterns and sizes as you gain confidence. Each braid you create is a step forward in mastering this beautiful art.
Consider trying different braid styles once you feel comfortable with the basic technique, like French braids, Dutch braids, or even combining them. Grab your comb, prepare your hair, and start practicing today. The more you braid, the more intuitive and effortless it becomes.