💅 How To Take Off Gel X Nails At Home
I remember the first time I tried to remove my own Gel X set without any instructions.
I ended up prying the tips off with a credit card, leaving my natural nails thin, peeling, and sensitive for months.
After years of professional practice and DIY experimentation, I have perfected a removal routine that preserves your nail health while getting the job done efficiently.
Quick Overview
Removing Gel X extensions is a test of patience rather than a test of strength.
This process focuses on dissolving the soft gel structure without traumatizing the keratin layers of your natural nail underneath.
- Time needed: 45 to 60 minutes
- Difficulty: Beginner
- What you’ll need: 100/180 grit nail file, 100% pure acetone, cotton balls, aluminum foil or soak clips, cuticle oil, and a wooden or metal cuticle pusher.
Step-by-Step Instructions
Step 1: Set Up a Safe Workspace
Prepare your area by laying down a towel or a lint-free wipe that you do not mind ruining.
Acetone is a powerful solvent that can easily melt plastic surfaces, damage wood finishes, or discolor fabric.
Make sure you are working in a well-ventilated room because the fumes from pure acetone can be quite strong over a thirty-minute period.
Pro Tip: Place a heavy glass or ceramic plate under your workspace to act as a barrier against any accidental acetone spills.
Step 2: Shorten the Extensions
Clip away the excess length of your Gel X extensions using a sturdy pair of nail clippers.
The less material the acetone has to dissolve, the faster your removal process will go.
Be careful not to clip too close to your natural nail bed, as the pressure from the clippers can cause the gel to shatter or lift painfully.
Step 3: Break the Seal of the Top Coat
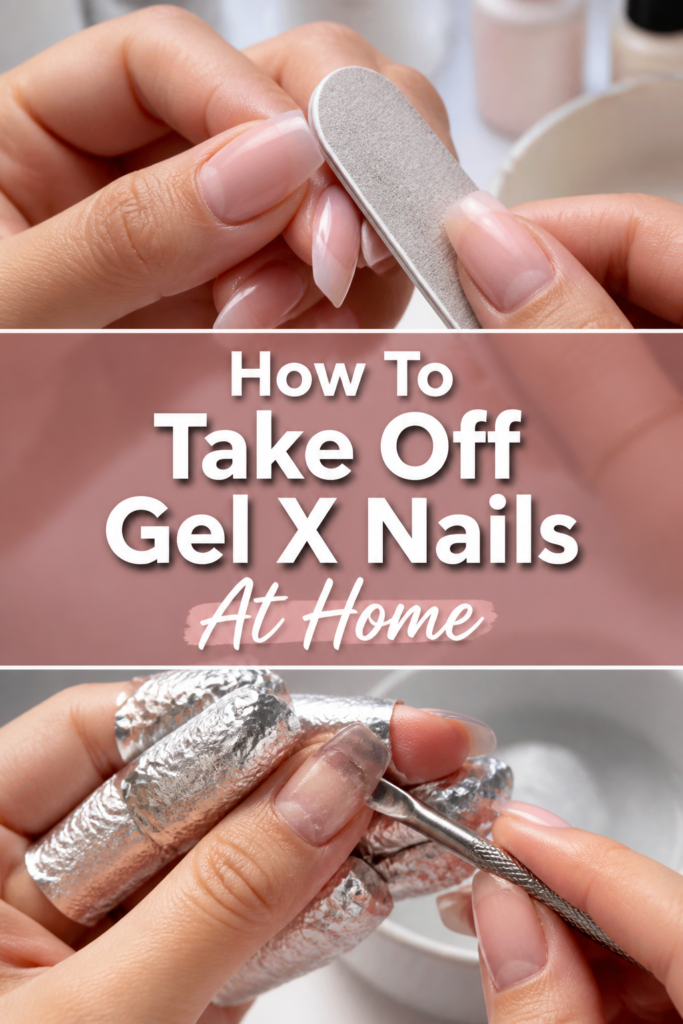
File the entire surface of each nail using the coarse side of a 100/180 grit file.
Gel X extensions are sealed with a non-porous top coat that is specifically designed to resist chemicals and daily wear.
You must remove this shiny layer completely to allow the acetone to penetrate the soft gel layers underneath.
Continue filing until the nails look dull and dusty, but stop before you reach the natural nail plate.
Step 4: Protect Your Surrounding Skin
Apply a thick layer of cuticle oil or petroleum jelly to the skin surrounding your nails and your fingertips.
Acetone is incredibly dehydrating and can cause the skin to become white, cracked, and irritated.
By creating a lipid barrier, you prevent the solvent from stripping all the natural oils from your skin during the soaking process.
Avoid getting any oil on the nail surface itself, as this can create a barrier that prevents the acetone from working on the gel.
Step 5: Saturate and Wrap the Nails
Soak a small piece of cotton ball in 100% pure acetone until it is dripping wet.
Place the cotton directly onto the filed nail surface and wrap it tightly with a square of aluminum foil.
The foil serves two purposes: it holds the cotton in place and traps your body heat, which helps the acetone work faster.
Repeat this for all ten fingers, ensuring the foil is snug enough that no air can get inside to evaporate the liquid.
Pro Tip: If you find foil difficult to manage alone, use plastic nail soak clips to clamp the cotton balls onto your fingertips.
Step 6: Wait with Patience
Set a timer for at least 15 to 20 minutes and resist the urge to peek at the progress.
Every time you open the foil to check, the acetone evaporates and the gel begins to re-harden.
Use this time to relax, watch a show, or listen to a podcast, as your hands will be mostly out of commission.
Step 7: Gently Scrape the Softened Gel
Remove one foil wrap at a time to check if the gel has “fluffed” up or looks like crumbled cake.
Use a wooden orange stick or a metal cuticle pusher to gently scrape the softened material away from the cuticle toward the tip.
Stop immediately if you encounter resistance; never force or pry the gel off if it is still firmly attached.
If the gel is still hard, re-wrap the nail with a fresh, wet cotton ball for another five to ten minutes.
Step 8: Buff Away Residual Adhesive
Cleanse the remaining bits of gel or adhesive with a soft foam buffer once the bulk of the extension is gone.
Use a very light touch to avoid thinning out your natural nail plate during this stage.
The goal is to leave the nail smooth and free of any leftover “Extend Gel” residue.
Step 9: Rehydrate and Recover
Wash your hands thoroughly with warm water and soap to remove all traces of acetone and dust.
Apply a generous amount of high-quality cuticle oil to the nails and massage it into the nail beds.
Finish with a thick hand cream to restore the moisture balance to your skin and cuticles.
Pro Tip: Apply a nail strengthener or a clear coat of polish if your nails feel slightly flexible or soft after removal.
Common Mistakes to Avoid
Prying and Peeling the Tips
The most damaging thing you can do is use a tool to lift the edge of the Gel X tip and rip it off.
This action pulls away the top layers of your natural nail, leading to white spots, thinning, and eventual breakage.
If the gel isn’t melting, it simply needs more time or more filing on the top layer.
Using Low-Quality Acetone
Generic nail polish remover often contains water, perfumes, and oils that dilute the active ingredient.
These formulas are not strong enough to break down the chemical bonds of a Gel X extension.
Always check the label for “100% Pure Acetone” to ensure the removal process is as quick as possible.
Skipping the Filing Step
Many people believe that soaking longer can make up for not filing down the bulk of the nail.
However, the top coat is specifically formulated to be solvent-resistant.
Without filing, you could soak for an hour and still find the extension fully intact.
Working in a Cold Environment
Chemical reactions, including the breakdown of gel by acetone, slow down significantly in cold temperatures.
If your hands are cold, the acetone will take much longer to work through the layers of the extension.
Try wrapping your foiled hands in a warm towel to speed up the process and improve the efficiency of the soak.
Troubleshooting
The Gel is Sticky and Won’t Come Off
This usually happens when the acetone has evaporated before it could fully dissolve the gel.
The gel becomes a gummy, sticky mess that smears across the nail instead of flaking off.
Apply a fresh, fully saturated cotton ball and wrap it tightly again for another ten minutes to re-liquefy the product.
My Skin is Burning or Stinging
Acetone is an irritant, and if you have any small cuts or hangnails, it will sting intensely.
If you feel a burning sensation, remove the wrap immediately and wash your hands with cool water.
Apply a barrier of petroleum jelly over the sensitive area before attempting to soak that finger again.
The Natural Nail Looks White and Chalky
This is a sign of extreme dehydration caused by the acetone bath.
It does not necessarily mean your nails are permanently damaged, but they are currently very brittle.
Submerge your fingertips in warm olive oil or jojoba oil for five minutes to deeply nourish the keratin cells.
Key Takeaways
- Filing is mandatory to break the top coat seal and allow the acetone to work.
- Patience prevents damage; never scrape harder than you would use to push back a cuticle.
- Heat helps the process, so keep your hands warm while they are wrapped in foil.
- Pure acetone is essential because standard polish removers are too weak for Gel X.
- Hydration is the final step to ensure your natural nails stay strong and flexible after the chemical exposure.
Frequently Asked Questions
Can I remove Gel X with just hot water and oil?
No, hot water and oil will not chemically break down the structure of Gel X extensions.
While this method might help lift nails that are already falling off, it usually results in the natural nail being peeled away.
Acetone is the only safe solvent that dissolves the gel without requiring mechanical force.
How long should I wait before putting on a new set?
Technically, you can apply a new set immediately if your natural nails are in healthy condition.
However, giving your nails 24 hours to rehydrate with cuticle oil is highly recommended.
This allows the nail plate to regain its natural moisture balance, which can actually help the next set adhere better.
Is it better to use a soaking bowl or foil wraps?
Foil wraps are generally better because they focus the acetone on the nail and minimize skin contact.
Soaking bowls require you to submerge your entire fingertip, which can be much harsher on your skin.
Foil also traps heat more effectively, which makes the removal process faster than an open bowl.
Why do my nails feel “bendy” right after removal?
Nails are made of keratin, which becomes temporarily soft when saturated with a liquid like acetone.
Once the residual solvent evaporates and you apply oil, the nails will firm up within an hour or two.
Avoid doing any heavy manual labor or prying things open during this brief window of vulnerability.
Our Top Recommended Finds
- Professional 100/180 Grit Files: These provide the necessary grit to cut through the tough top coat without vibrating the nail uncomfortably.
- Pure Jojoba Cuticle Oil: Jojoba oil has a molecular structure similar to human sebum, making it the most effective oil for penetrating the nail plate.
- Stainless Steel Cuticle Pusher: A high-quality pusher allows for precise scraping of softened gel without the risk of splintering like wooden sticks.
Mastering Your Natural Nail Health
Taking off your Gel X set properly is just as important as the application process itself.
Now that you know how to safely clear your canvas, you can focus on strengthening your natural nails for your next look.
Consider looking into nail growth serums or exploring the world of “naked manicures” to give your hands a stylish break.
Go grab your supplies and start your removal today to ensure your nails stay as healthy as they are beautiful.