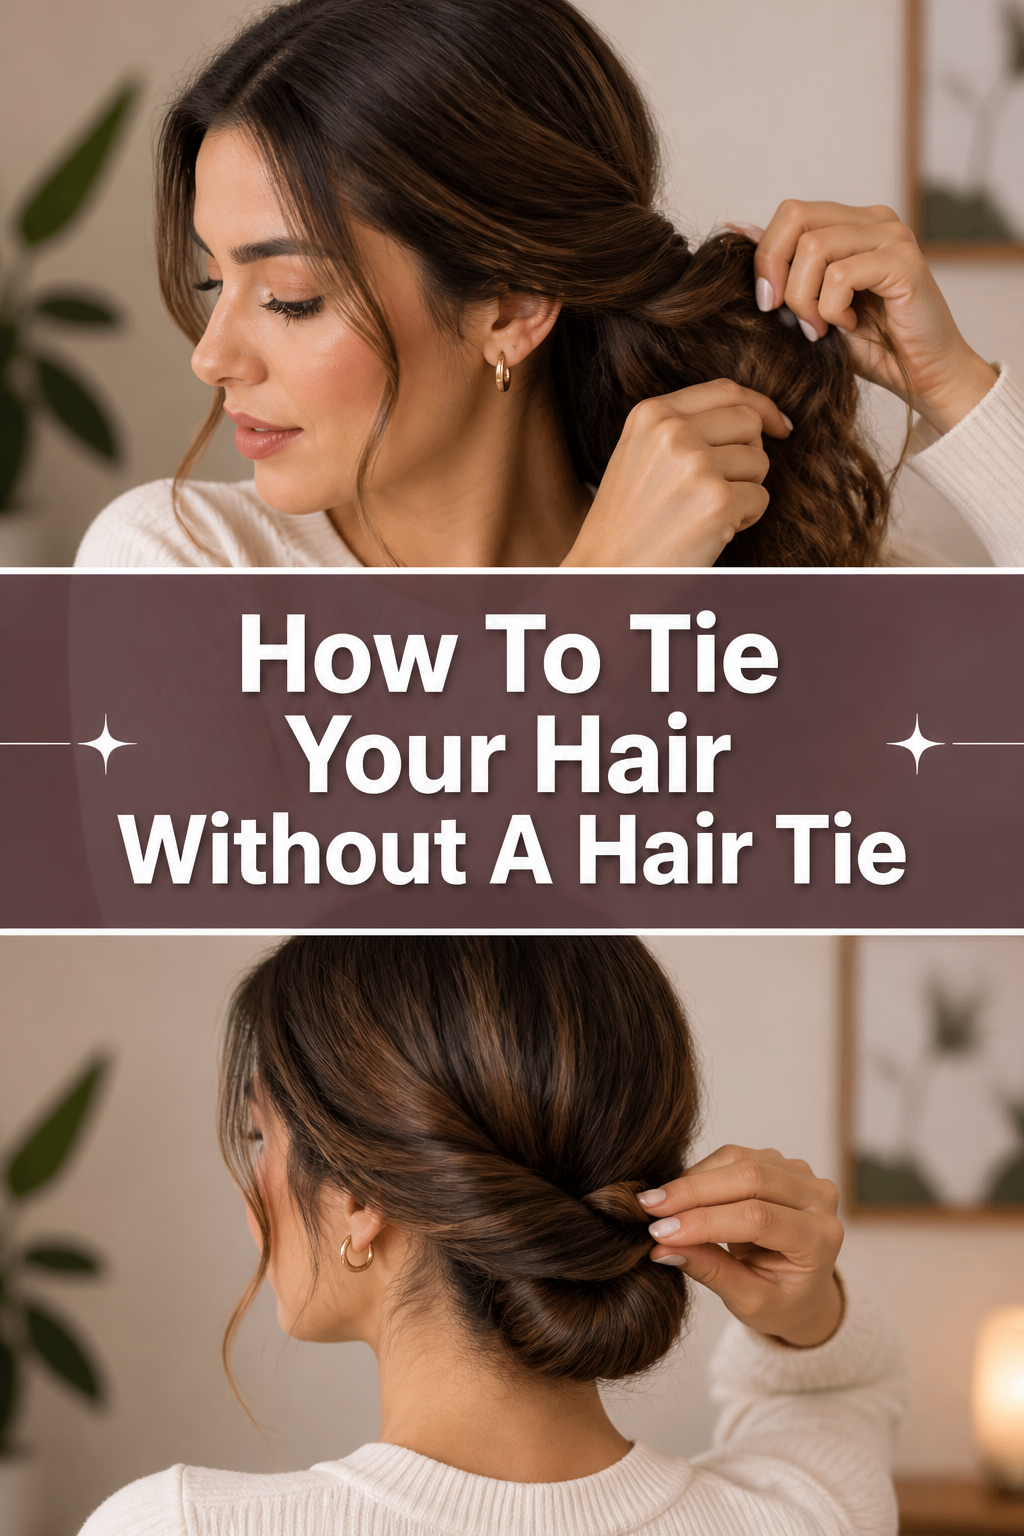
👱♀️ How To Tie Your Hair Without A Hair Tie
We have all been in that frustrating situation where a hair tie snaps at the worst possible moment.
Whether you are at the gym or finishing a long shift, your hair suddenly becomes a distraction you cannot manage.
I have spent years experimenting with various updos during outdoor adventures where I forgot my styling kit, and I can tell you that your hair is its own best tool.

Quick Overview
This guide will teach you how to secure your hair using nothing but its own length and some clever tension techniques.
- Time needed: 30 to 60 seconds
- Difficulty: Intermediate
- What you’ll need: Medium to long hair and your own two hands
Step-by-Step Instructions
Step 1: Prepare Your Hair Texture
Brush through your hair with your fingers to remove any major tangles that might catch while you are twisting.
If your hair is freshly washed and very slippery, you might find this process a bit more challenging at first.
Apply a small amount of dry shampoo or even a bit of water to the mid-lengths to give the strands more “grip.”
Pro Tip: Second-day hair usually stays in a knot much better than clean hair because the natural oils provide built-in friction.
Step 2: Gather Into a High Ponytail
Collect all of your hair at the crown of your head or wherever you want the bun to sit.
Use your dominant hand to hold the base of the ponytail firmly against your scalp.
Smooth the sides with your free hand to ensure there are no large bumps that might loosen the structure later.
Step 3: Create a Strong Initial Twist
Rotate the entire length of your hair in a clockwise direction until it begins to coil around itself.
You want the twist to be firm but not so tight that it causes pain or pulls on your scalp.
Keep twisting until the hair naturally wants to start wrapping around the base where your hand is holding it.
Step 4: Form the Primary Loop
Wrap the twisted length of hair once around the base of your ponytail to create a small “donut” shape.
Leave a small gap between the wrap and your scalp so you can fit your fingers through in the next step.
Hold the end of the ponytail with your non-dominant hand while your dominant hand maintains the shape of the loop.
Pro Tip: The tighter this initial wrap is, the more secure the final knot will be against gravity.
Step 5: Reach Through the Center
Insert your thumb and index finger through the middle of the loop you just created from the underside.
You are essentially creating a “hook” with your fingers to grab the remaining length of your hair.
Grasp the tail end of your hair firmly between your two fingers.
Step 6: Pull the Tail Through
Pull a portion of the tail back through the loop, but do not pull it all the way through.
This creates a second loop that acts as a locking mechanism for the rest of the hair.
Adjust the tension by pulling on the outer edges of this new loop to cinch it down against the base.
Step 7: Tuck the Remaining Ends
Take any leftover hair that is sticking out and tuck it underneath the main body of the bun.
Slide the ends deep into the center of the knot where the friction is highest.
Press the entire bun against your head to flatten it and increase the contact area with your scalp.
Step 8: Set the Tension
Shake your head gently from side to side to see if the knot feels loose or wobbly.
If it feels unstable, you can pull the sides of the bun outward to tighten the internal “knot” you just tied.
Finish by smoothing down any flyaways with a tiny bit of moisture or hairspray if you have it available.
Common Mistakes to Avoid
Using Too Much Hair in the Loop
If you try to pull the entire tail through the loop in Step 6, the whole structure will simply fall apart.
You are trying to create a knot, not a ponytail, so only a small section of the hair should be used to lock the rest in place.
Think of it like tying a shoelace where you leave a loop instead of pulling the string all the way through.
Twisting in the Wrong Direction
While you can twist in either direction, consistency is the most important factor for success.
If you wrap the hair one way and then try to loop it the other way, you will untwist the strands and lose all tension.
Make sure your wrap follows the same circular path as your initial twist to keep the fibers tightly bound.
Attempting This on Very Short Layers
Hair that has many short layers or is shorter than shoulder length will struggle to stay in a self-tied knot.
The shorter pieces will poke out of the twist and cause the knot to unravel almost immediately.
If you have layers, you must ensure the “locking” part of the knot consists of your longest strands.
Troubleshooting
The Knot Keeps Slipping Down
This usually happens because the hair is too smooth or the twist was not tight enough at the base.
Try starting with a tighter initial twist and making the loop closer to your scalp.
You can also try “roughing up” the hair by backcombing it slightly with your fingers before you start the process.
The Bun Feels Too Heavy and Painful
If the bun is pulling on one specific area of your scalp, you have likely caught a small section of hair too tightly.
Undo the knot and try to distribute the weight more evenly by gathering the hair with a wider grip.
Positioning the bun lower on the back of your head can also help reduce the strain on your hair follicles.
Key Takeaways
- Texture matters: Dirty or textured hair provides the friction needed to keep the knot from sliding.
- Tension is key: A firm twist at the base prevents the bun from sagging throughout the day.
- The loop lock: Only pull a portion of the hair through the loop to create a secure anchor.
- Directional consistency: Always wrap and twist in the same direction to maintain structural integrity.
- Practice makes perfect: It might take three or four tries to feel the “sweet spot” where the hair locks into place.
Frequently Asked Questions
Can I do this with wet hair?
You can, but it is generally not recommended because wet hair is much heavier and more prone to breakage.
The weight of the water will likely cause the knot to sag and pull painfully on your scalp as it dries.
If you must tie wet hair this way, keep the knot very loose and move it frequently to avoid damaging the strands.
Does this method cause hair breakage?
If you do it correctly, this method is actually gentler than using a rubber band which can snag and pull hair out.
The main risk of breakage comes from pulling the knot too tight or using it as a permanent styling solution.
Use this as a temporary fix and try to avoid keeping your hair in this tight knot for more than a few hours at a time.
How long should my hair be to use this technique?
Your hair typically needs to be at least past your shoulders to have enough length for the “loop and lock” method.
If your hair is shorter, you might be able to do a half-up version using only the top section of your hair.
The longer your hair is, the more times you can wrap it, which significantly increases the security of the bun.
Our Top Recommended Finds
- Dry Shampoo: This is essential for adding the “grit” and volume needed to keep a self-tied bun from slipping out of fine hair.
- Wooden Hair Sticks: While the goal is to use no tie, a simple stick can act as a permanent version of your finger in the loop, providing all-day hold.
- Sea Salt Spray: This helps mimic the texture of “beach hair,” which is the ideal state for creating knots that stay in place without accessories.
Mastering Your New Hair Skill
Learning to manage your hair without tools is a small but empowering skill that saves you from many daily annoyances.
Once you get the hang of the tension and the loop, you will find yourself using this method even when you have a hair tie nearby.
Try practicing this in front of a mirror a few times today to build the muscle memory in your hands.
You can also explore different placements, like a low nape knot or a side-swept version, to see which one works best for your specific hair type.
Take a moment to feel the weight and balance of the knot so you can adjust it on the go without needing to look.