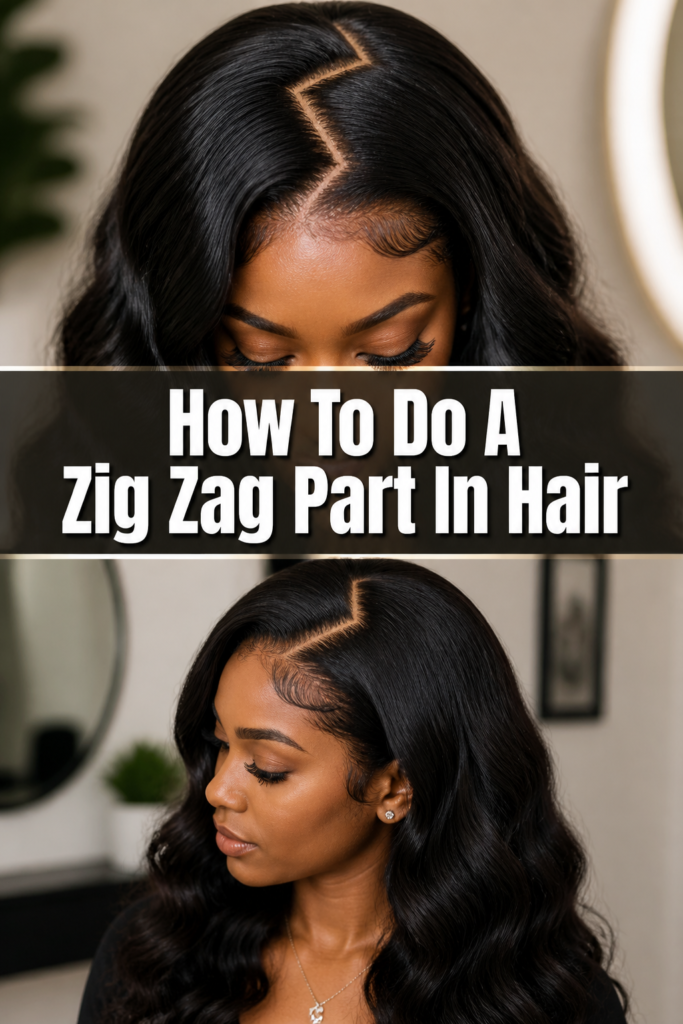
How To Do A Zig Zag Part In Hair
Creating a zig zag part in your hair is a fun way to add flair to any hairstyle.
It brings a playful, edgy touch that can elevate a simple look.
Having done this many times for events and everyday styles, I can show you how to achieve this eye-catching detail with ease.
Quick Overview
This guide will walk you through the simple steps to create a perfect zig zag part, transforming your usual hair routine. You will learn the tools, techniques, and tips to make your part stand out.
- Time needed: 10-20 minutes (depending on hair length/texture)
- Difficulty: Beginner to Intermediate
- What you’ll need: Rat-tail comb, styling product (optional), mirror
Step-by-Step Instructions
Step 1: Prepare Your Hair
Begin with clean, dry, or slightly damp hair. Ensure your hair is thoroughly brushed and free of tangles. This makes parting much smoother.
Any knots can snag your comb and create an uneven line.
Pro Tip: For best results, use a wide-tooth comb first to detangle, then switch to a finer brush for smoothness.
Step 2: Gather Your Tools
The most crucial tool for a zig zag part is a rat-tail comb. Its thin, pointed end is perfect for precision. You might also want a styling product like a light hold gel or spray to keep your part crisp.
Have a good mirror ready, ideally one that allows you to see the back of your head if you’re working on yourself.
Step 3: Determine Your Starting Point
Decide where you want your zig zag part to begin. This is usually at the hairline above your forehead, either in the center or slightly to one side. A central starting point often creates a more symmetrical look.
A side starting point can add a bit more asymmetry and drama.
Step 4: Create the First Point of the Zig Zag
Place the pointed end of your rat-tail comb at your chosen starting point on your scalp. Draw a short, straight line backward, about half an inch to an inch long. This forms the first “leg” of your zig zag.
Make sure this initial line is clear and precise.
Step 5: Execute the First Zig
From the end of your first line, pivot your comb. Now, draw another short line at an angle, moving in the opposite direction. This creates the first “zig” or corner of your part.
Think of it like drawing a very shallow letter ‘V’ or ‘Z’ on your scalp.
Step 6: Continue the Zig Zag Pattern
Keep repeating the angled lines, alternating directions with each stroke. Each line should be roughly the same length as the previous one to maintain consistency. Work slowly and deliberately to ensure each segment is clean.
The key is to keep your comb shallow, only parting the top layer of hair.
Pro Tip: If you make a mistake, gently brush the hair back together and start that section again. Don’t press too hard with the comb; a light touch gives more control.
Step 7: Extend the Part to the Crown
Continue the zig zag pattern all the way back to the crown of your head. For a full zig zag effect, you might even extend it slightly past the crown, depending on your desired style. Ensure the pattern remains consistent throughout.
You may need to use a second mirror or feel the pattern with your fingers for accuracy in the back.
Step 8: Define and Refine the Part
Once you’ve created the full zig zag line, use the comb to gently separate the hair along the part. This makes the zig zag more prominent. Use your fingers to smooth down any flyaways on either side of the part.
A little styling product can help hold the part firmly in place.
Step 9: Style Your Hair
With your zig zag part perfectly defined, you can now style the rest of your hair as desired. This part looks fantastic with ponytails, braids, buns, or even just loose hair. The zig zag adds an unexpected element.
Experiment with different styles to see how the part enhances them.
Common Mistakes to Avoid
Rushing the Process
Trying to create a zig zag part too quickly often leads to uneven lines and a messy appearance. The zig zag requires precision and a steady hand. Take your time with each segment of the part. Slow, deliberate strokes will yield a much cleaner and more defined result.
Rushing can also cause you to pull hair unnecessarily, leading to discomfort.
Using the Wrong Comb
Attempting a zig zag part with a wide-tooth comb or a regular brush is a common error. These tools lack the fine point needed for sharp, clean lines. A rat-tail comb is specifically designed for precise parting.
Its thin handle allows you to section hair accurately, which is essential for this look.
Inconsistent Segment Lengths
If your zig zag segments are all different lengths, the part will look haphazard and uneven. Strive for consistency in the length of each “zig” and “zag.” This creates a harmonious and polished pattern.
Evenly sized segments contribute significantly to the aesthetic appeal of the zig zag.
Pressing Too Hard
Applying too much pressure with your comb can irritate your scalp and make it harder to create a smooth, clean line. A light touch is all that’s needed to separate the hair. This also gives you better control over the comb’s movement.
Gentle pressure allows the comb to glide through the hair more easily.
Troubleshooting
The Part Looks Wobbly or Uneven
If your zig zag part appears wobbly, it likely means your comb strokes were not straight enough or your angles were inconsistent. To fix this, gently brush the hair back together in the problematic section. Re-comb the area and try again, focusing on making each line segment short and straight before changing direction.
Practice makes perfect; don’t be afraid to restart a section.
Hair Doesn’t Stay Separated
If your hair keeps falling back into the part, it might be too clean or fine to hold the style without help. Try applying a light hold hairspray or styling gel along the part line after you’ve created it. This will provide the necessary grip to keep the hair separated and defined.
You can also try doing the part on slightly damp hair, then letting it air dry or blow dry with the part in place.
Difficulty Reaching the Back of Your Head
Creating a zig zag part at the back of your head can be challenging when working on yourself. Use a hand mirror in conjunction with your main mirror to get a better view. Alternatively, use your fingers to feel the pattern you’re creating.
You can also ask a friend for assistance if you’re struggling with the back sections.
Key Takeaways
- Always start with detangled hair for a smoother process.
- A rat-tail comb is indispensable for precise zig zag parting.
- Consistency in segment length is key to a polished look.
- Work slowly and use a light touch to ensure clean lines and avoid scalp irritation.
- Don’t hesitate to use styling products for better hold and definition.
- Practice improves your technique and speed over time.
Frequently Asked Questions
Is a zig zag part suitable for all hair types?
Yes, a zig zag part can be done on most hair types, from fine to thick, and straight to curly. The key is to ensure your hair is well-detangled and smoothed before you begin. Thicker or curlier hair might require a bit more patience and a stronger hold product to keep the part defined.
Can I do a zig zag part on short hair?
Absolutely! A zig zag part can look incredibly stylish on short hair, adding an unexpected detail. The segments of the zig zag might be shorter and more numerous to fit the length of the hair, but the technique remains the same. It adds a chic, modern touch to bobs and pixie cuts.
How do I make my zig zag part last all day?
To ensure your zig zag part stays put, apply a light mist of hairspray or a dab of styling gel along the part line after you’ve completed it. You can also use small, flat clips temporarily to hold sections in place while the product sets. Avoid touching your part throughout the day, as this can disrupt the lines.
What’s the best way to practice getting a perfect zig zag?
The best way to practice is simply to do it! Start by trying it on days when you’re not going anywhere important. Focus on creating consistent segment lengths and sharp angles. You can even practice on a wig or a doll’s head if you prefer. Over time, your hand will become steadier, and your parts will become cleaner.
Our Top Recommended Finds
- Rat-Tail Comb: An essential tool with a fine-tooth comb and a pointed end for precise sectioning. Look for one with a comfortable grip.
- Light Hold Hairspray: Perfect for setting your zig zag part without making your hair stiff or sticky. It helps to tame flyaways and keep the part defined.
- Edge Control Gel: If you have very fine or unruly hair around your hairline, a small amount of edge control gel can help smooth and define the initial points of your zig zag.
Embrace Your Inner Stylist
You now have all the information you need to create a stunning zig zag part. This unique detail can truly transform your look, adding personality and flair to any hairstyle. It’s a simple yet effective way to express your creativity.
Don’t be afraid to experiment with different angles and lengths of your zig zags. Try a subtle wave or a sharp, dramatic pattern. Grab your comb and start practicing today. Your hair is your canvas; make it a masterpiece!