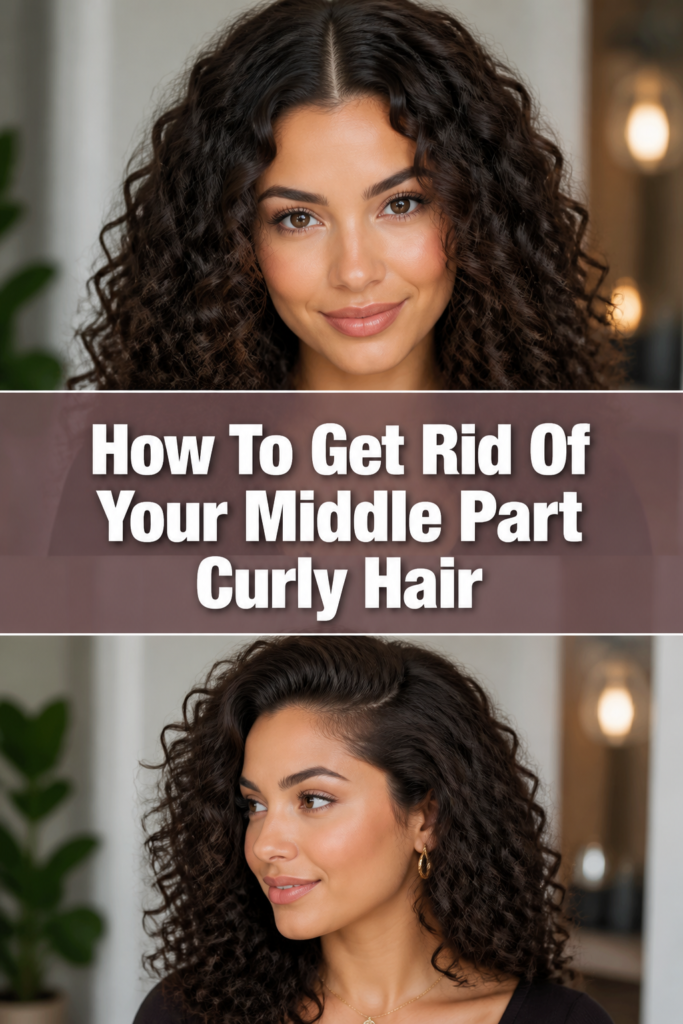
✨ How To Get Rid Of Your Middle Part Curly Hair
For years, my curls insisted on settling into the same old middle part, despite my best efforts to coax them elsewhere. It felt like a stubborn habit, a default setting I couldn’t break. This guide shares the exact methods I used to finally liberate my hair from that ingrained parting, embracing new styles with confidence.
You can absolutely change your hair’s mind. With a bit of technique and patience, your curls will learn to love a new look. Trust me, it’s a game-changer for your entire aesthetic.
Quick Overview
This guide will walk you through the process of retraining your curly hair to abandon its middle part, creating fresh, versatile styles. You’ll learn how to use products and techniques to encourage your curls to fall differently, offering a whole new world of looks.
- Time needed: 30-60 minutes per styling session (initially), ongoing daily maintenance for 2-4 weeks.
- Difficulty: Intermediate
- What you’ll need: Spray bottle, styling cream/gel, root clips, diffuser, microfiber towel.
Step-by-Step Instructions
Step 1: Fully Reset Your Hair
You need a clean slate to begin retraining your hair. A fresh wash day is the perfect starting point.
Wash your hair thoroughly with your favorite shampoo and conditioner. Ensure all product buildup is removed.
This step is crucial because it allows your hair to be at its most pliable. It makes it easier to manipulate into a new pattern.
Pro Tip: Use a clarifying shampoo if you suspect significant product buildup. This ensures your hair is truly free of old residue that might be holding the middle part in place.
Step 2: Gently Detangle and Prep
After washing, your curls are ready for gentle handling. Detangling carefully prevents breakage and prepares your hair for styling.
Apply a leave-in conditioner or detangler to your soaking wet hair. Use your fingers or a wide-tooth comb to work through any knots.
Ensure your hair is still quite wet. This helps with product distribution and defining your curls.
Step 3: Choose Your New Part
This is where you decide on your hair’s new direction. Experiment to find what feels natural and flattering.
Decide where you want your new part to be. This could be a deep side part, a subtle off-center part, or even no distinct part at all.
Use the tip of a rat-tail comb or your finger to gently create this new line. Ensure it extends back just a few inches from your hairline.
Step 4: Apply Root-Focused Products
Products are essential for holding your new part in place while your hair learns its new direction. Focus application at the roots.
Work a lightweight styling cream or gel into the roots of your hair, specifically along your chosen new part line. Distribute it evenly.
This product acts as a gentle adhesive, encouraging the hair to stay in its new position. Avoid heavy products that might weigh down your curls.
Step 5: Secure with Root Clips
Root clips are your best friend for training your hair. They provide the necessary lift and hold at the scalp.
Place small duckbill clips or root clips along the new part line, lifting the hair slightly at the roots. Position them so they hold the hair in the desired direction.
Add a few more clips around the crown if you want extra volume or to further discourage the middle part from forming. The goal is to create a slight lift and direct the hair away from its old habit.
Step 6: Diffuse or Air Dry with Care
How you dry your hair plays a significant role in setting your new style. Heat can help lock in the change.
Diffuse your hair on a low-to-medium heat setting, focusing on the roots first. Keep the clips in place until your roots are mostly dry.
If air-drying, try to avoid touching your hair too much until it’s about 80% dry. This minimizes frizz and allows the part to set.
Step 7: Remove Clips and Fluff
Once your hair is dry, it’s time to reveal your new style. Gentle removal and a bit of fluffing will enhance the look.
Carefully remove the root clips once your hair is completely dry. Avoid pulling or tugging.
Gently shake your head or use your fingers to fluff your roots. This adds volume and helps the new part look natural.
Step 8: Set and Maintain
To ensure your new part lasts, a final touch of hold is beneficial. Consistency is key for long-term change.
Spritz a light-hold hairspray over your roots and part line. This provides extra staying power throughout the day.
For the next few weeks, consistently style your hair with the new part. Your hair will gradually adapt and remember its new pattern.
Common Mistakes to Avoid
Not Fully Wetting Your Hair
Many people try to change their part on damp or dry hair, which is a common pitfall. Curly hair needs to be fully saturated to be easily manipulated. Trying to force a new part on hair that isn’t completely wet can lead to frizz, breakage, and the hair springing back to its old pattern. Always start with freshly washed, soaking wet hair for the best results.
Using Too Much Heavy Product at the Roots
While products are essential for hold, applying heavy creams or butter directly at the roots can weigh down your hair. This leads to a flat, greasy look and can make your curls lose their bounce. Opt for lightweight gels, mousses, or styling creams designed for root application. A little goes a long way, especially when focused on the part line.
Not Drying Properly
Allowing your hair to air dry completely without clips or diffusing can result in your curls falling back into their old middle part. The drying process is critical for setting the new pattern. Ensure your roots are thoroughly dry in the desired direction, ideally with the help of a diffuser and root clips, before disturbing the style. This “locks in” the new part.
Giving Up Too Soon
Changing a deeply ingrained hair part takes time and consistency. Many people get discouraged if their hair doesn’t immediately comply after one or two attempts. Your hair needs to be retrained, which can take several weeks of consistent effort. Be patient, stick to your routine, and trust that your curls will eventually adapt to their new normal.
Troubleshooting
Hair Still Falls Back to the Middle Part
This is a very common issue, especially in the initial stages. It means your hair’s memory is strong, and you need to reinforce the new part more aggressively.
Ensure your hair is soaking wet when you create the new part and apply products. Use more root clips than you think you need, placing them strategically to lift and direct the hair away from the middle. Diffuse until your roots are 100% dry before removing the clips. Consistency over several wash days will eventually win.
New Part Looks Flat or Lacks Volume
If your new part feels a bit lifeless, it’s likely due to product choice or drying technique. Heavy products can weigh down curls, especially at the roots.
Switch to a lighter-weight mousse or volumizing spray specifically for root application. When diffusing, use the cool shot setting to lock in volume, and gently lift your hair at the roots with your fingers after removing clips. Don’t be afraid to fluff your hair upside down for extra oomph.
Frizz Around the New Part
Frizz can happen if you’re over-manipulating your hair or if it’s not fully hydrated. Dryness and friction are frizz’s best friends.
Make sure your hair is thoroughly detangled and saturated with water and leave-in conditioner before applying styling products. Avoid touching your hair excessively while it’s drying. If diffusing, use a low airflow setting. A light serum or anti-frizz spray can also be applied gently once your hair is completely dry.
Key Takeaways
- Start with a Clean Slate: Always begin on freshly washed, soaking wet hair for maximum pliability.
- Target Roots with Product: Use lightweight styling products directly at the roots along your new part line for hold.
- Utilize Root Clips: These are essential tools for lifting hair and training it away from its old pattern during drying.
- Dry Strategically: Diffuse or air dry with clips in place until roots are completely dry to set the new part.
- Be Patient and Consistent: Retraining your hair takes time and repeated effort; don’t get discouraged after a few attempts.
- Embrace Experimentation: Don’t be afraid to try different part placements to find what suits your face shape and curl pattern best.
Frequently Asked Questions
How long does it take for hair to “retrain” to a new part?
The time it takes varies for everyone, but typically you can expect to see significant changes within 2 to 4 weeks of consistent effort. Some people with very stubborn hair might need a bit longer, up to 6 weeks. The key is never to let your hair dry in its old middle part during this period.
Can I still wear a middle part sometimes after retraining my hair?
Once your hair has successfully retrained, it will be much more versatile. You can certainly choose to wear a middle part occasionally. However, if you want to maintain the new part, make sure the majority of your styling efforts reinforce the new direction. Your hair will be less likely to default to the middle part.
What if my hair is very fine and falls flat easily?
Fine curly hair can still be retrained, but you’ll need to be extra mindful of product choice and drying techniques. Opt for very lightweight mousses or volume-boosting sprays at the roots. Focus on lifting the hair with root clips and diffusing upside down for maximum volume. Avoid heavy creams or oils near the scalp.
Does hair type (e.g., 3A vs. 4C) matter for this process?
The principles remain the same across all curly hair types: wet hair, product, training, and drying. However, the exact products and drying times might differ. Tighter curl patterns (like 4C) might hold a new part more easily due to their natural volume, while looser curls (like 3A) might require more product and clips for initial hold.
Our Top Recommended Finds
- Duckbill Clips / Root Clips: These small, flat clips are invaluable for securing hair at the roots and creating lift. They hold hair without leaving dents.
- Lightweight Volumizing Mousse: A good mousse provides hold and volume without weighing down curls. Look for formulas specifically designed for curly hair.
- Microfiber Hair Towel: Using a microfiber towel reduces friction and frizz, keeping your curls smooth and defined as you prep for styling.
Embrace Your New Perspective
Breaking free from a stubborn middle part is more than just a hairstyle change; it’s an opportunity to see yourself in a new light. Your curls are incredibly versatile, and with these steps, you’re now equipped to explore that potential. Don’t be afraid to play, experiment, and enjoy the journey of discovering new looks that make you feel amazing.
Take the first step today. Gather your tools, dedicate a wash day to this transformation, and watch as your curls respond. You’ll be surprised at the confidence a simple shift in your part can bring.