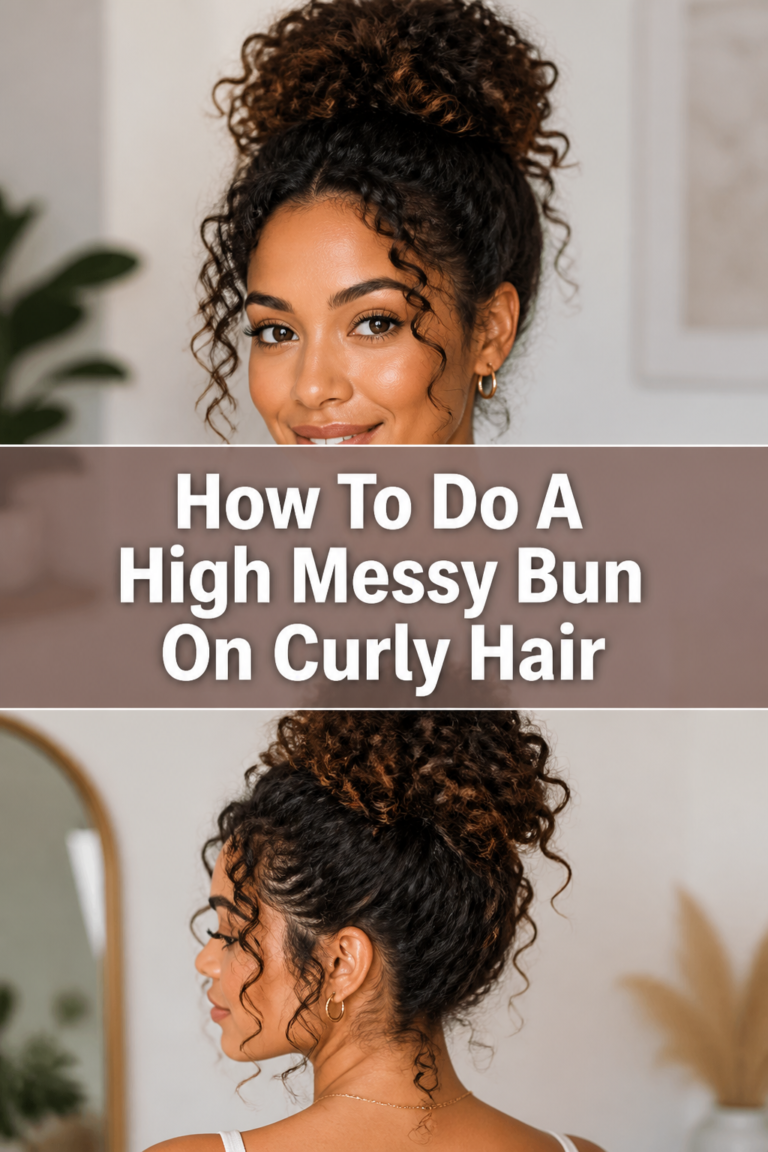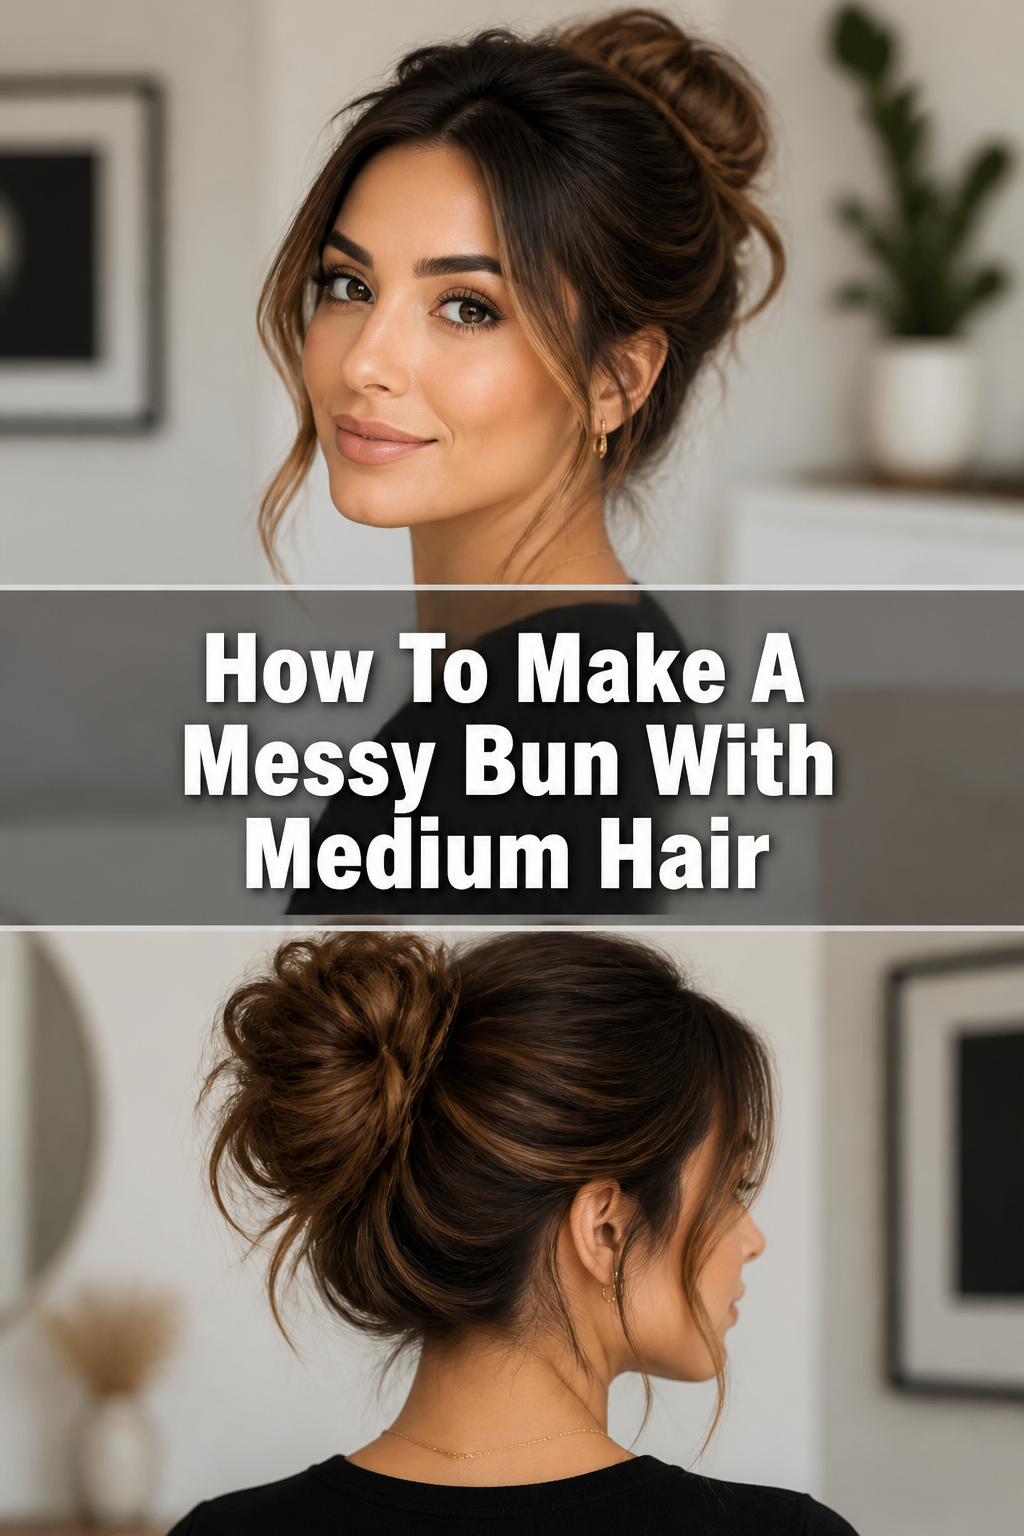
✨ How To Make A Messy Bun With Medium Hair
You want that perfectly undone, effortlessly chic look, right? The messy bun is a go-to style for busy days, relaxed weekends, or when you just want your hair up and out of the way. It’s a style I’ve personally perfected through countless attempts, from too-tight knots to overly elaborate updos. Trust me, I’ve learned the secrets to making it look natural and stylish, especially with medium-length hair.
This guide will walk you through each simple step, ensuring you achieve that ideal balance of casual and put-together. You’ll soon master this versatile hairstyle.

Quick Overview
Creating a fabulous messy bun is quicker and easier than you might think. You’ll achieve a stylish, practical updo that looks great on any occasion.
- Time needed: 5-10 minutes
- Difficulty: Beginner
- What you’ll need: Hair tie, bobby pins (optional), texturizing spray (optional), hairspray (optional)
Step-by-Step Instructions
Step 1: Prep Your Hair for Texture
Starting with the right base is crucial for a truly messy bun. Clean, super-slippery hair often struggles to hold its shape.
If your hair is freshly washed, consider letting it air dry for a bit or add some product. Day-old hair often works best, as it has a natural grip.
For added volume and hold, gently mist a texturizing spray or dry shampoo through your roots and mid-lengths. Lightly scrunch your hair with your hands to distribute the product and encourage some natural wave. This creates the foundation for that perfectly undone look.
Pro Tip: Avoid brushing your hair too smoothly. A little natural tangle and texture will actually help your messy bun stay put and look more authentic.
Step 2: Gather Your Hair Loosely
Decide on the placement of your bun first. Do you want it high on your crown, at the back of your head, or lower towards your nape? The height changes the whole vibe.
Gently gather your hair with your hands as if you’re making a ponytail. Don’t use a comb, and don’t pull it too tight. The looser and more relaxed your grip, the better the messy effect will be.
Allow some face-framing pieces to fall out naturally around your temples and ears. These stray strands are key to the “messy” aesthetic.
Step 3: Create the Initial Loop
Once your hair is gathered at your chosen height, take your hair tie in your dominant hand. Loop the tie around your hair once, as you would for a regular ponytail.
On the second loop, only pull your hair halfway through the elastic. This creates a small, loose loop of hair, with the ends still pointing downwards or outwards. This forms the base of your bun.
Don’t worry if it looks a bit odd at this stage; we’re just building the foundation. The key is to keep it loose.
Step 4: Twist and Wrap the Remaining Ends
Now, take the loose ends of your hair that are hanging from the loop. Gently twist them a few times. This provides a bit more structure without making the bun too neat.
Then, loosely wrap these twisted ends around the base of the half-pulled-through loop. You’re essentially creating a coil around the initial bun shape.
Don’t wrap too tightly. The goal is a soft, irregular shape, not a perfectly coiled knot.
Step 5: Secure the Bun with Your Hair Tie
Once you’ve wrapped the ends around the base, take your hair tie again. Carefully loop it over the entire bun you’ve created.
You might need to adjust the hair tie slightly to catch all the wrapped sections. You want it to feel secure but not painfully tight. This final loop of the hair tie locks the bun in place.
If your hair is particularly thick, you might need to loop the tie once more for extra security.
Step 6: Gently Pull and Loosen
This is where the “messy” part truly comes in. Using your fingers, gently tug at various sections of the bun. Pull small loops of hair outwards from the center of the bun.
Also, gently pull at the hair around your hairline and temples. The goal is to loosen everything up and create that soft, undone look.
Don’t be afraid to experiment. Pull a little more here, a little less there, until you like the shape and volume.
Pro Tip: Focus on creating soft wisps around your face. These pieces add to the natural, effortless charm of the messy bun.
Step 7: Add Volume and Shape
If your bun feels a bit flat, gently pull the bun itself away from your head. This lifts it slightly and adds volume. You can also carefully pull a few more strands from the inside of the bun to create more texture and dimension.
Use your fingers to sculpt the bun into your desired shape. Some prefer a wider, flatter bun, while others like a more rounded, voluminous one. Medium hair offers great flexibility here.
Make sure the overall shape feels balanced and natural for your head.
Step 8: Pin for Extra Security (Optional)
If you have any stubborn pieces that won’t stay, or if you want extra hold, grab a few bobby pins. Insert them discreetly into the base of the bun, pushing them towards your scalp.
Aim to catch both a piece of the bun and some hair from your scalp to anchor it properly. Use as few pins as possible to maintain the effortless look.
Bobby pins are your secret weapon for making the messy bun last all day. They provide hidden support.
Step 9: Lock in the Look
Once you’re happy with your messy bun, give it a light mist of hairspray. Hold the can about 10-12 inches away from your head to avoid making your hair stiff or crunchy.
A light hold hairspray is usually sufficient. This helps to tame any flyaways and ensures your messy bun stays put without losing its natural movement.
Step back and admire your perfectly imperfect creation!
Common Mistakes to Avoid
Making Your Ponytail Too Perfect
One of the biggest pitfalls is starting with a perfectly smooth, tight ponytail. This defeats the purpose of a messy bun. A too-neat base makes it difficult to achieve that relaxed, undone texture.
Instead, gather your hair very loosely with your fingers, allowing natural bumps and stray strands. The more relaxed your initial gather, the easier it is to create an authentically messy bun. Embrace the imperfections from the start.
Over-Twisting the Hair
While a slight twist can help give your bun some structure, over-twisting your entire ponytail before wrapping it will result in a very tight, uniform bun. This looks more like a formal updo than a casual messy bun.
Keep the twisting minimal. Focus on gently wrapping and looping the hair rather than tightly coiling it. The goal is to create soft, irregular folds of hair.
Ignoring Hair Texture
Trying to force a messy bun on super-clean, silky hair without any product often leads to frustration. The hair might slip out easily or look too flat. Texture is essential for hold and volume.
Always consider adding a texturizing spray, dry shampoo, or even just letting your hair be day-old. This creates grip and body, making your messy bun much more successful and long-lasting.
Using Too Many Bobby Pins
While bobby pins are helpful for security, using too many can make your bun look stiff and overdone. It can also make the bun feel heavy and uncomfortable. The goal is a light, effortless feel.
Start with just one or two pins to secure the most unruly sections. If the bun still feels loose, add one or two more strategically. Less is often more when it comes to messy bun pins.
Troubleshooting
Bun Falls Out Easily
If your messy bun collapses after a short time, it’s likely due to a lack of grip or insufficient securing. Your hair might be too clean or too slippery.
Try adding more texturizing spray or dry shampoo to your roots and mid-lengths before you start. Also, ensure your hair tie is snug enough to hold the initial loop and the wrapped hair. Don’t be afraid to use a few bobby pins to anchor the bun firmly to your scalp, especially at the base.
Bun Looks Flat/Lifeless
A flat messy bun lacks the desired volume and bounce. This often happens if your hair is too smooth or if you’re not pulling enough pieces out.
Before starting, scrunch your hair or add a volumizing product. When you’re finished securing the bun, gently tug at various sections of the bun itself, pulling them outwards to create more height and width. Don’t forget to pull some hair away from your scalp at the crown for extra lift.
Hair Strands Won’t Stay
Those annoying flyaways or short layers that refuse to stay in the bun can be frustrating. This is a common issue, especially with medium hair that often has layers.
Embrace some of the stray strands around your face for the “messy” effect. For truly unruly pieces, a light mist of hairspray directly onto the strand and then gently smoothing it into the bun can help. You can also use a small bobby pin to tuck in any stubborn pieces discreetly.
Key Takeaways
- Start with textured hair; day-old hair or texturizing spray works wonders.
- Gather your hair loosely to encourage natural volume and avoid a stiff look.
- Create an initial half-loop with your hair tie, then wrap the ends around it.
- Gently pull and loosen sections of the bun and around your hairline for the “messy” effect.
- Use bobby pins sparingly for security, focusing on anchoring the bun discreetly.
- Finish with a light mist of hairspray to hold the style without stiffness.
Frequently Asked Questions
Can I do this on clean hair?
Yes, you absolutely can, but you’ll need to add some texture. Freshly washed hair can be very slippery and hard to hold. To combat this, liberally apply a texturizing spray or dry shampoo throughout your hair before you start. This will give your hair the necessary grip and body for a successful messy bun.
How do I get more volume in my messy bun?
Volume comes from a combination of technique and product. Before you start, consider teasing your hair lightly at the roots or using a volumizing mousse. When forming the bun, gently pull the loops and sections outwards to expand its shape. Pulling the bun slightly away from your scalp also adds lift, preventing a flat appearance.
What if my hair is layered?
Medium hair with layers is actually perfect for a messy bun! The layers naturally create texture and dimension, making the “messy” look even more authentic. Don’t try to force all the layers into the bun. Let some shorter pieces fall out around your face and neck; these contribute to the effortless, undone charm.
How do I make my messy bun last all day?
Durability often comes down to a secure base and a good finish. Ensure your hair tie is snug enough to hold the initial shape without being too tight. Strategically placed bobby pins can provide extra anchorage where needed. Finally, a flexible-hold hairspray will lock in the style, protecting against humidity and movement without making your bun stiff.
Our Top Recommended Finds
- Texturizing Spray: Essential for adding grip and volume, especially on clean hair. It creates the perfect foundation for a messy look.
- No-Crease Hair Ties: These prevent dents in your hair and are gentle, perfect for looping and securing your bun without damage.
- Curved Bobby Pins: These pins are designed to hug the shape of your head better, providing a more secure hold that’s less likely to slip out.
Embrace Your Inner Hair Artist
You now have all the tools and techniques to create a stunning messy bun with your medium hair. This style isn’t about perfection; it’s about embracing a little bit of beautiful chaos. Experiment with different heights and levels of “messiness” to find what truly suits you.
Don’t be afraid to pull out a few extra strands or leave some pieces untouched. The more you practice, the more intuitive it becomes. Go on, give it a try today and enjoy the confidence that comes with a perfectly undone hairstyle!