✨ How To Apply Foundation Correctly Step By Step Makeup Tutorials
Achieving a flawless base often feels like a guessing game of textures and tones.
I spent years struggling with “cakey” skin and visible lines until I realized the secret lies in the preparation rather than just the product.
This guide shares the professional techniques I have learned through trial and error to help you master a finish that looks like real skin.
Quick Overview
Before you begin your transformation, it is helpful to know what to expect from the process.
- Time needed: 15 to 20 minutes
- Difficulty: Beginner
- What you’ll need: Cleanser, moisturizer, primer, foundation, makeup sponge or brush, and setting powder.
Step-by-Step Instructions
Step 1: Prepare Your Canvas
Start by thoroughly cleansing your face to remove any lingering oils or debris from the night before.
Apply a lightweight moisturizer that matches your skin type, ensuring it absorbs completely before moving to the next step.
Exfoliate gently once or twice a week to prevent the foundation from clinging to dry patches or dead skin cells.
Pro Tip: Wait at least five minutes after moisturizing to let the product “sink in” so your foundation doesn’t slide off.
Step 2: Choose and Apply Primer
Select a primer that addresses your specific skin concerns, such as large pores, redness, or excess oil.
Focus the application on your T-zone, which includes the forehead, nose, and chin, where makeup tends to wear off first.
Press the primer into the skin rather than rubbing it, which helps fill in fine lines and creates a smoother surface.
Using a primer acts as a barrier between your skin and the makeup, preventing the foundation from being absorbed into your pores.
Step 3: Identify Your Undertone
Check the veins on your wrist to determine if you are cool, warm, or neutral-toned.
Look for blue or purple veins if you have cool undertones, or green veins if you have warm undertones.
Test foundation shades on your jawline rather than your hand to get the most accurate match for your face and neck.
A common mistake is choosing a shade that looks good in the bottle but turns orange once it interacts with your skin’s natural oils.
Step 4: Select Your Application Tool
Use a damp makeup sponge if you prefer a sheer, dewy finish that looks natural in daylight.
Opt for a dense kabuki brush if you need more coverage and want to buff the product into the skin for a polished look.
Clean your tools regularly to prevent bacteria buildup, which can lead to breakouts and uneven application.
Pro Tip: If you use a sponge, squeeze out all excess water until it is just barely damp to avoid diluting the foundation formula.
Step 5: Apply Foundation in Thin Layers
Place a small amount of foundation on the back of your hand to warm the product up with your body heat.
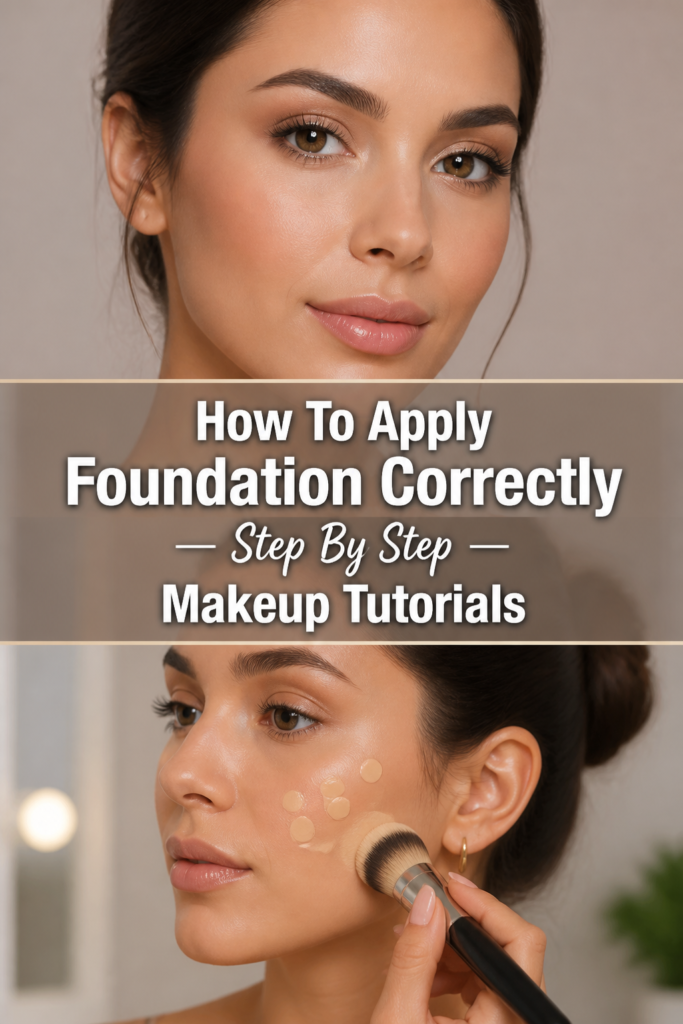
Dot the foundation in the center of your face, specifically on your cheeks, nose, and forehead.
Spread the product outward toward your hairline and jawline to ensure the heaviest coverage stays where you usually need it most.
It is much easier to add more product to areas with redness than it is to remove excess foundation once it has set.
Step 6: Master the Blending Technique
Stipple or bounce your tool against your skin instead of dragging it to avoid creating visible streaks.
Blend down past your jawline and onto your neck to eliminate any “mask” effect that separates your face from your body.
Pay close attention to the area around your nostrils and the corners of your mouth, as product often settles there.
Blending is the most time-consuming part of the process, but it is the difference between a professional look and a messy one.
Step 7: Conceal Specific Areas
Apply concealer only after your foundation is blended so you can see exactly where you still need extra coverage.
Pat the concealer onto blemishes or under-eye circles using your ring finger for a gentle, seamless integration.
Avoid using too much product under the eyes, as this area is prone to creasing throughout the day.
Step 8: Set Your Work
Dust a translucent setting powder over your face using a large, fluffy brush to lock everything in place.
Focus the powder on areas that get oily, while leaving the cheeks slightly more natural for a healthy glow.
Finish with a setting spray to melt the powder into the foundation and provide a long-lasting, skin-like finish.
Pro Tip: Use a pressing motion with your powder brush instead of a swiping motion to avoid moving the foundation you just applied.
Common Mistakes to Avoid
Matching to Your Hand
Many people test foundation on the back of their hand while shopping. Your hand is rarely the same color as your face because it receives more sun exposure. Always swipe a tester along your jawline and check it in natural light before purchasing.
Using Too Much Product
Starting with a thick layer of foundation makes it difficult to blend and often leads to a “cakey” appearance. It is better to apply a very thin layer and then go back to add a second layer only where you have redness or imperfections. This technique keeps your skin looking fresh and breathable.
Ignoring Your Skin Type
Using a matte foundation on dry skin will emphasize flakes and fine lines. Similarly, using a dewy, oil-based foundation on oily skin will likely result in the product sliding off within a few hours. Always read the label to ensure the formula is designed for your specific skin concerns.
Skipping the Neck
The face often holds more pigment or redness than the neck. If you stop your foundation exactly at the jawline, it creates a harsh, unnatural line. Always use the leftover product on your brush or sponge to blend downward toward your collarbone.
Troubleshooting
Foundation Looking Cakey
If your makeup looks heavy or textured, you may have skipped the moisturizing step or used too much powder. You can fix this by lightly misting your face with a hydrating facial spray and gently pressing a damp sponge over the textured areas. This helps re-hydrate the product and blend it back into the skin.
Makeup Separating on the Nose
Foundation often breaks apart on the nose due to oil production or the presence of large pores. Try using a eye primer on your nose before applying foundation, as these formulas are designed to grip pigment more intensely. You should also avoid over-applying product to this area, as thinner layers stay in place longer.
Foundation Changing Color
If your foundation turns orange after an hour, it is likely oxidizing. This happens when the oils on your skin or the acidity of your skin react with the ingredients in the makeup. To prevent this, use a silicone-based primer to create a barrier, or try a foundation shade that is one half-step lighter than your actual skin tone.
Key Takeaways
- Proper skin preparation with cleanser and moisturizer is non-negotiable for a smooth application.
- Always match your foundation to your jawline and consider your undertone for a natural look.
- Apply makeup in thin, buildable layers rather than one thick coat to avoid a heavy finish.
- Blending down the neck and into the hairline prevents the dreaded “makeup mask” appearance.
- Set your foundation with powder and spray to ensure it lasts throughout the day without shifting.
- Clean your brushes and sponges weekly to maintain skin health and application quality.
Frequently Asked Questions
Should I apply concealer before or after foundation?
It is generally better to apply concealer after foundation. Foundation will cover most of your discoloration, meaning you will need much less concealer than you think. This prevents the buildup of too many layers, which can lead to creasing and a heavy look.
What is the best way to apply foundation for dry skin?
For dry skin, use a damp makeup sponge and a liquid, hydrating foundation. Avoid using heavy powders, and focus on cream-based products that add moisture back into the skin. A hydrating primer with hyaluronic acid can also help create a smoother base.
How do I stop foundation from settling into fine lines?
The key is to use a primer specifically designed for smoothing and to avoid applying thick layers of foundation over wrinkled areas. After applying your base, use a clean Q-tip to gently wipe away any excess product that has settled into lines before you set the face with a very light dusting of powder.
Can I apply foundation with my fingers?
Yes, you can use your fingers to apply foundation, as the warmth of your hands helps the product melt into the skin. However, this method usually provides less coverage and can be less hygienic if your hands aren’t perfectly clean. It works best for sheer formulas like tinted moisturizers or BB creams.
Our Top Recommended Finds
- A High-Quality Beauty Sponge: Look for a latex-free sponge with a pointed tip for reaching small areas around the eyes and a flat base for larger surfaces.
- A Translucent Loose Setting Powder: This tool is essential for blurring pores and ensuring your foundation stays matte without adding extra color or weight.
- A Buffing Foundation Brush: A dense, flat-top brush is perfect for those who want a full-coverage finish and a quick, airbrushed application.
Elevate Your Beauty Routine
Mastering the art of foundation is the foundation of every great makeup look. Once you feel comfortable with your base, you can begin exploring the worlds of contouring and highlighting to add dimension to your face.
Try practicing these steps during a quiet evening when you aren’t in a rush to head out the door. The more you work with your specific skin texture and the tools you have, the more intuitive the process will become.
Take a moment today to look at your current foundation shade in natural sunlight and see if it truly matches your neck. If it doesn’t, use the tips in this guide to adjust your technique and achieve the seamless finish you deserve.