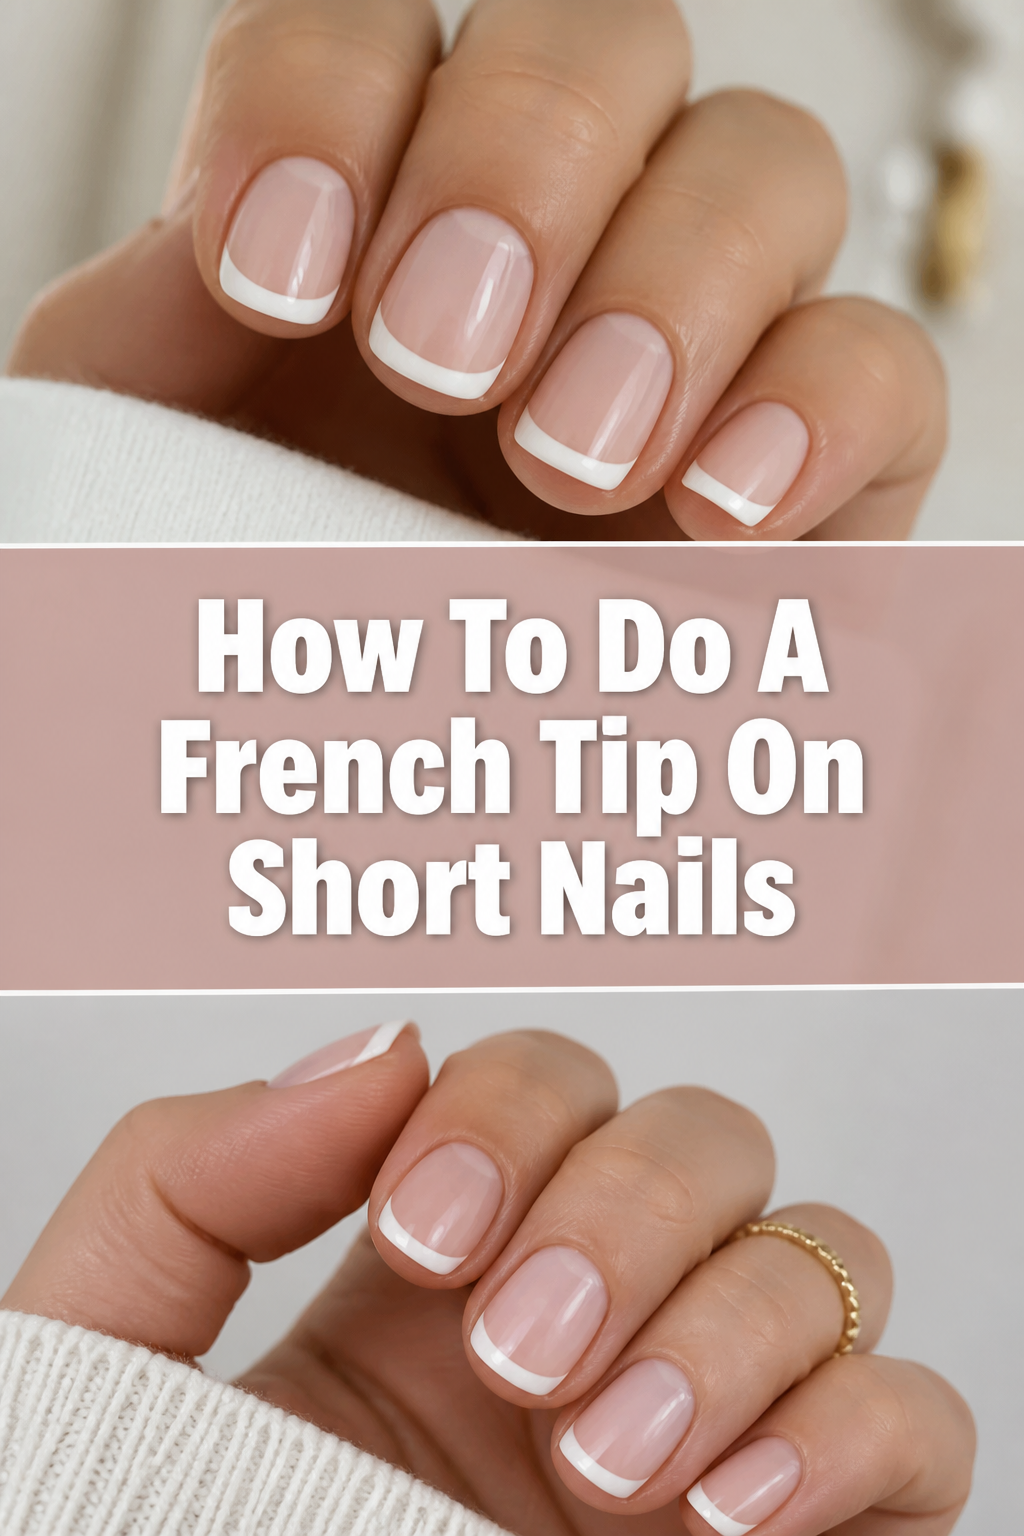
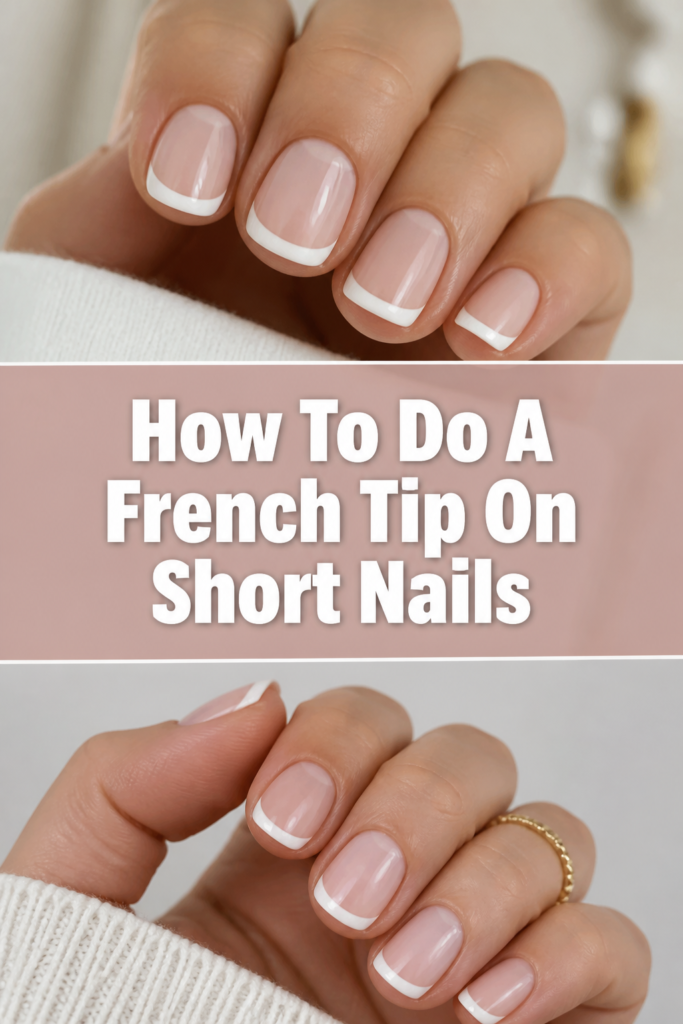
How To Do A French Tip On Short Nails
I used to believe that a classic French manicure was reserved exclusively for long, almond-shaped extensions.
After working behind a manicure desk for years, I realized that short nails actually provide the perfect canvas for a sophisticated, “clean girl” aesthetic.
This guide will show you exactly how to scale down this iconic look to suit your natural nail length with precision and style.
Quick Overview
You are about to master the “micro-French” technique, which is specifically designed to flatter shorter nail beds without making your fingers look stubby.
- Time needed: 40 to 50 minutes (including drying time)
- Difficulty: Intermediate
- What you’ll need: Base coat, sheer nude polish, opaque white polish, a long-haired liner brush, pure acetone, and a glossy top coat.
Step-by-Step Instructions
Step 1: Sanitize and Shape the Canvas
Start by washing your hands thoroughly to remove any natural oils or lotions that might prevent the polish from sticking.
Shape your nails using a high-quality glass file or a 240-grit emery board, moving in one direction to avoid splitting the layers.
For short nails, a “squoval” or a soft round shape works best because it provides a gentle curve for the white tip to follow.
Step 2: Detail the Cuticle Area
Short nails often look much longer when you maximize the visible nail plate by managing your cuticles.
Apply a small amount of cuticle remover and use a wooden orange stick to gently push back the skin at the base of the nail.
Avoid cutting your cuticles; instead, focus on removing the dead “pterygium” skin that clings to the nail surface so the polish can lay flat.
Pro Tip: Use a lint-free wipe soaked in rubbing alcohol to scrub the nail plate clean after cuticle work to ensure a bone-dry surface.
Step 3: Apply a Strengthening Base Coat
Apply one thin layer of a clear or ridge-filling base coat to create a smooth foundation for your color.
Protect your natural nails from the yellowing that can sometimes occur with white pigments by ensuring total coverage.
Let this layer dry for at least two minutes before you proceed to the next step.
Step 4: Choose and Apply Your Sheer Base
The secret to a professional French manicure is the sheer “base” color that hides imperfections while looking natural.
Swipe on two very thin coats of a sheer pink, peach, or milky nude polish that complements your skin’s undertone.
Wait about three to five minutes between coats so the polish doesn’t become “gummy” or thick on your small nail surface.
Step 5: Load Your Liner Brush Correctly
Forget the brush that comes inside the white polish bottle; it is far too large for detailed work on short nails.
Place a few drops of white polish onto a piece of aluminum foil or a plastic palette to use as your ink well.
Dip a long, thin liner brush into the polish and pull it through the drop to coat the bristles evenly without creating a glob at the tip.
Pro Tip: If the white polish feels too thick, add one single drop of nail thinner to the palette to help it flow more smoothly.
Step 6: Map the Smile Line
Instead of trying to draw one continuous line, start by marking the center point of your nail’s free edge with a tiny dot.
Connect the corners of your nail to that center dot using very light pressure and short, controlled strokes.
On short nails, keep this line extremely thin—aim for about one millimeter—to maintain a balanced proportion.
Step 7: Refine the Curve
Once your basic “V” or curve is mapped out, look at the nail from a straight-on angle to check for symmetry.
Smooth out the transition where the white tip meets the nude base, ensuring the arc is graceful and even on both sides.
If one side looks higher than the other, use a tiny bit more white polish to even it out rather than trying to erase it.
Step 8: Execute the Precision Cleanup
Even the most experienced nail artists make small mistakes, especially when working on a tiny surface area.
Dip a clean, angled makeup brush or a dedicated nail cleanup brush into pure acetone and dab the excess onto a paper towel.
Gently “carve” the smile line from the underside to sharpen the white edge and remove any polish that strayed onto your skin.
Pro Tip: Keep your cleanup brush nearly dry; too much acetone will run into the wet polish and ruin your base color.
Step 9: Seal and Cap the Free Edge
Wait at least five minutes for the white tips to set so you don’t “drag” the white pigment across your nude base when applying top coat.
Apply a generous layer of high-shine top coat, using a light touch to “float” the brush over the surface of the nail.
Crucially, run the brush along the very front edge of your nail to “cap” the tip, which prevents the white polish from chipping off prematurely.
Step 10: Hydrate for a Salon Finish
Once your top coat is dry to the touch, your skin might look a bit dehydrated from the acetone cleanup.
Massage a drop of jojoba-based cuticle oil into the skin around each nail to bring back the glow and flexibility.
This final step makes the entire manicure look professional and keeps your cuticles from looking ragged as the nails grow.
Common Mistakes to Avoid
Applying the Tip Too Deeply
One of the most frequent errors is starting the white tip too far down the nail bed.
When you have short nails, a deep smile line eats up all the visual space and makes the nails look even shorter than they are.
Keep the white portion restricted to the very edge of the nail to create the illusion of a longer nail plate.
Using Opaque White for the Base
Some beginners try to use an opaque “nude” polish as the base color, which can look heavy and artificial.
A sheer or semi-transparent base allows some of the natural nail’s light to shine through, which is the hallmark of a classic French look.
If your base is too thick, the white tip will sit on top like a physical ridge rather than blending seamlessly into the design.
Overloading the Brush
If you have too much polish on your liner brush, you will lose control of the line the moment it touches the nail.
The polish will “flood” the area, resulting in a thick, uneven blob that is difficult to fix without starting over.
Always wipe the excess polish off your brush on the palette until the bristles look thin and pointed.
Troubleshooting
The White Tips are Streaky
If your white polish looks see-through or streaky, it is likely because the formula is too thin or you are pressing too hard.
Try using a “one-coat” white stamping polish or a highly pigmented gel-paint for the tips to get full opacity in one pass.
Ensure you are using a light, “feathering” motion rather than dragging the brush through the paint.
The Top Coat Smudged the Design
This usually happens because the white polish wasn’t dry enough or the top coat was applied with too much pressure.
To fix this, you can try to “blur” the smudge with a tiny bit of base color, but often it is better to wipe that one nail and redo it.
In the future, make sure there is a large bead of top coat on your brush so the bristles never actually touch the white paint.
Bubbles Appearing in the Polish
Tiny bubbles usually form when polish is shaken instead of rolled, or when layers are applied too quickly.
If you see bubbles, you can try to gently pop them with a pin while the polish is wet, but preventing them is easier.
Work in a cool environment away from direct fans or drafts, which can cause the top layer of polish to dry too fast and trap air.
Key Takeaways
- The “micro-French” style is the most flattering technique for nails that don’t have much length.
- Using a separate liner brush is non-negotiable for achieving the precision needed on a small surface.
- Proper nail prep and cuticle management can add significant visual length to your nail beds.
- Sheer base colors provide a more natural and professional finish than opaque nudes.
- Capping the free edge with top coat is the best way to ensure your manicure lasts more than a few days.
- Acetone and a cleanup brush are your best friends for correcting shaky lines and perfecting the smile curve.
Frequently Asked Questions
Can I do a French tip if my nails are bitten?
Yes, you can still achieve this look, though it requires a very steady hand and a “barely-there” line.
Instead of following a non-existent free edge, draw a very thin straight line across the top of the nail to create the suggestion of length.
This can actually help encourage you to stop biting as you’ll want to preserve the beautiful design you’ve created.
What is the best color for the base?
The best color depends entirely on your skin’s undertone; cool skin looks great with sheer pinks, while warm skin suits peaches or creams.
Look for polishes labeled as “sheer,” “jelly,” or “translucent” to get that soft, diffused look.
A “milky white” base is also a very popular modern alternative to the traditional pink-toned French manicure.
How long does a French manicure last on short nails?
Because short nails don’t bend or flex as much as long nails, a French manicure can actually last quite a long time.
Typically, you can expect five to seven days of wear with regular polish if you use a high-quality top coat and cap the edges.
If you use gel polish, the look can easily last two to three weeks without any chipping or fading of the white tips.
Our Top Recommended Finds
- Long-Haired Detail Brushes: Look for a set that includes a 7mm or 9mm liner brush, which allows you to draw a curve in one smooth motion.
- High-Pigment White Polish: A “stamping” white polish is often better for French tips because it is designed to be opaque in a single thin layer.
- Glass Nail File: These files seal the keratin layers of the nail as you file, preventing the peeling that often ruins a manicure on short nails.
Mastering Your Minimalist Manicure
Now that you have the foundational skills for a micro-French manicure, you can start experimenting with modern variations.
Consider trying a “reverse French” where the color is at the cuticle, or swap the white for a neon shade for a pop of summer color.
The beauty of short nails is their practicality, and with this technique, you never have to sacrifice style for convenience.
Grab your liner brush and give your short nails the elegant upgrade they deserve today.