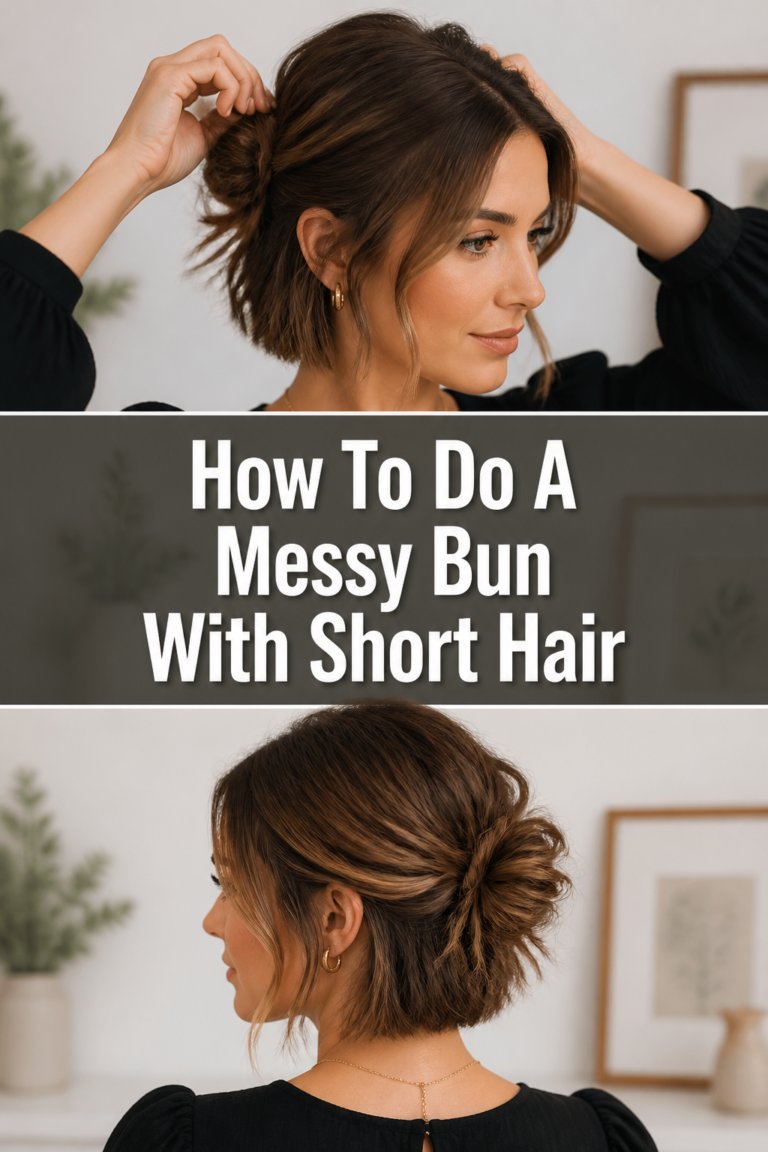
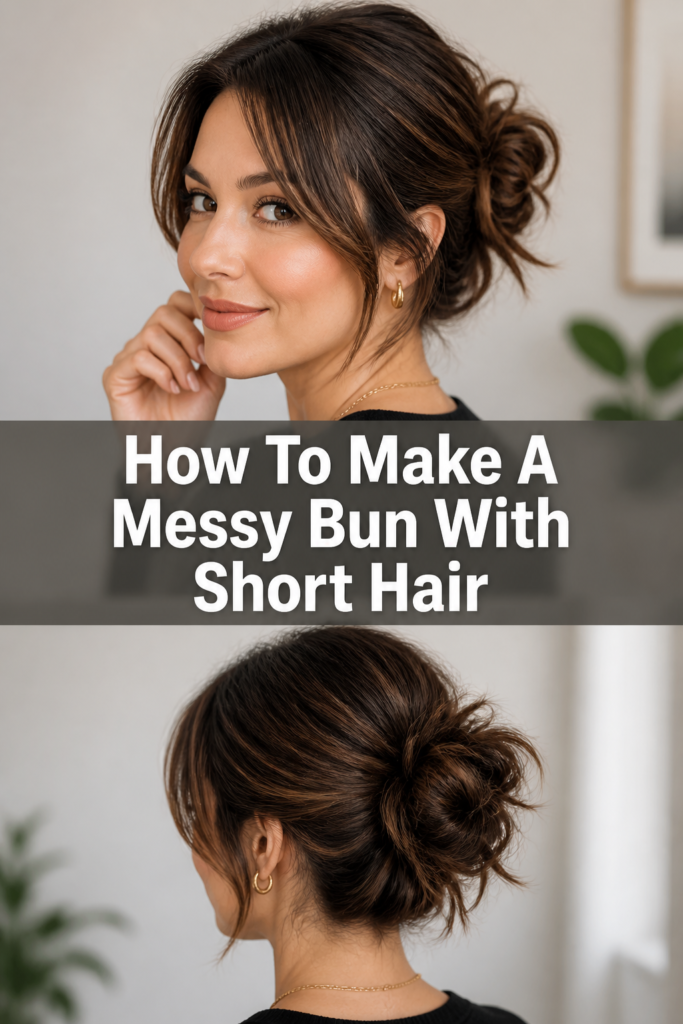
💁♀️ How To Make A Messy Bun With Short Hair
Short hair and messy buns seemed like a myth to me for the longest time.
I struggled with flyaways and a lack of volume, thinking this effortlessly chic style was only for long locks.
After countless tries and a lot of experimentation, I finally cracked the code, and now I’m here to share my easy, short-hair-friendly method with you.
Quick Overview
This guide will walk you through creating a perfectly imperfect messy bun, even if your hair barely grazes your shoulders. You’ll learn the tricks to add volume, secure stray strands, and achieve that coveted undone look. Get ready to transform your short hair into a stylish, convenient updo.
- Time needed: 5-10 minutes
- Difficulty: Beginner
- What you’ll need: Hair tie, bobby pins, texturizing spray, dry shampoo (optional), hairspray.
Step-by-Step Instructions
Step 1: Prep Your Hair for Texture
The secret to a successful messy bun with short hair lies in the texture. Start with hair that isn’t freshly washed, ideally second or third-day hair. This provides natural grip.
If your hair is too clean or feels slippery, spray a generous amount of dry shampoo or texturizing spray through your roots and mid-lengths. This will add crucial grip and volume, making your hair much easier to work with. Gently massage it in with your fingertips to distribute the product evenly.
Pro Tip: Don’t be shy with the texturizing spray. It’s your best friend for building the foundation of a voluminous messy bun on shorter hair. Focus on the areas where you want the most lift.
Step 2: Gather Your Hair into a High Pony
Decide on the placement of your bun. For a classic messy bun, aim for the crown of your head, just above where a ponytail would normally sit. This higher placement creates the illusion of more hair and helps secure shorter layers.
Gather all your hair with your hands, as if you’re making a high ponytail. Don’t worry about being perfectly neat; some loose strands around your face are part of the messy charm. Use your fingers rather than a brush for a softer, less structured gather.
Step 3: Create the Initial Loop
With your hair gathered, take your hair tie. Loop it once around your hair as you would for a regular ponytail. On the second loop, instead of pulling your hair all the way through, only pull it halfway.
This creates a small, loose loop or a “half-bun” right at the crown of your head. The ends of your hair will be pointing upwards or outwards, depending on your hair length. This initial loop forms the core of your messy bun.
Step 4: Twist and Wrap the Ends
Now, take the remaining loose ends of your hair that are sticking out from the loop. Twist them gently, creating a loose rope of hair. This twist doesn’t need to be tight or uniform.
Once twisted, wrap these ends around the base of the half-bun you just created. Depending on your hair length, you might only be able to wrap them once or twice. The goal is to contain these shorter pieces and give the bun more substance.
Pro Tip: For very short layers, some strands might not be long enough to fully wrap. Don’t force them. Let them fall where they may; you’ll secure them with pins in the next step.
Step 5: Secure with Bobby Pins
This is where bobby pins become your absolute best friend. Insert several bobby pins around the bun to secure the wrapped ends and the base of the initial loop. Focus on pinning any stray pieces that feel loose or are sticking out awkwardly.
Push the bobby pins into the bun, aiming to catch both the bun itself and some hair from your scalp. This provides a strong anchor. Use as many pins as needed until the bun feels secure, usually 5-7 for short hair.
Step 6: Gently Pull and Loosen
The “messy” part comes next. Once your bun is secure, gently pull small sections of hair from the bun itself. You want to create volume and a relaxed, undone look.
Loosen some strands around your hairline, temples, and neck. This softens the entire style and gives it that effortless, lived-in feel. Don’t be afraid to pull a little; you can always re-pin if you pull too much. The goal is an imperfect, lived-in texture.
Step 7: Tame Flyaways and Set
Finally, address any persistent flyaways or short layers around your face that you want to control. You can either tuck them behind your ears or use a tiny bit of hairspray on your fingertips to smooth them down. A few wispy pieces are desirable for the messy look.
Once you’re happy with the shape and messiness, finish with a light mist of hairspray. This will help hold your bun in place all day without making it feel stiff. Hold the can about 10-12 inches away from your head for an even, fine mist.
Common Mistakes to Avoid
Using Too Tight a Hair Tie
Many people try to secure their bun by using a hair tie that’s too restrictive. This can make your bun look too neat and stiff, which goes against the messy aesthetic. It also puts undue stress on your hair, potentially causing breakage.
Instead, opt for a softer, more forgiving hair tie that allows for some looseness. The goal is to create a soft base for your bun, not a tightly pulled ponytail. The messy look thrives on a bit of give.
Forgetting to Add Texture
Short hair often lacks the natural volume and grip of longer hair. Skipping the texturizing step can result in a flat, slippery bun that quickly unravels. Clean, sleek hair simply won’t hold the messy style well.
Always start with dry shampoo or texturizing spray. This creates friction and body, giving your hair the necessary foundation to hold the messy bun shape. It makes a huge difference in the longevity and appearance of your style.
Over-Pinning the Bun
While bobby pins are essential, using too many or pinning them incorrectly can make your bun look stiff and artificial. An overly pinned bun loses its natural, effortless charm. It can also feel heavy and uncomfortable.
Focus on strategic pinning. Instead of scattering pins everywhere, target the loose ends and the base of the bun where it needs the most support. Aim to hide the pins within the bun for a seamless finish.
Expecting Perfection
The very name “messy bun” implies imperfection. Many people get frustrated when their bun doesn’t look exactly like a picture they saw online. Trying to achieve a perfectly symmetrical or neat messy bun defeats the purpose.
Embrace the asymmetry and the loose strands. The beauty of this style is its relaxed, undone nature. Each messy bun will be unique, reflecting your hair’s natural texture and length. Don’t strive for perfection, aim for effortless charm.
Troubleshooting
Bun Keeps Falling Out
If your messy bun struggles to stay put, it often comes down to insufficient texture or an insecure base. Your hair might be too clean, too fine, or the initial gathering wasn’t firm enough. The bun feels like it’s slipping.
Revisit Step 1: ensure you’ve used enough texturizing product. Also, when you create the initial loop (Step 3), make sure the hair tie is snug enough to hold the half-bun, but not overly tight. Finally, use bobby pins strategically, pushing them deep enough to catch scalp hair for a strong anchor.
Looks Too “Neat”
Sometimes, even after following the steps, your bun might look more polished than messy. This usually happens if you’ve been too careful or haven’t pulled enough hair out. The bun appears too compact.
After securing your bun, don’t be afraid to gently tug on small sections of hair from the bun itself. Pull out a few strands around your face, temples, and nape. Use your fingers to rough up the texture a bit. The goal is to disrupt the neatness.
Not Enough Volume
Short hair can sometimes make a messy bun look flat or small. If your bun lacks the desired lift and fullness, you might need to enhance your hair’s natural body. The bun seems to sit too close to your head.
Before gathering your hair, try backcombing the roots at your crown slightly. Use a fine-tooth comb and gently tease the hair closest to your scalp. Then, apply extra texturizing spray. A higher ponytail placement (Step 2) also naturally adds more lift to the bun.
Key Takeaways
- Texture is absolutely key for short hair messy buns; use dry shampoo or texturizing spray generously.
- Don’t aim for perfection; embrace the loose strands and asymmetry for an authentic messy look.
- Bobby pins are your best friends for securing shorter layers and giving the bun stability.
- Practice makes perfect; experiment with placement and looseness to find what works best for your hair.
- A high ponytail placement provides necessary lift and makes the bun appear fuller.
- Gently pulling and loosening sections after pinning creates that coveted effortless, undone aesthetic.
Frequently Asked Questions
Can I do this with really short hair (e.g., a bob)?
Yes, absolutely! While it might be a smaller bun, the principles remain the same. Focus on creating a high ponytail or half-ponytail as high as possible. You’ll rely more heavily on bobby pins to secure all the shorter pieces. The result will be a cute, mini messy bun or a messy half-up style.
What if my hair is too fine?
Fine hair benefits immensely from texturizing products. Before you even start, apply a volumizing mousse to damp hair and blow-dry upside down for maximum lift. Then, follow the steps, using plenty of dry shampoo or texturizing spray. Backcombing the roots before gathering your hair will also add crucial volume.
Should I use hairspray before or after?
It’s generally best to use hairspray after you’ve created and perfected your messy bun. Applying it at the end helps set the style and tame any final flyaways without making your hair stiff or difficult to work with during the styling process. A light mist is usually sufficient.
How do I make it last all day?
To maximize longevity, start with good texture. Ensure your bun is securely pinned, catching both the bun and some scalp hair. Finish with a medium-hold hairspray. Avoid touching your bun excessively throughout the day, as this can loosen the pins and disturb the style.
Our Top Recommended Finds
- Texturizing Dry Shampoo: This dual-purpose product adds volume and absorbs oil, giving your short hair the perfect foundation for a messy bun. It’s a game-changer for grip.
- No-Crease Hair Ties: These fabric-covered ties are gentle on your hair, preventing damage and those annoying kinks. They provide a secure hold without being too tight.
- Good Quality Bobby Pins: Invest in pins that have a strong grip and don’t easily slip. They are crucial for securing all those shorter layers and keeping your messy bun intact.
Embrace Your Effortless Style
You now have all the tools and knowledge to master the messy bun, even with your beautiful short hair. This versatile style is perfect for busy mornings, casual outings, or even dressing up a relaxed look. It’s about feeling confident and comfortable.
Don’t be afraid to experiment with different placements or by pulling out more face-framing pieces. Each time you try, you’ll get a little better, a little faster, and a little more confident. Go ahead, give it a try today and discover your new favorite go-to hairstyle!