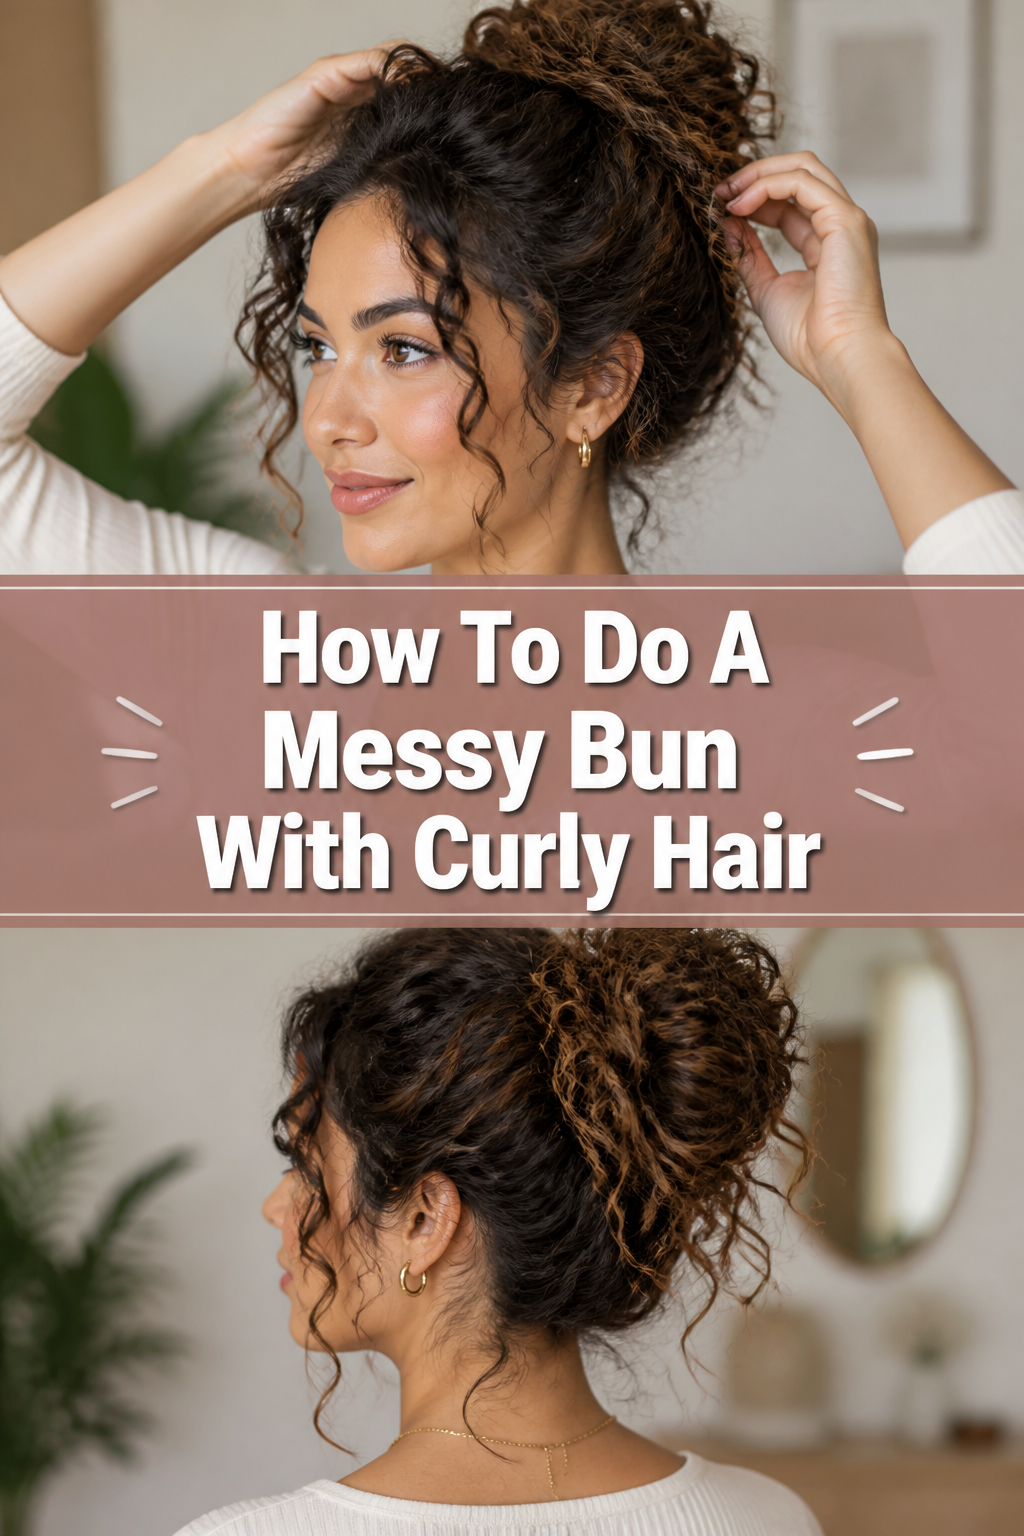
✨ How To Do A Messy Bun With Curly Hair
Creating a messy bun with curly hair might seem like a chaotic endeavor, but it’s actually a celebration of your natural texture. It’s the ultimate effortlessly chic hairstyle, perfect for any occasion from running errands to a casual brunch. As someone who battles and embraces their own curly mane daily, I’ve perfected the art of a quick, stylish, and durable messy bun that truly works.
This guide will walk you through every twist and pull, ensuring your curls are showcased beautifully, not hidden away. You’ll learn the simple tricks to achieve that coveted “just threw it up” look with confidence and ease. Get ready to embrace your curls in a whole new, wonderfully messy way.

Quick Overview
You’re about to master the art of the perfectly imperfect messy bun, designed specifically for gorgeous curly hair. This style embraces your natural volume and texture, making it a go-to for busy days or when you want a relaxed, stylish vibe.
Here’s a snapshot of what you’ll achieve:
- Time needed: 5-10 minutes
- Difficulty: Beginner
- What you’ll need: Hair tie (preferably a scrunchie or fabric-covered elastic), bobby pins, curl refreshing spray (optional), light hold hairspray (optional)
Step-by-Step Instructions
Step 1: Prep Your Curls
Start with hair that’s either second-day (or third-day) curls, or freshly washed and dried. Day-old curls often have more grip and volume, which is ideal for a messy bun. If your curls are a bit flat, a quick refresh can work wonders.
Lightly mist your hair with a curl refreshing spray or a bit of water. This helps reactivate your curl pattern and adds a touch of moisture without soaking your hair. Gently scrunch your curls upwards to boost volume and definition.
Step 2: Decide on Placement
Consider where you want your bun to sit on your head. A high bun offers a playful, youthful look, while a mid-level bun is classic and versatile. A low messy bun creates an elegant, relaxed aesthetic.
Experiment with different placements to see what feels best for your face shape and personal style. The placement significantly impacts the overall vibe of your messy bun, so take a moment to visualize.
Step 3: Gather Your Hair Loosely
Bend your head forward slightly, allowing your hair to fall naturally. This helps create natural volume at the roots and prevents a super-tight, pulled-back look. Use your fingers to gently gather all your hair as if you’re making a ponytail.
Don’t use a brush; your fingers are perfect for maintaining your curl definition and creating that desired messy texture. Keep the gather loose and soft, not taut against your scalp.
Pro Tip: For extra volume, flip your head completely upside down before gathering. This technique encourages all your roots to lift, giving your bun a fuller appearance right from the start.
Step 4: Secure with a Hair Tie
Hold your gathered hair in one hand. With your other hand, take your hair tie or scrunchie. Wrap the hair tie around the base of your “ponytail” once, as you would for a regular ponytail.
On the second wrap, pull your hair only halfway through the elastic, creating a loop. This forms the initial base of your messy bun. Let the ends of your hair spill out freely from this loop.
Step 5: Twist and Pin the Ends
Take the loose ends of your hair that are hanging from the half-pulled-through loop. Gently twist these sections around the base of the loop you just created. The twisting doesn’t need to be perfect or tight.
Once twisted, use bobby pins to secure these ends against your head or into the existing bun structure. Aim to tuck the pins discreetly into the curls, ensuring they hold the shape without being visible. This step helps build the “messy” shape.
Step 6: Fluff and Manipulate
Now comes the fun part: shaping your messy bun. Gently tug at sections of the bun to expand its size and create more volume. Pull out small pieces of hair from around your face and temples.
These face-framing pieces soften the look and contribute to the “messy” aesthetic. Don’t be afraid to pull some strands completely out of the bun itself to add to the disheveled charm.
Pro Tip: Focus on creating an asymmetrical shape. A perfectly round bun can look too formal. Embrace the unevenness for a truly authentic messy look.
Step 7: Check for Security and Balance
Give your head a gentle shake to test the bun’s stability. If any parts feel too loose, add more bobby pins. Place pins strategically into the base of the bun, pushing them towards the center to anchor everything.
Step back and look at your bun from different angles using a mirror. Adjust any stray curls or uneven sections. The goal is a balanced, effortless look, not necessarily symmetrical perfection.
Step 8: Final Touches and Hold
If desired, lightly spritz your finished messy bun with a flexible hold hairspray. This will help keep flyaways in place without making your curls stiff or crunchy. Choose a humidity-resistant spray if you’re in a damp climate.
For an extra touch, you can add a decorative scrunchie or a small hair clip. This can elevate the messy bun from casual to chic, depending on the accessory you choose.
Common Mistakes to Avoid
Tying Too Tightly
A common pitfall is pulling your hair too tightly when gathering it for the bun. This creates a slicked-back, severe look that counteracts the desired messy aesthetic. It also puts unnecessary tension on your scalp and curls, leading to discomfort and potentially breakage.
Instead, gather your hair very loosely with your fingers, allowing for natural volume and softness around your hairline. The goal is an “undone” feel, not a perfectly taut ponytail.
Over-Combing Your Curls
Brushing or over-combing curly hair before or during the bun process is a recipe for frizz and loss of definition. Curls thrive when left undisturbed, retaining their natural clumps and texture. Aggressive combing will separate these clumps.
Use your fingers to gently detangle and gather your hair. If you need to smooth any areas, a wide-tooth comb used very sparingly on damp hair is the best approach. Embrace the natural texture your curls provide.
Using Too Many Bobby Pins
While bobby pins are essential for security, using an excessive amount can make your bun look stiff and overdone. Too many pins can also poke out awkwardly, detracting from the effortless vibe. It can also make the bun feel heavy and uncomfortable.
Focus on strategic placement. Use just enough pins to secure the bun’s core and any particularly unruly sections. Tuck them in discreetly, aiming to anchor the bun without making it rigid.
Trying to Achieve Perfection
The very essence of a “messy bun” is its imperfection. Trying to make every curl fall just right or ensuring perfect symmetry will lead to frustration and a bun that looks too “done.” This defeats the purpose of the style.
Let go of the need for perfection. Embrace the flyaways, the unevenness, and the natural sprawl of your curls. The beauty of a messy bun lies in its relaxed, authentic charm.
Troubleshooting
My Bun Keeps Falling Out
If your messy bun feels unstable or starts to unravel, the issue might be a combination of too-smooth hair and insufficient anchoring. Very soft, silky curls can slip out of elastic easily.
Try using a scrunchie with a bit more grip, or a textured hair tie. Before creating the bun, you can also lightly mist your roots with a texturizing spray or dry shampoo to add some hold. Ensure you’re inserting bobby pins through a section of the bun and then into the hair on your scalp for a secure anchor.
It Looks Too Neat, Not Messy Enough
If your bun is leaning more towards “neat” than “messy,” you might be gathering your hair too carefully or pinning it too precisely. The key to messiness is deliberate dishevelment.
After forming the basic bun shape, gently pull out small sections of hair from the bun itself. Don’t be afraid to tug lightly on the edges of the bun to loosen it up and create more volume. Pull out more face-framing pieces and let them hang freely.
My Curls Are Frizzy Around the Bun
Frizz around your messy bun can happen if your hair is dry, or if you’ve manipulated it too much. Curly hair is prone to frizz, especially when disturbed.
Ensure your hair is adequately moisturized before styling. A curl cream or leave-in conditioner can help. After forming the bun, gently smooth any frizzy areas with a tiny amount of anti-frizz serum or a light hold hairspray, using your fingertips. Avoid over-touching your hair once the bun is in place.
Key Takeaways
- Embrace your natural curl texture; don’t try to smooth it out.
- Start with day-old curls for better grip and volume.
- Use your fingers to gather hair, avoiding brushes to prevent frizz.
- Don’t pull your hair too tightly; keep it loose for a softer look.
- Twist and pin loose ends strategically to build the bun’s shape.
- Gently tug and pull pieces to create desired volume and messiness.
- Use bobby pins for security, but avoid over-pinning.
- Let go of perfection; the beauty is in the effortless, imperfect style.
Frequently Asked Questions
Can I do a messy bun with short curly hair?
Absolutely! While it might be a smaller bun, short curly hair can definitely be styled into a messy bun. You might need more bobby pins to secure shorter layers and to create the illusion of more volume. Focus on a low or mid-level bun to ensure all strands can be gathered.
How do I make my messy bun last all day?
The key to longevity is good preparation and strategic pinning. Starting with slightly textured, day-old hair helps. Use a fabric-covered hair tie or scrunchie for better grip. Secure the bun by pushing bobby pins through the bun and anchoring them into the hair on your scalp. A light mist of flexible hold hairspray can also extend its life.
What if my hair is very fine or thin?
If you have fine or thin curly hair, you can still achieve a voluminous messy bun. Before gathering, apply a volumizing mousse or dry shampoo to your roots to add texture and lift. When forming the bun, gently backcomb the ponytail section before twisting it, which creates more bulk. You can also strategically pull out more loops and pin them to give the appearance of a fuller bun.
Should I use gel or hairspray for a messy bun?
It depends on your desired hold and texture. A light hold hairspray is great for setting the bun and taming flyaways without stiffness. For more definition and frizz control, a light curl gel or cream can be applied to damp hair before drying and styling. Avoid heavy gels that can make your curls crunchy or stiff for this relaxed style.
Our Top Recommended Finds
- Silk or Satin Scrunchies: Gentle on curls, prevents breakage, and reduces creasing.
- Texturizing Spray: Adds grip and volume to fine or freshly washed hair, perfect for building a messy bun.
- Flexible Hold Hairspray: Sets your style without making curls stiff, allowing for natural movement.
Embrace Your Beautiful Chaos
You’ve now got the blueprint for creating a stunning messy bun that truly celebrates your curly hair. This isn’t just a hairstyle; it’s an attitude – one of effortless elegance and confidence. Don’t be afraid to experiment with different placements and levels of “messiness” until you find your signature look.
Practice makes perfect, or rather, perfectly imperfect! So grab your scrunchie, embrace your magnificent curls, and give this a try today. You’ll be amazed at how quickly this becomes your favorite go-to style for any day of the week.