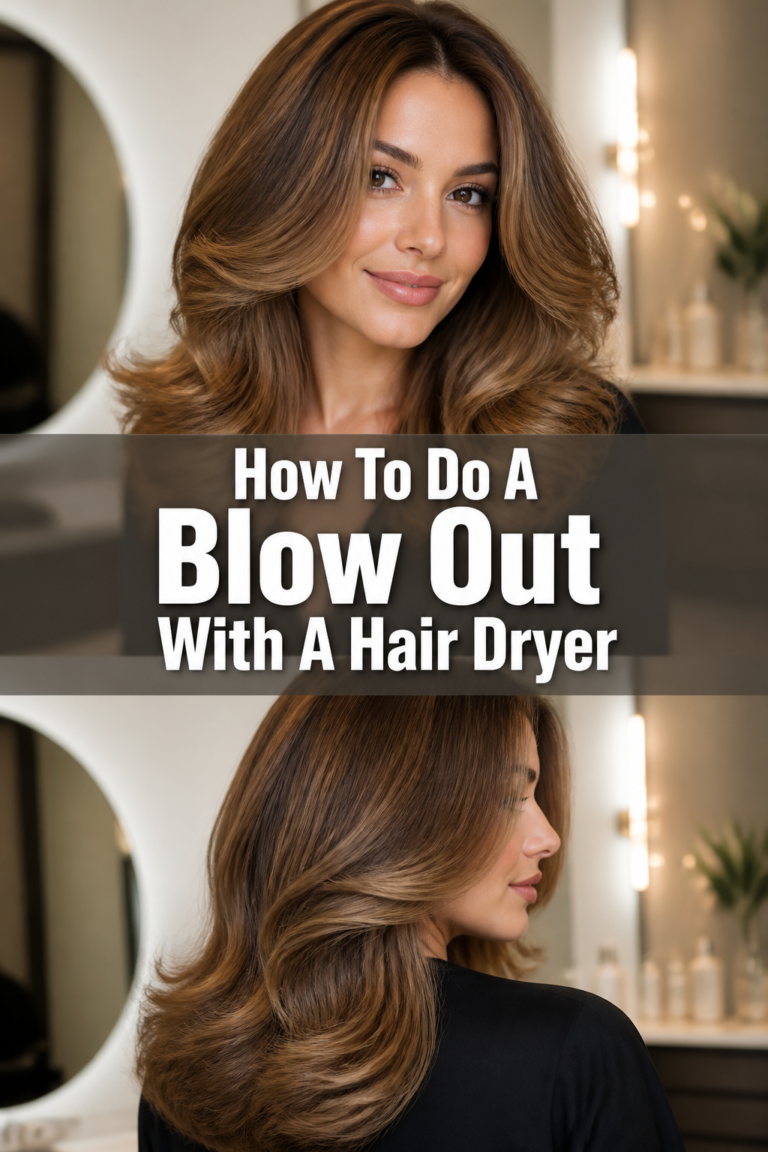
💨 How To Do A Blowout With A Blow Dryer
Remember those days staring in the mirror, wishing for salon-perfect hair without the salon visit? I certainly do. Learning to master a blowout at home was a game-changer for my confidence and my hair routine.
It took practice, but once I cracked the code, effortless volume and shine became a regular part of my life. This guide shares all the practical steps and insider tips I’ve learned along the way, helping you achieve that coveted bouncy, smooth finish yourself.

Quick Overview
Get ready to transform your hair with this comprehensive guide. You’ll learn the techniques to create a professional-looking blowout right in your own bathroom.
This process covers everything from proper product application to effective drying methods, ensuring a flawless finish.
- Time needed: 45-75 minutes (depending on hair length and thickness)
- Difficulty: Intermediate
- What you’ll need: Blow dryer with nozzle, round brush, sectioning clips, heat protectant, styling product, hairspray
Step-by-Step Instructions
Step 1: Prepare Your Hair
Start with freshly washed, towel-dried hair. Your hair should be damp, not dripping wet, for optimal styling. Gently blot your hair with a microfiber towel to remove excess water without causing frizz.
Apply a generous amount of heat protectant evenly through your hair. This crucial step shields your strands from heat damage.
Work in a volumizing mousse or styling cream from roots to ends. This will provide hold, body, and smoothness to your blowout.
Pro Tip: Never skip heat protectant. It’s your hair’s best defense against the high temperatures of your blow dryer. For extra volume, focus volumizing products at the roots.
Step 2: Rough Dry Your Hair
Before you pick up your round brush, you need to remove most of the moisture from your hair. This initial drying phase saves time and makes the precise styling easier.
Flip your head upside down and rough dry your hair until it’s about 60-70% dry. Use your fingers to lift the roots and encourage airflow.
Focus on drying the roots first during this stage. This helps build a strong foundation for volume.
Avoid using a brush at this point to prevent unnecessary pulling or snagging. Just use your hands to tousle and lift.
Step 3: Section Your Hair
Proper sectioning is the secret to an even, smooth blowout. It allows you to work on smaller, manageable pieces of hair. This prevents tangles and ensures every strand gets attention.
Part your hair as you normally would. Then, create a horizontal section from ear to ear across the back of your head.
Clip up the top section of your hair securely out of the way. You will start working on the bottom layers.
Divide the bottom section into two or three smaller, vertical subsections. The thickness of these sections should be slightly narrower than your round brush.
Pro Tip: The smaller your sections, the smoother and more controlled your blowout will be. Don’t try to dry too much hair at once.
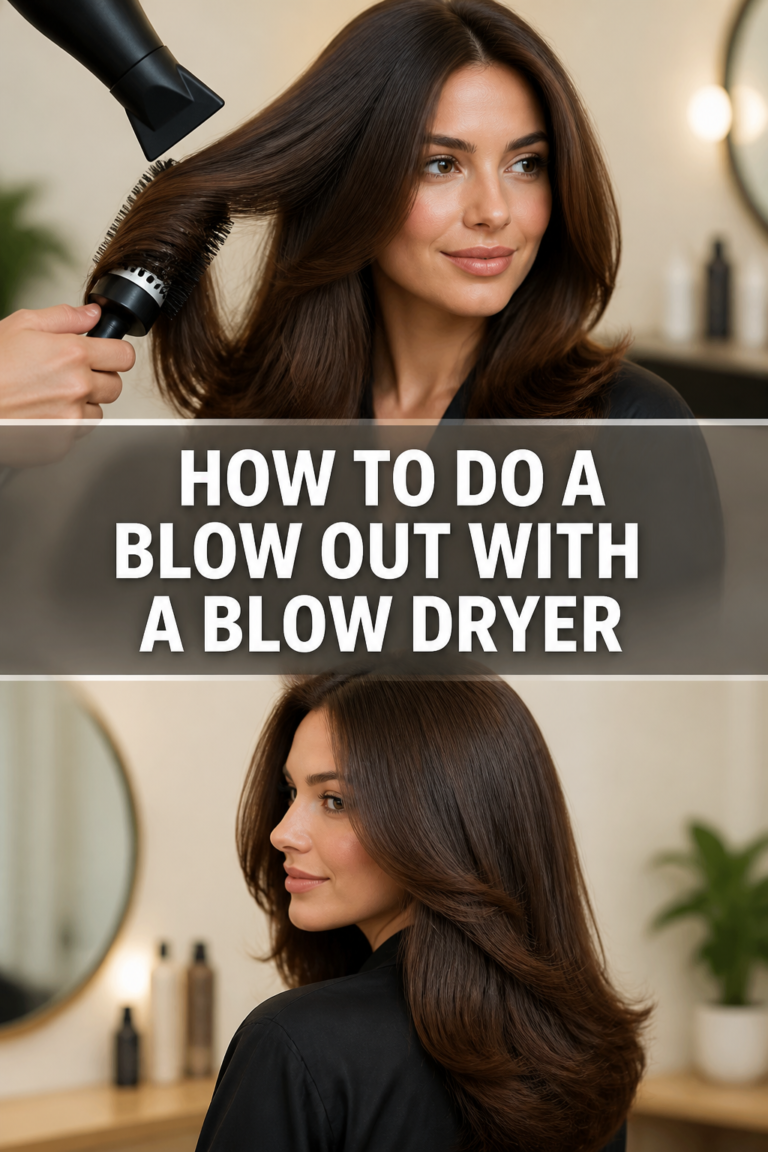
Step 4: Master the Bottom Sections
This is where the magic of the round brush begins. Focus on creating tension and smooth passes to achieve a sleek finish.
Take your first bottom section. Place your round brush at the roots, underneath the hair.
Direct the blow dryer nozzle downwards, following the brush as you pull it through the hair. Maintain constant tension.
Roll the brush down to the ends, ensuring the hair wraps smoothly around the barrel. Dry the hair from roots to ends, moving the dryer steadily.
Repeat this process, working your way through all the bottom sections. Make sure each section is completely dry before moving on.
Step 5: Tackle the Mid-Sections
Once the bottom layers are done, release the next horizontal section of hair. This will typically be around the crown of your head.
Divide this new section into smaller, manageable subsections, similar to how you did the bottom layer.
Work with your round brush and blow dryer, repeating the same technique of pulling the brush through with tension. Always direct the nozzle downwards.
Concentrate on lifting the roots for added volume. You can slightly over-direct the hair upwards as you dry.
Step 6: Perfect the Top and Crown
The top and crown sections are crucial for overall shape and volume. These are the most visible parts of your hair, so take your time here.
Release the final top section of your hair. Create subsections that are easy to manage with your brush.
For maximum volume at the crown, lift each section straight up. Place your round brush at the roots and dry upwards and outwards.
Roll the hair around the brush and hold the dryer on it for a few seconds. Then, use the cool shot button on your dryer to set the curl and volume.
Gently unroll the brush. This technique helps lock in the shape and shine.
Pro Tip: For extra lift, dry the hair at the crown by pulling it forward and up. This creates a soft sweep back.
Step 7: Frame Your Face and Bangs
The front sections dictate how your hair frames your face. This requires a delicate touch to avoid a stiff or unnatural look.
Take your front sections or bangs. If you have bangs, dry them first, styling them as you normally would with your brush.
For face-framing layers, pull the hair slightly forward and down. Use your round brush to create a soft bend or curl away from your face.
Use the cool shot on these sections as well to help set the shape. This prevents them from falling flat too quickly.
Step 8: The Finishing Touches and Cool Down
Once all sections are dry, it’s time to finalize your look. A proper cool-down period is essential for lasting results.
Give your entire head a final blast with the cool shot button. This closes the hair cuticles, enhancing shine and setting the style.
Wait a few minutes for your hair to completely cool before touching it too much. This allows the style to fully set.
Lightly mist with a flexible hold hairspray. Hold the can about 10-12 inches away from your head to ensure even distribution without stiffness.
Gently tousle your hair with your fingers to break up any perfect curls and create a more natural, voluminous look.
Common Mistakes to Avoid
Achieving a perfect blowout takes practice, and understanding common pitfalls can significantly speed up your learning curve. Sidestep these errors for a smoother, more successful style.
Starting with Soaking Wet Hair
Attempting to blow dry hair that is too wet will take an excessive amount of time and can lead to over-exposure to heat. This strips moisture and causes damage and frizz. Always rough dry your hair to about 60-70% dry before beginning with your brush work. This makes styling more efficient and less damaging.
Not Sectioning Properly
Trying to dry large chunks of hair at once is a recipe for disaster. It results in uneven drying, tangled hair, and a lack of control over the style. Always take small, manageable sections that are no wider than your brush. This ensures every strand gets properly dried and smoothed, leading to a much more polished finish.
Using Too Much Heat
While heat is necessary for styling, excessive or incorrect heat settings can fry your hair. Using the highest heat for too long on any one section will cause damage, dryness, and can even change your hair color. Always match your heat setting to your hair type and texture, and keep the dryer moving. Use the cool shot to set the style, not more heat.
Pulling Hair Too Hard or Not Hard Enough
The right amount of tension is key for a smooth blowout. Pulling too hard can cause breakage and discomfort, especially at the roots. Not enough tension, however, will result in a lack of smoothness and volume. Find a balance that allows the hair to wrap around the brush firmly but without strain. Let the brush and the heat do the work.
Troubleshooting
Even with the best instructions, you might encounter a few hiccups. Here’s how to address some common blowout challenges.
My Hair Looks Frizzy
Frizz often occurs when the hair cuticle isn’t completely smooth or when moisture is still trapped. Ensure your hair is completely dry, especially at the roots and ends, before turning off the dryer. Use the cool shot button generously at the end of each section and over your entire head to seal the cuticle. Applying a small amount of anti-frizz serum or a light oil after drying can also help.
My Roots Are Flat
Flat roots are a common complaint. The key to volume is lifting the hair at the root during the drying process. Make sure you are using a volumizing product at the roots before you start. When blow drying, lift each section straight up from the scalp with your round brush and direct the airflow underneath, concentrating the heat there. Use the cool shot to set the root lift before moving the brush.
Hair Gets Tangled in the Brush
This usually happens if your sections are too large or if you’re pulling the brush through too quickly without enough control. Always work with smaller, manageable sections of hair. Ensure the hair is smoothly wrapped around the brush as you pull it through. If a tangle starts, stop, turn off the dryer, and gently unroll the brush, rather than pulling. Consider using a brush with a larger barrel if your hair is very long, as this reduces the chances of tangling.
Key Takeaways
- Preparation is paramount: Always start with towel-dried hair and apply heat protectant and styling products generously.
- Sectioning is non-negotiable: Divide your hair into small, manageable sections for even drying and control.
- Master the tension: Use consistent, firm tension with your round brush to smooth the hair and create volume.
- Direct the airflow downwards: Always point your dryer’s nozzle down the hair shaft to smooth the cuticle and maximize shine.
- Utilize the cool shot: Finish each section and your entire head with a blast of cool air to set the style and boost shine.
- Patience pays off: Don’t rush the process. Take your time with each section for a truly salon-quality finish.
Frequently Asked Questions
Can I do a blowout on short hair?
Absolutely! Blowouts aren’t just for long hair. For short hair, you might use a smaller round brush to create volume and shape. The principles remain the same: sectioning, tension, and proper heat application will give short hair fantastic body and style.
How often can I blow dry my hair?
While blow drying can create beautiful styles, frequent heat styling can be damaging. Aim for 2-3 times a week at most, allowing your hair to air dry on other days. Always use heat protectant and incorporate deep conditioning treatments into your routine to maintain hair health.
What’s the best type of round brush to use?
The best round brush depends on your hair length and desired style. Ceramic or tourmaline brushes heat up evenly and help smooth the hair, while boar bristles can add shine. For long hair, a larger barrel creates loose waves and volume; for shorter hair, a smaller barrel provides tighter curls and more control.
How do I make my blowout last longer?
To extend your blowout, avoid touching your hair excessively. Sleep on a silk pillowcase to reduce friction and frizz. Use dry shampoo at the roots on day two or three to absorb oil and refresh volume. You can also loosely tie your hair in a high bun (pineapple method) overnight to preserve volume.
Our Top Recommended Finds
- Professional Ionic Blow Dryer: Look for one with multiple heat and speed settings, plus a cool shot button. Ionic technology helps reduce frizz and speed up drying time.
- Ceramic or Tourmaline Round Brush: These brushes heat up evenly, helping to set curls and smooth the hair cuticle for a shiny finish. Choose a barrel size appropriate for your hair length.
- Lightweight Heat Protectant Spray: A non-greasy formula that offers strong thermal protection without weighing your hair down. Essential for every heat styling session.
Your Best Hair Day Awaits
You now have all the tools and knowledge to create a stunning blowout right in your own home. It takes a little practice, but with each attempt, you’ll gain confidence and finesse.
Don’t be afraid to experiment with different techniques and products to find what works best for your unique hair type. Embrace the process, enjoy the transformation, and get ready to turn heads with your beautifully styled hair.