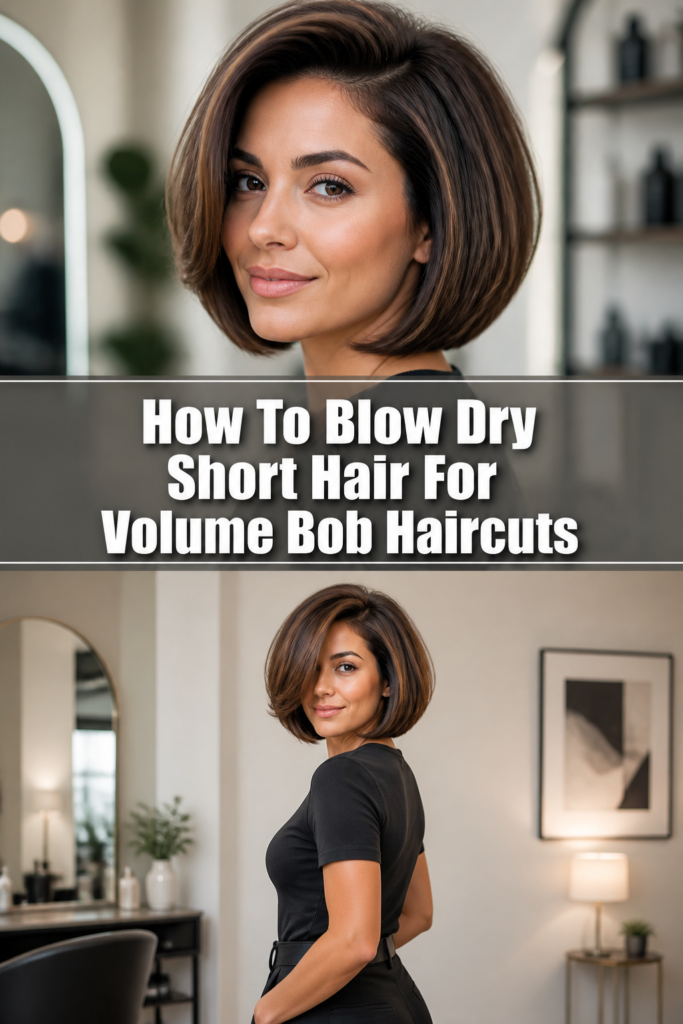
💇♀️ How To Blow Dry Short Hair For Volume Bob Haircuts
Achieving that perfect voluminous bob can feel like a daily challenge.
I remember countless mornings battling my own short hair, ending up with a flat, lifeless style.
Through years of practice and learning from top stylists, I’ve mastered the techniques to create lasting lift and bounce, and I’m excited to share them with you.
Quick Overview
This guide will walk you through the essential steps to transform your short bob from flat to fabulous, ensuring maximum volume and lasting style. You’ll learn how to properly prepare your hair, use the right tools, and master blow-drying techniques for a salon-quality finish at home.
- Time needed: 15-25 minutes
- Difficulty: Intermediate
- What you’ll need: Quality blow dryer with nozzle, heat protectant, volumizing mousse/spray, sectioning clips, medium round brush, wide-tooth comb, light-hold hairspray.
Step-by-Step Instructions
Step 1: Prepare Your Hair
Start with freshly washed and conditioned hair. Gently towel dry your hair to remove excess water until it’s about 60-70% dry. This initial air-drying prevents heat damage and speeds up the process.
Apply a heat protectant evenly through your damp hair. This crucial step shields your strands from the high temperatures of your blow dryer.
Distribute a volumizing mousse or spray, focusing on the roots. Comb it through with a wide-tooth comb to ensure even coverage from root to tip.
Step 2: Section for Success
Using a comb, create clean, horizontal sections across your head. Start by sectioning off the top half or two-thirds of your hair and secure it with clips. This allows you to work systematically and focus on one area at a time.
Begin with the bottom-most section, typically at the nape of your neck. This systematic approach ensures every strand gets adequate attention and heat.
Step 3: Rough Dry the Foundation
Before using your brush, do a quick rough dry. Using your hands and the blow dryer on a medium heat setting, tumble dry your hair until it’s about 80% dry. This helps to lift the roots and remove more moisture quickly.
Point the nozzle downwards to smooth the cuticle and minimize frizz during this stage. Avoid over-drying any section at this point.
Step 4: Master the Nape Area
Unclip the lowest section of your hair. Take a small subsection, about the width of your round brush. Place the brush at the roots, underneath the hair.
Pull the hair taut with the brush, directing the airflow from your blow dryer (with the nozzle attached) down the hair shaft. Roll the brush outwards and upwards at the ends to create a slight curl or bevel.
Pro Tip: For maximum root lift, lift the brush directly upwards at the roots while directing heat. Hold for a few seconds before slowly gliding the brush down the hair.
Step 5: Work Up the Sides
Move to the next section of hair, working your way up from the nape to the crown. Repeat the same technique, taking small subsections.
Focus on creating tension with the brush and directing the heat towards the roots. Over-directing the hair (pulling it in the opposite direction from where it naturally falls) as you dry will amplify volume.
Step 6: Tackle the Crown and Top Layers
Release the top section of your hair. For the crown, take a horizontal section and place the round brush underneath, at the roots.
Lift the hair straight up, towards the ceiling, while directing heat at the roots. This technique is key for creating significant volume at the very top of your head.
Repeat this motion, slowly pulling the brush through to the ends, ensuring the hair is fully dry and has a slight bend.
Step 7: Frame Your Face
For the front sections around your face, consider your desired style. If you want a soft, face-framing look, roll the hair gently under with the round brush.
Direct the air downwards and away from your face for a softer effect. If you prefer more volume at the front, over-direct these sections upwards and back before rolling them under.
Step 8: Set the Volume with a Cool Shot
Once your entire head is dry, switch your blow dryer to the cool shot setting. Revisit each section, especially at the roots, and blast with cool air.
Hold the hair up at the roots with your fingers or the brush while applying the cool air. This step helps to set the style and close the hair cuticles, locking in shine and volume for longer.
Step 9: Finish with Finesse
Gently run your fingers through your hair to break up any stiff sections and arrange your style. Avoid over-brushing, as this can flatten the volume you’ve just created.
Spritz a light-hold hairspray over your finished style to keep everything in place without stiffness. For extra texture and definition, a small amount of texturizing spray can be applied to the ends.
Common Mistakes to Avoid
Over-Drying Soaking Wet Hair
Attempting to blow dry hair that is dripping wet takes an excessive amount of time and exposes your hair to unnecessary heat for longer periods. This can lead to damage, frizz, and a dull finish. Always towel dry first until your hair is 60-70% dry.
Skipping Heat Protectant
Neglecting to use a heat protectant is a direct path to damaged, brittle hair. Blow dryers, especially on higher settings, can strip moisture and break down hair proteins. A good protectant creates a barrier, safeguarding your strands.
Using the Wrong Brush Size
A brush that is too large won’t give you enough tension and lift for short hair, resulting in flat roots. A brush that is too small can create overly tight curls or make it difficult to maneuver. For most bobs, a medium-sized round brush (around 1.5-2 inches in diameter) is ideal for volume and control.
Not Sectioning Your Hair
Trying to blow dry your entire head at once is a recipe for uneven drying, tangles, and frustration. Sectioning your hair allows you to focus heat and tension precisely where needed, ensuring every part of your bob receives proper attention for maximum volume and smoothness.
Troubleshooting
My Hair is Still Flat
If your bob lacks volume, you might not be getting enough lift at the roots. Ensure you are applying volumizing product directly to the roots and lifting the hair straight up with your brush as you blow dry. Over-directing the hair in the opposite direction of its fall before drying also helps create lasting lift.
Frizz Around the Edges
Frizz often occurs when cuticles are not smoothed down. Make sure your blow dryer nozzle is always pointed downwards, following the direction of hair growth. Avoid using too high a heat setting, which can rough up the cuticle, and finish each section with a cool shot to seal it.
Hair Feels Stiff or Crunchy
This is usually a sign of using too much product. Volumizing mousses and sprays are potent, so a little goes a long way. Start with a small amount and add more only if absolutely necessary. Ensure products are distributed evenly, avoiding concentrated clumps.
Key Takeaways
- Always begin with hair that is 60-70% towel-dried to minimize heat exposure.
- Heat protectant and a volumizing product at the roots are non-negotiable for protection and lift.
- Sectioning your hair is crucial for systematic drying and achieving consistent volume.
- Use a medium-sized round brush and direct the nozzle downwards for smooth, voluminous results.
- Over-directing hair at the roots and finishing with a cool shot are key techniques for lasting volume.
- Avoid common mistakes like over-drying soaking wet hair or skipping heat protectant.
Frequently Asked Questions
What’s the best product for volume in short hair?
For short hair, a lightweight volumizing mousse applied to the roots of damp hair works wonders. Volumizing sprays or root-lifting powders can also provide excellent lift without weighing down your bob. Experiment to find what best suits your hair type.
How often should I wash short hair to maintain volume?
Washing frequency depends on your hair type and lifestyle. Generally, short hair can be washed every 1-3 days. Excessive washing can strip natural oils, while too little can lead to product buildup, both of which can flatten volume. Use a dry shampoo on non-wash days to refresh roots and add lift.
Can I achieve volume without a round brush?
While a round brush is ideal for creating smooth, lasting volume, you can achieve some lift using a paddle brush or even just your fingers. Rough dry upside down for initial root lift, then use a paddle brush with tension, lifting sections at the roots. It won’t be as polished, but it will add body.
What temperature should my blow dryer be on?
A medium heat setting is generally best for blow-drying short hair for volume. High heat can cause damage and frizz, especially on fine hair. The medium setting allows for effective drying and styling without over-exposing your hair to extreme temperatures. Always finish with a cool shot to set the style.
Our Top Recommended Finds
- Professional Ionic Blow Dryer: An ionic dryer reduces frizz and speeds up drying time, making your styling routine more efficient and hair smoother.
- Ceramic Round Brush (1.5-inch): The ceramic barrel heats up quickly and evenly, helping to shape and add shine, while the 1.5-inch size is perfect for creating volume and bends in bob haircuts.
- Lightweight Volumizing Mousse: A good mousse provides hold and lift at the roots without making your hair feel sticky or crunchy, crucial for maintaining natural movement in a bob.
Mastering Your Voluminous Bob
Embracing a voluminous bob is more than just a style; it’s a statement of confidence and elegance. With these practical steps, you now have the tools and knowledge to transform your short hair into a dynamic, bouncy masterpiece every single day.
Don’t let flat hair dictate your morning mood any longer. Take these techniques to your bathroom mirror, practice them, and watch as your bob comes to life with incredible lift and movement. Your perfect hair day starts now.