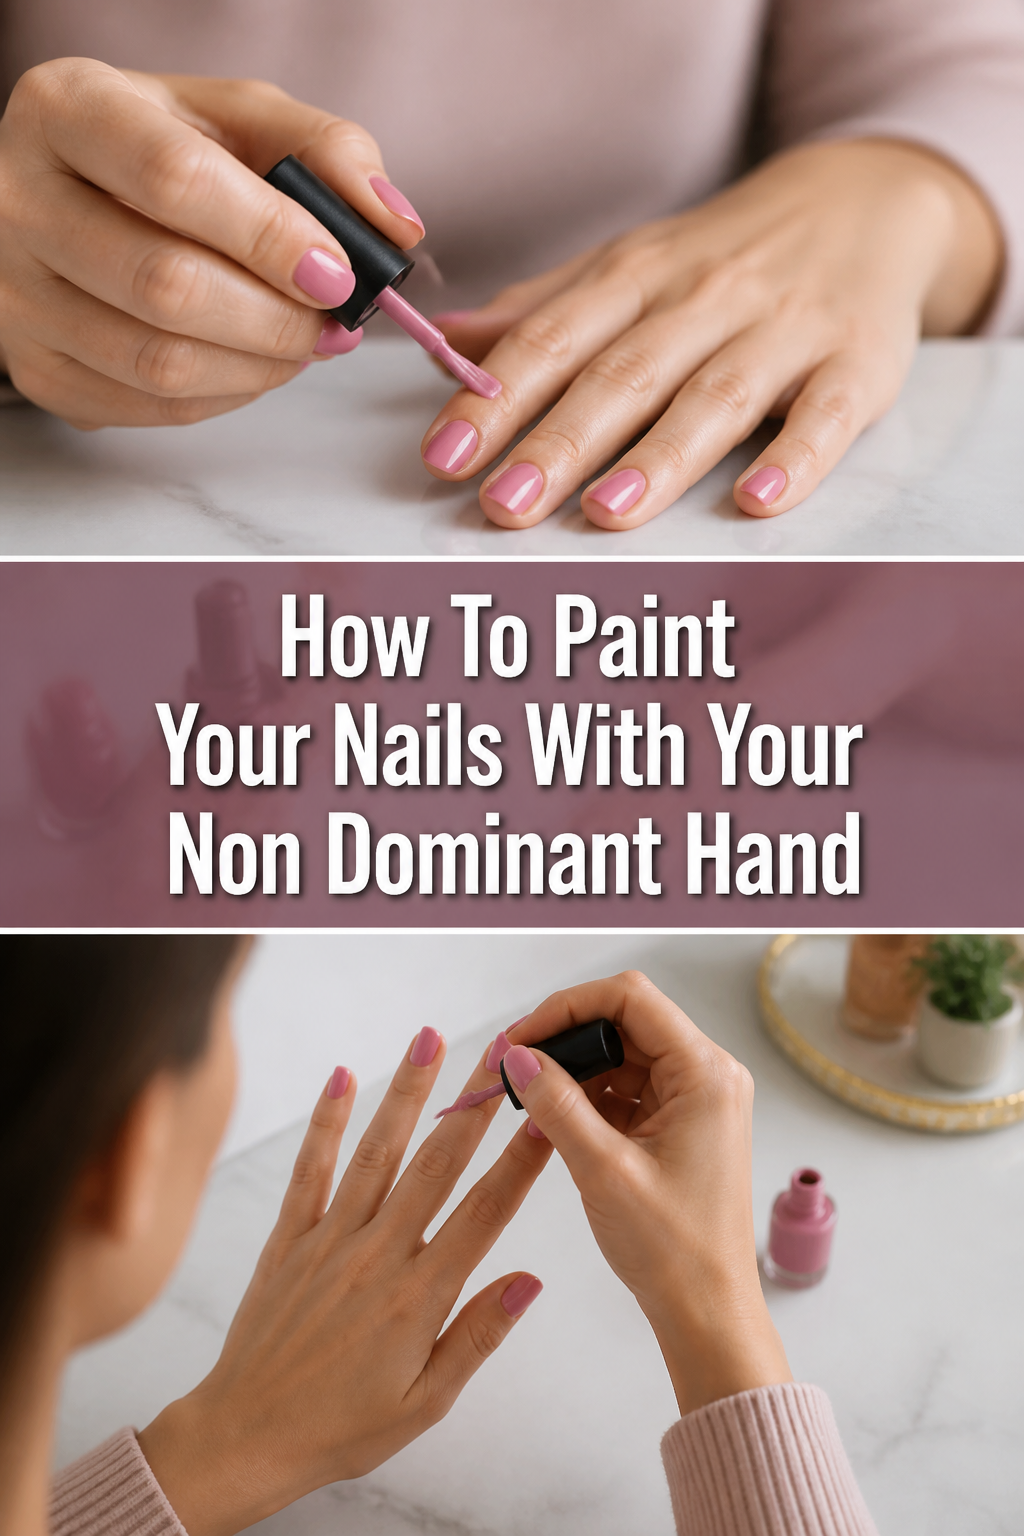
💅 How To Paint Your Nails With Your Non Dominant Hand
Painting your dominant hand’s nails can feel like an impossible feat.
I remember trying it for the first time, ending up with polish everywhere but my nails.
This guide shares the techniques I learned to achieve a salon-worthy look, even with my less-than-steady left hand.

Quick Overview
This guide will walk you through preparing your nails, mastering application techniques, and fixing any smudges. You’ll gain the confidence to paint both hands flawlessly.
- Time needed: 30-45 minutes (including drying time)
- Difficulty: Intermediate
- What you’ll need: Nail polish remover, cotton pads, cuticle pusher, nail file, base coat, nail polish, top coat, small brush or cotton swab, acetone.
Step-by-Step Instructions
Step 1: Gather Your Tools and Prep Your Nails
Collect all your supplies before you begin. Having everything within reach prevents interruptions and keeps your focus.
Ensure your workspace is well-lit and comfortable. A flat surface is ideal for stability when working with your non-dominant hand.
Remove any old polish with a cotton pad soaked in nail polish remover. Push back cuticles gently and file your nails to your desired shape.
Pro Tip: Clean nails are crucial. Oils or residue can prevent polish from adhering properly, leading to chips. Wipe nails with a bit of remover even if they’re bare.
Step 2: Apply a Base Coat
Start with a thin layer of base coat on each nail. This step protects your natural nails from staining and helps the color last longer.
Allow the base coat to dry completely. This usually takes just a minute or two, depending on the product.
A fully dry base coat provides a smooth, tacky surface for your color application. It’s a foundational step for a long-lasting manicure.
Step 3: Master the “Anchor and Glide” Technique
Rest your dominant hand (the one being painted) on a stable surface. This steadiness is key for your non-dominant hand.
Anchor your non-dominant hand. You can brace your painting hand’s pinky or ring finger against the table or against your dominant hand itself.
Hold the polish brush firmly but not too tightly. Your non-dominant hand will benefit from controlled, deliberate movements.
Pro Tip: Practice holding the brush and making strokes on a piece of paper first. This helps build muscle memory and confidence without the pressure of actual nail painting.
Step 4: Load the Brush Correctly
Wipe one side of the brush against the neck of the polish bottle. This removes excess polish, preventing floods.
Keep a small bead of polish on the other side of the brush. This is the perfect amount for a single nail.
Too much polish leads to messy application and longer drying times. Too little results in streaky coverage.
Step 5: Paint Your Nails with Precision
Place the brush near the cuticle, leaving a tiny gap. Gently push the brush towards the cuticle without touching the skin.
Drag the brush in a straight line up the center of the nail. This creates your first stripe.
Follow with two more strokes, one on each side, overlapping slightly with the center stripe. Aim for three strokes per nail.
Repeat this process for all nails on your dominant hand. Take your time with each one.
Pro Tip: Rotate the hand you’re painting, rather than trying to contort your non-dominant hand. Adjusting the angle of your fingers makes reaching all edges much easier.
Step 6: Apply a Second Coat (If Needed)
Wait for the first coat to dry completely before applying a second. This prevents smudging and uneven texture.
Repeat the three-stroke application method for the second coat. This layer builds opacity and evens out the color.
Most polishes look best with two thin coats. Some highly pigmented colors might only need one, but two generally provides better wear.
Step 7: Clean Up Any Mistakes
Dip a small, flat brush or a pointed cotton swab into acetone or nail polish remover.
Carefully trace around the edges of your nails to remove any polish that got onto your skin.
This cleanup step makes a huge difference in the finished look. Don’t skip it; precision comes with practice.
Step 8: Finish with a Top Coat
Apply a layer of top coat over your dry color. This seals the polish, adds shine, and prevents chipping.
Extend the top coat slightly over the free edge of your nail. This “caps” the polish and helps it last longer.
Allow ample drying time. A quick-dry top coat can significantly speed up the process and reduce the risk of smudges.
Common Mistakes to Avoid
Applying Too Much Polish
Loading too much polish onto the brush is a common pitfall. This leads to thick, gloopy coats that take forever to dry and are prone to smudging.
Instead, wipe one side of the brush against the bottle neck. You want just enough polish to create a small bead on the other side for a single nail.
Painting Too Quickly
Rushing through the process, especially with your non-dominant hand, often results in messy edges and uneven coats. Patience is a virtue here.
Take your time with each stroke. Focus on control and precision rather than speed. Slow, deliberate movements yield better results.
Skipping Base and Top Coats
Some people omit base and top coats, thinking they are unnecessary. These steps are crucial for the longevity and appearance of your manicure.
A base coat protects your nails and helps color adhere. A top coat seals the polish, adds shine, and prevents chips. Always use both for a professional finish.
Not Letting Coats Dry
Applying subsequent layers of polish before the previous one is fully dry is a recipe for disaster. This causes smudges, bubbles, and an uneven finish.
Give each coat a few minutes to dry to the touch before applying the next. Quick-dry products can help, but patience is still important.
Troubleshooting
Streaky Polish
If your polish looks streaky, it often means you either didn’t load enough polish onto the brush or your coats were too thin.
Ensure you have a small bead of polish on the brush for each nail. Apply two thin, even coats, allowing each to dry completely before the next.
Bubbles in Polish
Bubbles can appear if you shake the polish bottle vigorously, apply polish too thickly, or paint in a humid environment.
Roll the polish bottle between your palms instead of shaking. Apply thin coats and ensure each layer dries fully. Avoid painting near fans or in steamy rooms.
Polish on Cuticles and Skin
Even with careful application, some polish might get onto your skin or cuticles. This is especially common when using your non-dominant hand.
Immediately after painting each nail, use a small brush or a pointed cotton swab dipped in acetone to clean up any errant polish. This is easier when the polish is still wet.
Key Takeaways
- Prep your nails meticulously: clean, file, and push back cuticles.
- Always use a base coat to protect nails and a top coat for longevity and shine.
- Anchor your painting hand and rotate the hand being painted for better control.
- Load the brush with just enough polish to avoid thick, messy coats.
- Apply polish in thin, even layers, allowing each coat to dry fully.
- Don’t rush; patience and precision are more important than speed.
- Clean up any mistakes immediately with a small brush and acetone for a crisp finish.
Frequently Asked Questions
How can I make my non-dominant hand steadier?
Practicing regularly is the best way to improve steadiness. Try resting your pinky finger of your painting hand on your dominant hand or the table for extra support. Deep breaths can also help calm nerves and reduce tremors.
Is it better to use a specific type of nail polish brush?
Some polish brands offer wider, flatter brushes that can make application easier, especially for beginners. However, the technique is more important than the brush itself. A good quality, medium-sized brush that isn’t too stiff or flimsy works well.
How long should I wait between coats?
A general rule is to wait 2-3 minutes between each coat of colored polish. For the top coat, wait at least 5 minutes after the last color coat. If you’re using a quick-dry polish or top coat, these times can be shorter, but always ensure the previous layer is dry to the touch.
What if I still struggle with my non-dominant hand?
Don’t get discouraged! It takes time and practice. Consider painting one nail at a time and taking breaks. You might also try starting with lighter, sheerer polishes, as mistakes are less noticeable with them. Gel polishes, which don’t dry until cured, can also offer more time for cleanup.
Our Top Recommended Finds
- Nail Polish Corrector Pen: This pen-like tool has a fine tip pre-soaked in remover, perfect for precise cleanup around the cuticles. It makes tidying up quick and easy.
- Quick-Dry Top Coat: A good quick-dry top coat dramatically cuts down waiting time, reducing the chance of smudges. It’s a game-changer for impatient painters.
- Cuticle Oil Pen: After all that hard work, hydrate your cuticles. A pen applicator makes it mess-free and keeps your manicure looking fresh.
Embrace Your Inner Nail Artist
You now have the tools and knowledge to conquer the challenge of painting your nails with your non-dominant hand. It might feel awkward at first, but every stroke builds confidence and skill.
The satisfaction of a perfectly painted dominant hand, done entirely by you, is truly rewarding. This isn’t just about polish; it’s about mastering a new skill and appreciating your own effort.
So, gather your polishes, find a quiet moment, and give it a try today. Your perfectly polished nails are waiting.