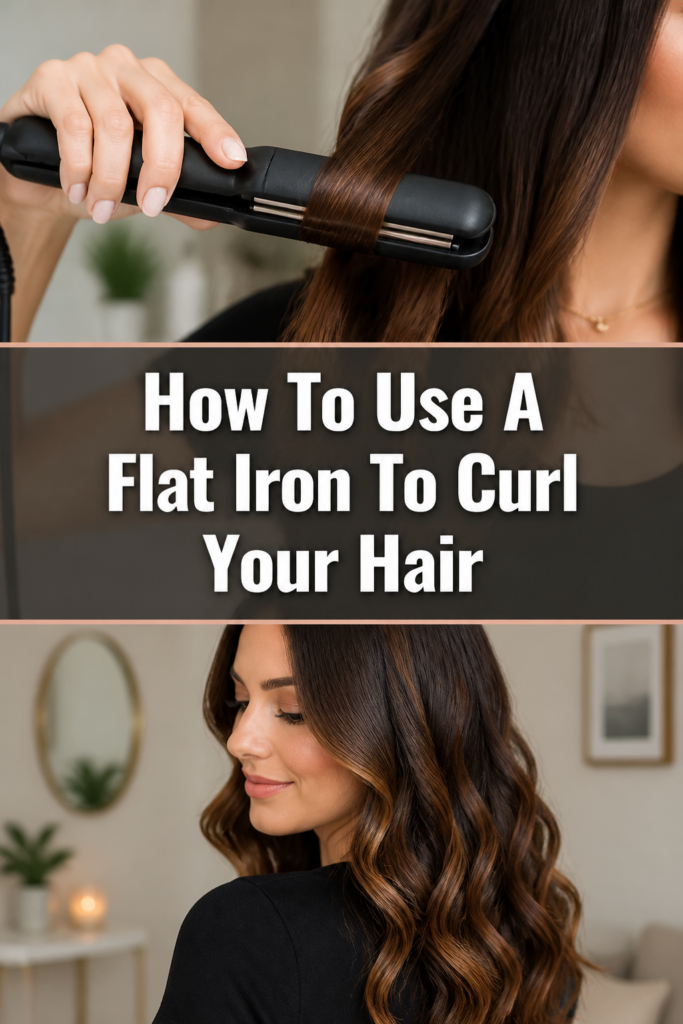
💁♀️ How To Use A Flat Iron To Curl Your Hair
For years, many of us only saw our flat irons as tools for sleek, straight hair.
I remember being amazed the first time I watched someone effortlessly create bouncy curls with theirs, transforming a straightening tool into a versatile styling wand.
This guide draws on years of personal experimentation and professional advice to help you master that very technique.
Quick Overview
This guide will equip you to transform your flat iron into a curling marvel, creating beautiful waves and curls.
You’ll learn the essential techniques, product choices, and finishing touches for long-lasting results.
- Time needed: 20-45 minutes (depending on hair length and density)
- Difficulty: Intermediate
- What you’ll need: Flat iron, heat protectant, hair clips, comb, hairspray
Step-by-Step Instructions
Step 1: Prepare Your Hair
Start with clean, dry hair. Any dampness can cause damage when heat is applied.
Ensure your hair is free of tangles by gently combing through it from ends to roots.
Apply a generous amount of heat protectant spray evenly throughout your hair. This crucial step shields your strands from heat damage.
Pro Tip: Heat protectant not only prevents damage but also helps your curls last longer by creating a barrier. Don’t skip it!
Step 2: Section Your Hair
Divide your hair into manageable sections using hair clips. Begin by parting your hair horizontally from ear to ear, clipping up the top half.
Work on the bottom section first. For very thick hair, you might need to create three or four horizontal sections.
Smaller sections mean more defined curls, while larger sections create looser waves.
Step 3: Choose Your Heat Setting
Select the appropriate heat setting on your flat iron. Fine or damaged hair requires lower temperatures (250-300°F).
Medium hair types can use a mid-range setting (300-350°F).
Thick or coarse hair may need higher temperatures (350-400°F), but always start lower and increase if necessary.
Step 4: Take a Small Section
Unclip a small section of hair from your lowest working area. The size of this section will determine the curl’s tightness.
For tight curls, use sections about 1 inch wide. For looser waves, aim for 1.5-2 inch sections.
Hold the section taut, away from your head.
Step 5: Position the Flat Iron
Open your flat iron and place the section of hair between the plates, close to the root. Leave about an inch or two from the scalp to avoid a harsh crimp.
The angle at which you hold the iron is key. For curls that frame your face, position the iron so the section of hair is over the top plate and under the bottom plate, with the iron angled slightly downward.
Step 6: Clamp, Twist, and Glide
Clamp the flat iron gently but firmly onto the hair section. Now, here’s the magic: rotate the flat iron 180 degrees (a half turn) away from your face.
Keep the iron rotated and slowly glide it down the hair shaft, maintaining consistent pressure. The slower you glide, the more defined the curl will be.
As you glide, the hair wraps around the barrel of the iron, forming a curl.
Pro Tip: Keep your hand and the flat iron moving in one fluid motion. Stopping can create creases or uneven heat distribution, leading to less defined curls.
Step 7: Release and Cool
Once you reach the end of the hair section, release the flat iron. Do not immediately touch or pull the fresh curl.
Allow the curl to cool completely in its coiled shape. This cooling period is vital for setting the curl and ensuring it lasts.
You can gently cup the warm curl in your palm for a few seconds to help it set.
Step 8: Repeat Through All Sections
Continue this process, working your way through all the sections of your hair.
Remember to consistently curl all sections away from your face for a cohesive, flattering look.
Once you finish a horizontal section, unclip the next one and repeat the curling steps.
Step 9: Finish and Set
After all your hair is curled and cooled, gently finger-comb through the curls to break them up and create a softer, more natural look.
Avoid using a brush, as this can turn curls into frizz. If you prefer a more defined look, skip the finger-combing.
Finally, finish with a light mist of hairspray to lock in your curls and provide long-lasting hold.
Common Mistakes to Avoid
Using Too Much Heat
Applying excessive heat to your hair is a common mistake. High temperatures can cause significant damage, leading to dryness, breakage, and split ends.
Always start with the lowest effective heat setting for your hair type and only increase it if absolutely necessary.
Not Using Heat Protectant
Skipping heat protectant is like going out in the sun without sunscreen. Your hair needs a barrier against direct heat.
Without it, your hair is vulnerable to intense damage, making it look dull and unhealthy over time.
Clamping Too Tightly or Stopping
Clamping the flat iron too tightly or pausing it mid-glide can create harsh creases in your curls.
This results in an unnatural, crimped appearance instead of a smooth, flowing curl. Maintain a consistent, gentle grip and a continuous motion.
Curling Towards Your Face
While curling some sections towards your face can create specific styles, consistently doing so often makes your hair appear to close in on your features.
For a universally flattering and open look, always aim to curl sections away from your face, especially those around the front.
Troubleshooting
Curls Don’t Hold
If your curls fall flat quickly, several factors could be at play. Your hair might be too clean or soft, lacking the texture to hold a curl.
Try using a texturizing spray or dry shampoo before curling. Ensure you’re allowing the curls to cool completely before touching them, as this is crucial for setting.
Hair Looks Frizzy
Frizz often occurs when hair lacks moisture or when it’s exposed to humidity after styling. Ensure your hair is completely dry before curling.
Use an anti-frizz serum or a light hair oil after curling, and finish with a humidity-resistant hairspray to seal the style.
Creases or Kinks in Hair
Creases are usually a result of stopping the flat iron during the glide or clamping too hard.
Practice a smooth, continuous motion from root to tip, maintaining an even, gentle pressure. Ensure your flat iron plates are clean and smooth.
Key Takeaways
- Always apply heat protectant before using your flat iron.
- Section your hair into manageable pieces for consistent results.
- Choose the correct heat setting based on your hair type.
- Rotate the flat iron 180 degrees away from your face and glide smoothly.
- Allow curls to cool completely before touching them to ensure they set.
- Finish with hairspray for lasting hold and a polished look.
Frequently Asked Questions
Can I curl short hair with a flat iron?
Absolutely! Curling short hair with a flat iron is very achievable. Use a flat iron with narrower plates, ideally 1 inch or less, to better grip shorter sections of hair. Focus on smaller sections and a quick glide.
What’s the best flat iron size for curling?
For versatile curling, a 1-inch to 1.25-inch flat iron is ideal. Smaller plates (0.5-0.75 inches) are better for tighter curls or very short hair, while larger plates (1.5-2 inches) create looser, beachy waves on longer hair.
How do I make my flat iron curls last longer?
To maximize curl longevity, start with day-old hair or use a texturizing spray. Always use heat protectant and hairspray. Allow each curl to cool completely before touching it, and consider pinning up sections while they cool for extra hold.
Can I curl my hair with a flat iron without damaging it?
Yes, with proper technique and products. Always use heat protectant, choose the lowest effective heat setting, avoid going over the same section multiple times, and ensure your hair is completely dry before styling. Regular deep conditioning treatments also help maintain hair health.
Our Top Recommended Finds
- Quality Heat Protectant Spray: Essential for shielding your hair from thermal damage. Look for one that also offers conditioning benefits.
- Sectioning Clips: These are indispensable for neatly dividing your hair, making the curling process much more efficient and precise.
- Ceramic or Titanium Flat Iron (1-1.25 inch): A versatile size with plates that heat evenly, reducing snagging and providing consistent curls.
Embrace Your Inner Stylist Today
Transforming your flat iron from a straightening tool to a curling wizard is a skill that opens up a world of styling possibilities.
With practice, patience, and the right techniques, you can achieve beautiful, salon-worthy curls right at home.
Don’t wait to experiment with different curl sizes and styles. Grab your flat iron and start creating stunning looks that will turn heads and boost your confidence.