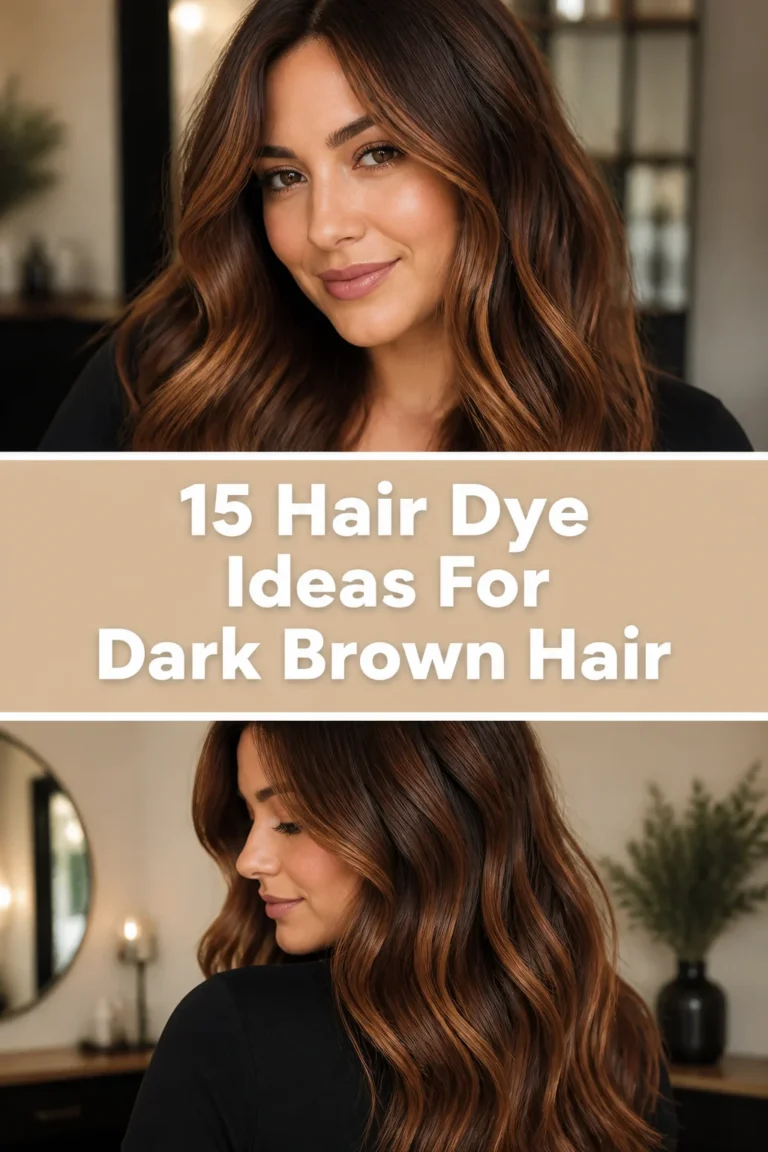
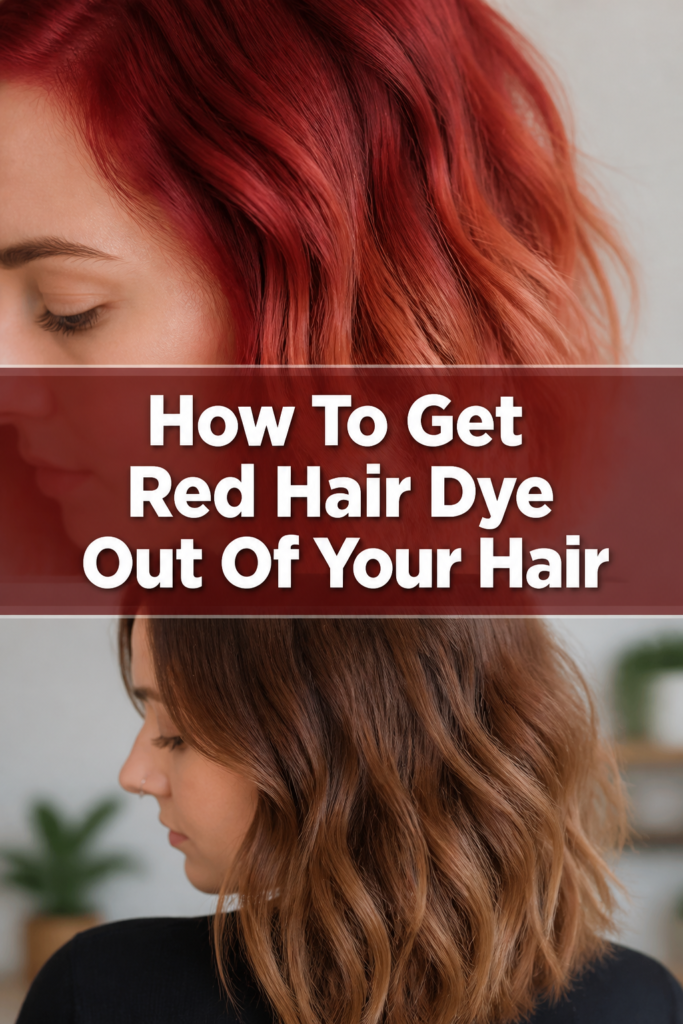
🎨 How To Get Red Hair Dye Out Of Your Hair
Getting red hair can feel like a bold, exciting change. Sometimes, though, that vibrant shade isn’t quite what you envisioned.
Perhaps it’s too bright, too orange, or simply not you. I’ve been there myself, staring at a fiery red reflection wondering how to hit the undo button.
This guide shares practical steps and insights, born from personal experience and research, to help you safely fade or remove that unwanted red.
Quick Overview
This guide will walk you through gentle and more intensive methods to remove red hair dye, focusing on hair health and realistic expectations. You’ll learn how to gradually fade the color, correct unwanted tones, and know when to seek professional assistance.
- Time needed: Several hours to a few weeks (depending on method and desired outcome)
- Difficulty: Intermediate
- What you’ll need: Clarifying shampoo, Vitamin C powder, deep conditioner, color remover (non-bleach), toning products, gloves, old towels.
Step-by-Step Instructions
Step 1: Assess Your Hair and the Dye
Before you begin, take a moment to understand your starting point. Is your hair healthy or already compromised? This will influence which methods are safest for you.
Consider the type of red dye you used. Semi-permanent dyes are generally easier to remove than permanent ones. Knowing this helps set realistic expectations for the process ahead.
Pro Tip: Permanent dyes penetrate deeper into the hair shaft, making them more resistant to removal. Semi-permanent dyes coat the hair, allowing for easier fading.
Step 2: Gather Your Essential Tools
Having everything ready before you start saves time and prevents mid-process scrambling. Collect all your products and protective gear.
You will need clarifying shampoo, Vitamin C powder, a non-metallic bowl and spoon, deep conditioning masks, gloves, old towels, and potentially a color remover kit. A shower cap can also be very useful.
Step 3: Start with Clarifying Shampoo Washes
This is the gentlest first step to begin fading red dye. Clarifying shampoos are designed to strip away buildup, including some surface-level dye molecules.
Wash your hair repeatedly with clarifying shampoo. Lather thoroughly and rinse with warm water, which helps open the hair cuticle. You might need to do this several times over a few days.
Pro Tip: Hot water can encourage the hair cuticle to open slightly more, allowing dye molecules to escape. Follow with a cool rinse to help seal the cuticle.
Step 4: Try a Vitamin C Treatment
Vitamin C is a natural acid that can help break down dye molecules without causing significant damage. This method is effective for fading, especially with semi-permanent dyes.
In a non-metallic bowl, mix several crushed Vitamin C tablets or pure Vitamin C powder with clarifying shampoo until it forms a paste. Apply this paste generously to damp hair, ensuring even saturation.
Cover your hair with a shower cap and leave it on for 30 minutes to an hour. Rinse thoroughly and follow with a deep conditioner. You can repeat this treatment every few days.
Step 5: Consider a Non-Bleach Color Remover
If gentle methods aren’t enough, a non-bleach color remover is the next step. These products shrink the artificial dye molecules, allowing them to be rinsed out.
Always perform a strand test and a patch test before full application. This checks for allergic reactions and predicts how your hair will react. Follow the product instructions carefully, as timing is crucial.
Apply the remover to dry, unwashed hair. Ensure even coverage and monitor your hair closely. Rinse extensively for at least 15-20 minutes to remove all the shrunken dye molecules.
Step 6: Deep Condition, Deep Condition, Deep Condition
Every dye removal attempt, even gentle ones, can be drying to your hair. Deep conditioning is non-negotiable to maintain hair health.
After every fading or removal treatment, apply a rich, moisturizing deep conditioner or hair mask. Leave it on for the recommended time, or even longer for an intensive treatment.
Rinse with cool water to help seal the cuticle and lock in moisture. This step helps prevent damage, breakage, and keeps your hair soft.
Step 7: Neutralize Unwanted Tones with Toner
After removing red dye, you might be left with orange, yellow, or even pinkish undertones. Toning helps to neutralize these colors.
Understand the color wheel: Green neutralizes red, blue neutralizes orange, and purple neutralizes yellow. For residual orange, a blue toner or blue-tinted shampoo will be most effective.
Apply the toner according to its instructions. These products are designed to deposit opposite color pigments to cancel out unwanted hues. Be careful not to leave it on too long, or you might end up with blue or green hair.
Step 8: Seek Professional Help for Stubborn Cases
Sometimes, home methods aren’t enough, or you might encounter unexpected results. Knowing when to call in the experts is important for your hair’s health.
If your red dye is particularly stubborn, your hair is showing signs of damage, or you’re struggling with uneven color, a professional stylist can help. They have access to stronger, salon-grade products and expertise.
A stylist can assess your hair’s condition and formulate a plan to safely remove the remaining red or transition to your desired shade. They can prevent further damage.
Step 9: Practice Patience and Repeat if Necessary
Removing red dye is rarely a one-and-done process. It often requires multiple gentle treatments and a good deal of patience.
Wait a few days between treatments to give your hair a break. Continuously stripping and processing can lead to severe damage. Observe how your hair responds and adjust your approach.
Remember that gradual fading is much safer than aggressive removal. Your hair’s health should always be the priority throughout this journey.
Common Mistakes to Avoid
Rushing the Process
Attempting to remove red dye too quickly, especially with strong chemicals, can severely damage your hair. This leads to dryness, breakage, and a compromised texture. Give your hair time to recover between treatments, and understand that fading red is a marathon, not a sprint.
Over-Bleaching Your Hair
Bleach is a powerful tool, but it’s often too harsh for initial red dye removal. Using bleach prematurely or incorrectly can leave your hair brittle, gummy, or even cause it to melt. It can also drive red pigments deeper, making them harder to remove without creating an undesirable orange hue.
Ignoring Hair Health
Neglecting to deep condition or moisturize your hair during the removal process is a recipe for disaster. Each treatment, even gentle ones, can strip natural oils. Consistent conditioning prevents dryness, frizz, and breakage, ensuring your hair remains as healthy as possible.
Not Patch Testing
Skipping the patch test for color removers or toners is a significant risk. You might have an allergic reaction, or the product could react unexpectedly with your specific hair type or residual dye. Always apply a small amount to an inconspicuous area first.
Troubleshooting
Hair Feels Dry or Damaged
If your hair feels rough, brittle, or overly dry after a treatment, it’s a sign of moisture loss. Immediately cease any further dye removal attempts. Focus entirely on intensive conditioning treatments. Use deep conditioning masks, leave-in conditioners, and hair oils daily. Consider a protein treatment if your hair feels overly elastic or gummy, as this can indicate protein loss.
Still Too Orange or Yellow
Residual orange or yellow tones are common after red dye removal. This means the red pigment has been lifted, but underlying warm tones are now exposed. Revisit Step 7 and use a blue-based toner for orange, or a purple-based toner for yellow. Ensure even application and monitor closely to avoid over-toning. You might need to repeat toning every few washes.
Uneven Color Results
If parts of your hair are lighter or darker, or have different undertones, it often means the product wasn’t applied evenly or processed differently. For minor unevenness, targeted application of a toner or another gentle fading treatment might help. For significant patchiness, especially if it’s very noticeable, it’s best to consult a professional stylist. They can assess the varying porosity and pigment levels.
Key Takeaways
- Patience is crucial; red dye removal is a gradual process.
- Always prioritize your hair’s health with consistent deep conditioning.
- Start with the gentlest methods like clarifying shampoo and Vitamin C.
- Perform patch and strand tests for all new products, especially color removers.
- Understand the color wheel to effectively neutralize unwanted orange or yellow tones.
- Don’t hesitate to seek professional help for stubborn dye or damaged hair.
Frequently Asked Questions
Can I go back to blonde immediately after removing red dye?
Going directly from red to blonde at home is very difficult and risky. Red dye often leaves behind stubborn orange or yellow undertones. Attempting to bleach these out immediately can lead to severe damage or an undesirable brassy blonde. It’s best to fade the red as much as possible, neutralize undertones, and then slowly lighten over time, ideally with professional guidance.
Will red dye ever completely leave my hair?
With permanent red dye, it’s challenging to remove every last molecule. While you can significantly fade it and neutralize most of the pigment, a slight underlying warmth might always remain. Semi-permanent dyes are easier to wash out completely over time. Realistic expectations are key for a satisfying outcome.
How long should I wait between dye removal treatments?
Always allow your hair to rest and recover between treatments. For gentle methods like clarifying shampoo or Vitamin C, you can wait 2-3 days. For stronger methods like color removers, wait at least a week, and only proceed if your hair feels healthy. Deep condition religiously during these waiting periods.
What if my hair turns green after trying to remove red?
This usually happens if you apply a blue or green-based product to try and neutralize residual red or orange. If your hair is still quite red or orange and you apply a green toner, the colors can mix to create an olive or muddy green. If this happens, a red-tinted shampoo or a very diluted semi-permanent red dye (like a strawberry blonde toner) can sometimes help to re-introduce warmth and cancel out the green. Professional help is recommended for significant green tones.
Our Top Recommended Finds
- Clarifying Shampoo: Look for formulas specifically designed to remove buildup and residues. These are your first line of defense.
- Non-Bleach Color Remover: Opt for a kit that works by shrinking dye molecules rather than stripping the hair with harsh bleach. Always read reviews.
- Intensive Deep Conditioning Mask: A rich, reparative mask with ingredients like keratin, argan oil, or shea butter is essential to restore moisture and strength.
Reclaim Your True Color Confidence
Navigating the world of hair dye removal can feel overwhelming, but with the right approach, you can successfully fade that unwanted red. Remember, your hair’s health is paramount, so always choose the gentlest methods first and proceed with caution.
You have the power to transform your hair and feel good about your reflection again. Take these steps today, embrace the process, and soon you’ll be rocking a shade that truly makes you smile.