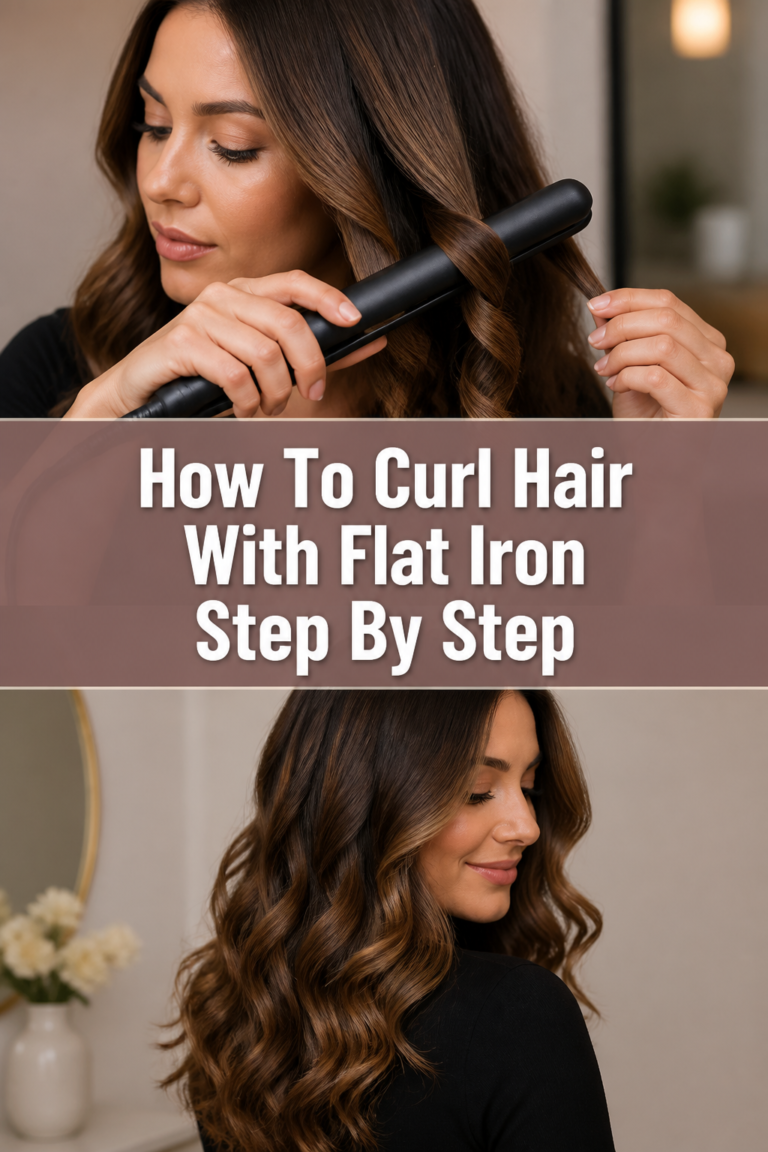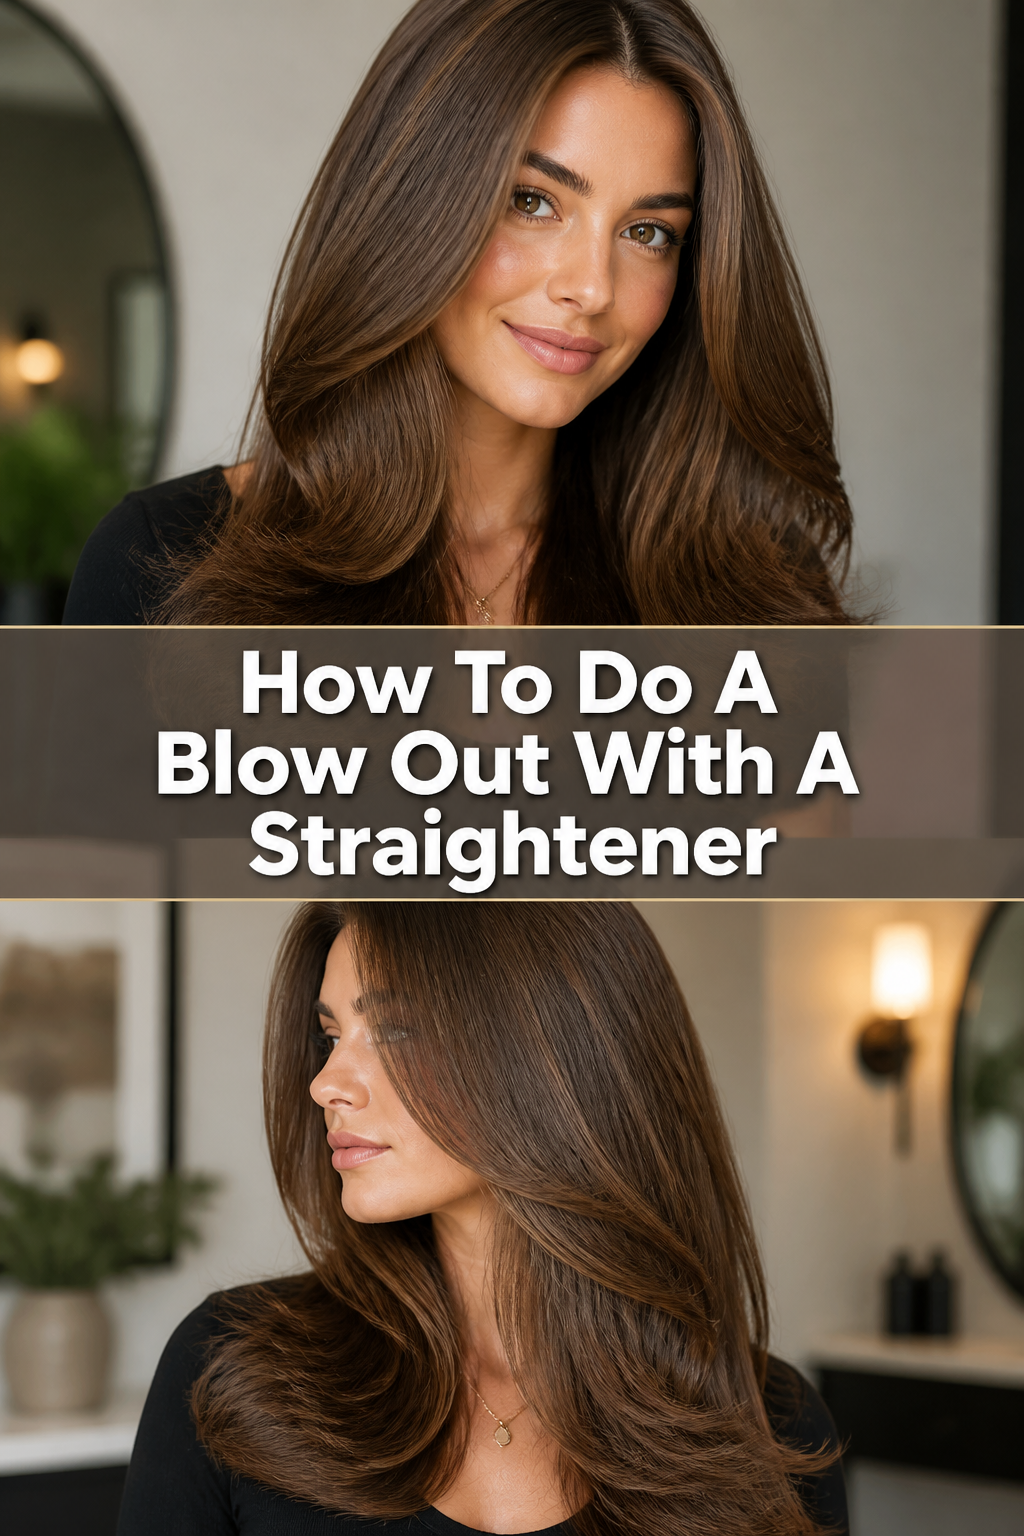
💁♀️ How To Do A Blow Out With A Straightener
Dreaming of salon-worthy hair without the fuss of a traditional blow dryer?
Achieving that bouncy, voluminous look with just a flat iron might sound like a paradox, but it’s entirely possible.
I’ve refined this technique over countless mornings, transforming flat strands into a vibrant, full style, and now I’m sharing my exact method.

Quick Overview
This guide will equip you with the skills to create a beautiful, voluminous blowout using only a straightener. You’ll learn how to add body, smooth frizz, and create movement, all from the comfort of your home.
- Time needed: 30-60 minutes (depending on hair length and thickness)
- Difficulty: Intermediate (requires some practice for mastery)
- What you’ll need: A quality straightener, heat protectant spray, sectioning clips, a paddle brush, and a light-hold setting spray.
Step-by-Step Instructions
Step 1: Prepare Your Canvas
Start with clean, dry hair. For the best results, wash and condition your hair, then let it air dry completely or use a blow dryer on a cool setting until it’s 100% dry.
Any residual dampness can damage your hair and prevent the style from holding.
Gently detangle your hair using a wide-tooth comb or a paddle brush to remove any knots.
Step 2: Section for Success
Proper sectioning is key to ensuring every strand gets attention and your blowout looks uniform.
Use hair clips to divide your hair into manageable sections. Start by creating a horizontal part from ear to ear, clipping the top half away.
Then, divide the bottom section into two or three smaller vertical sections, depending on your hair’s thickness.
Pro Tip: Smaller sections are easier to work with and allow for more precise styling. Aim for sections no wider than the plates of your straightener.
Step 3: Apply Heat Protectant
This step is non-negotiable. Heat protectant creates a barrier between your hair and the hot plates of the straightener, preventing damage and minimizing frizz.
Spray a generous amount of heat protectant evenly over each section of hair before applying any heat.
Ensure it’s distributed from roots to ends. Let it air dry for a few seconds before proceeding.
Step 4: Master the Root Lift
Volume begins at the roots. Take your first small section of hair from the bottom layer.
Place your straightener at the roots, clamping down gently. Angle the straightener upwards and away from your scalp.
Hold it in this position for a few seconds, creating a lift at the root before slowly gliding the straightener down the hair shaft.
This initial lift is crucial for achieving that bouncy, blown-out look.
Step 5: Create the Soft Bend
Once you’ve lifted the roots, it’s time to introduce a gentle bend throughout the mid-lengths of your hair.
As you glide the straightener down from the roots, slowly rotate your wrist about a quarter turn (90 degrees) away from your face.
Maintain a consistent, fluid motion, moving the straightener smoothly down the hair shaft without stopping.
This creates a soft, C-shaped curve, adding body and movement without creating a defined curl.
Step 6: Curl the Ends (Optional)
For a polished, bouncy finish, you can add a subtle curl or flick to the ends of your hair.
When you reach the last few inches of your hair, rotate your wrist a full half-turn (180 degrees) either inwards or outwards, depending on your desired look.
Slowly pull the straightener through the ends, allowing them to wrap around the barrel as you release.
This gives your blowout a classic, styled finish.
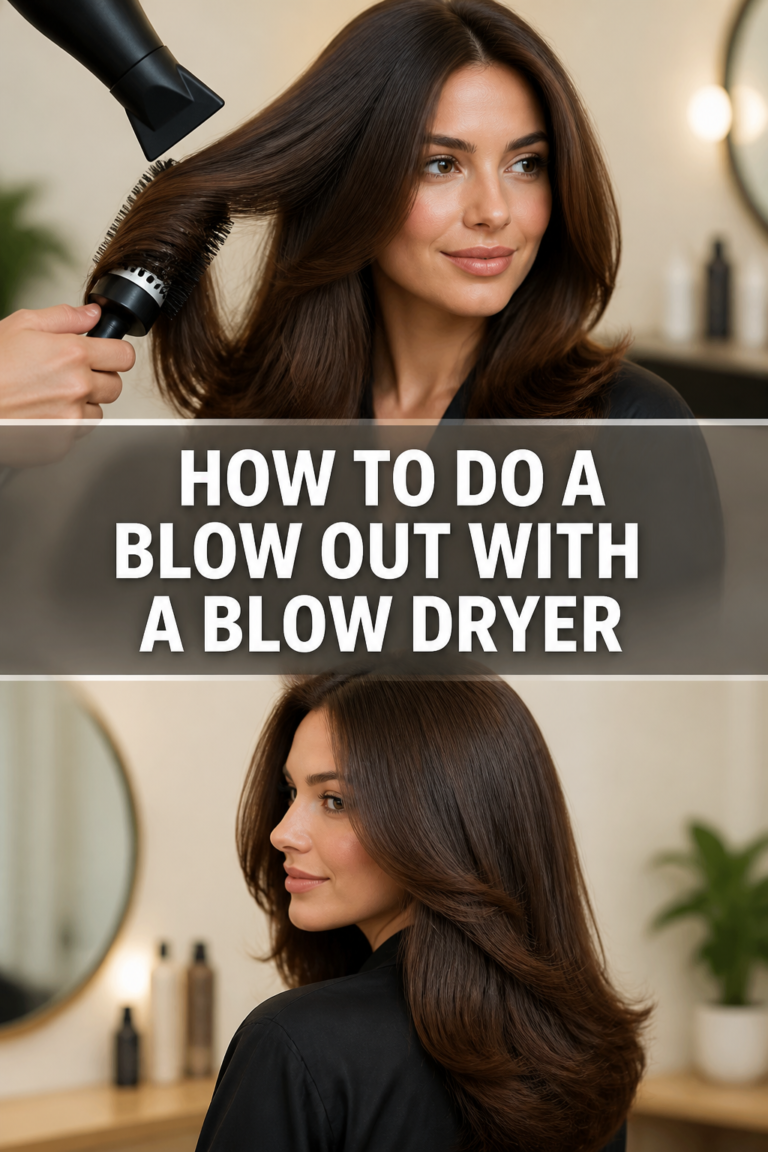
Step 7: Add Volume and Texture
Once you’ve styled all your sections, you might want to enhance the volume further.
Flip your head upside down and gently shake your hair at the roots with your fingers.
You can also use a texture spray or a light volumizing powder at the roots for an extra boost.
This helps to break up the sections and blend them seamlessly.
Step 8: Cool and Set
Allow your hair to cool completely before touching it too much or applying any finishing products.
Cooling helps to “set” the style, making it last longer. If you have time, you can pin the curled sections with roller clips while they cool.
Once cool, gently run your fingers or a wide-tooth comb through your hair to soften the waves and blend them together.
Step 9: Finish with Hold
To lock in your beautiful blowout, finish with a light-hold hairspray.
Hold the spray about 10-12 inches away from your head and mist evenly over your entire style.
Avoid using too much, as this can weigh down your hair and make it stiff.
A light mist is all you need to maintain the bounce and volume.
Common Mistakes to Avoid
Using Too Much Heat
Many people believe higher heat equals better results, but this is a common misconception that leads to damage. Excessive heat can fry your hair, making it brittle and prone to breakage.
Instead, start with a lower temperature setting on your straightener, especially if you have fine or color-treated hair. Adjust upwards only if necessary, and never exceed 375-400°F (190-200°C) for most hair types.
Skipping Heat Protectant
Forgetting to apply heat protectant is one of the most detrimental mistakes you can make. Without this barrier, your hair is directly exposed to intense heat, leading to significant damage over time.
Always apply a quality heat protectant spray to every section of your hair before using your straightener. Think of it as sunscreen for your hair.
Incorrect Sectioning
Attempting to style large, thick sections of hair will result in uneven heat distribution and a flat, unstyled look. The straightener won’t be able to effectively shape all the strands.
Take your time to create small, manageable sections, no wider than the plates of your straightener. This ensures each strand receives adequate heat and styling, leading to a more consistent and voluminous finish.
Pulling Too Fast
Rushing through the styling process by pulling the straightener too quickly through your hair prevents the heat from properly molding the hair into the desired shape. This often results in a style that doesn’t hold or lacks definition.
Move the straightener slowly and deliberately through each section. A consistent, steady pace allows the heat to penetrate and set the hair into its new, voluminous form.
Neglecting the Cool Down
Immediately touching, brushing, or applying products to freshly heated hair can cause the style to fall flat. Hair is most pliable when warm and needs time to cool and set in its new shape.
Allow your hair to cool completely after styling each section or after finishing your entire head. This crucial step locks in the volume and bounce, ensuring your blowout lasts much longer.
Troubleshooting
Hair Looks Flat or Lacks Volume
If your blowout isn’t as voluminous as you hoped, it might be due to insufficient root lift or using sections that were too large. Ensure you’re really focusing on lifting the straightener upwards at the roots for a few seconds before gliding down.
Also, try taking smaller sections of hair, especially around the crown. You can also incorporate a volumizing mousse into your damp hair before drying and styling for an extra boost.
Ends Are Frizzy or Look Damaged
Frizzy or damaged ends often indicate too much heat, insufficient heat protectant, or a straightener with uneven heat distribution. Double-check your straightener’s temperature setting and ensure it’s appropriate for your hair type.
Always apply heat protectant thoroughly to the ends. Consider investing in a straightener with ceramic or tourmaline plates, which provide more consistent heat. A leave-in conditioner or hair oil applied sparingly to the ends can also help.
Straightener Snags Hair
Hair snagging can be frustrating and damaging. This usually happens if your straightener plates are old, scratched, or if your hair isn’t fully detangled. Ensure your hair is completely knot-free before you begin styling.
If your straightener is older, its plates might be worn. Consider upgrading to a model with smooth, floating plates that glide effortlessly. Cleaning your straightener regularly can also prevent product buildup that causes snagging.
Key Takeaways
- Always start with completely dry, detangled hair to prevent damage and ensure an even style.
- Sectioning your hair properly into small, manageable pieces is fundamental for consistent results.
- Heat protectant is a non-negotiable step to shield your hair from thermal damage.
- Focus on lifting at the roots and creating a fluid, consistent motion with the straightener for optimal volume and bend.
- Allow your hair to cool completely after styling to set the shape and extend the longevity of your blowout.
- Practice is key; don’t get discouraged if your first attempt isn’t perfect – every try improves your technique.
Frequently Asked Questions
Can this work on short hair?
Absolutely! This technique is adaptable for various hair lengths, including bobs and lobs. For shorter hair, you’ll use smaller sections and focus on subtle bends and flicks, especially around the face, to create volume and movement rather than full curls.
How often can I do this without damaging my hair?
While heat protectant helps, frequent heat styling can still take a toll. Aim for 2-3 times a week at most. Incorporate heat-free styling days and use nourishing hair masks regularly to keep your hair healthy and resilient.
What’s the best straightener for this technique?
A straightener with rounded edges and floating plates is ideal. Rounded edges allow for smoother curling and bending motions, while floating plates ensure even tension and prevent snagging. Ceramic or tourmaline plates are excellent for consistent, gentle heat.
Can I use this technique on wet hair?
No, never use a straightener on wet or even damp hair. Doing so can cause severe damage, essentially boiling the water inside your hair shaft. Always ensure your hair is 100% dry before applying any heat from a straightener.
Our Top Recommended Finds
- Ceramic or Tourmaline Flat Iron with Rounded Edges: Essential for smooth gliding and creating soft bends without harsh creases. Look for adjustable temperature settings.
- Lightweight Heat Protectant Spray: A fine mist formula that shields hair from heat without weighing it down or leaving a greasy residue.
- Boar Bristle Paddle Brush: Excellent for detangling and smoothing hair gently, distributing natural oils, and creating a sleek finish before and after styling.
Your Best Hair Day Starts Now
Transforming your look with a straightener blowout is a skill that empowers you to achieve salon-quality results right at home.
It opens up a world of styling possibilities beyond just sleek, straight hair, giving you that coveted volume and bounce.
Now that you have the steps, the tips, and the confidence, why not give it a try today?
Experiment with different section sizes and wrist movements to discover what works best for your hair type and desired level of volume. You might even find yourself exploring other straightener styling techniques, like creating beach waves or tighter curls, with your newfound expertise.